This article shows you how to increase or decrease an Android emulator’s internal storage and memory (the default amount of storage and RAM might be insufficient due to running many apps over time).
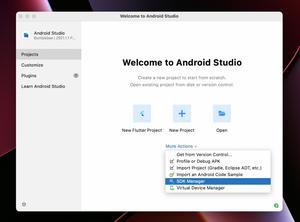
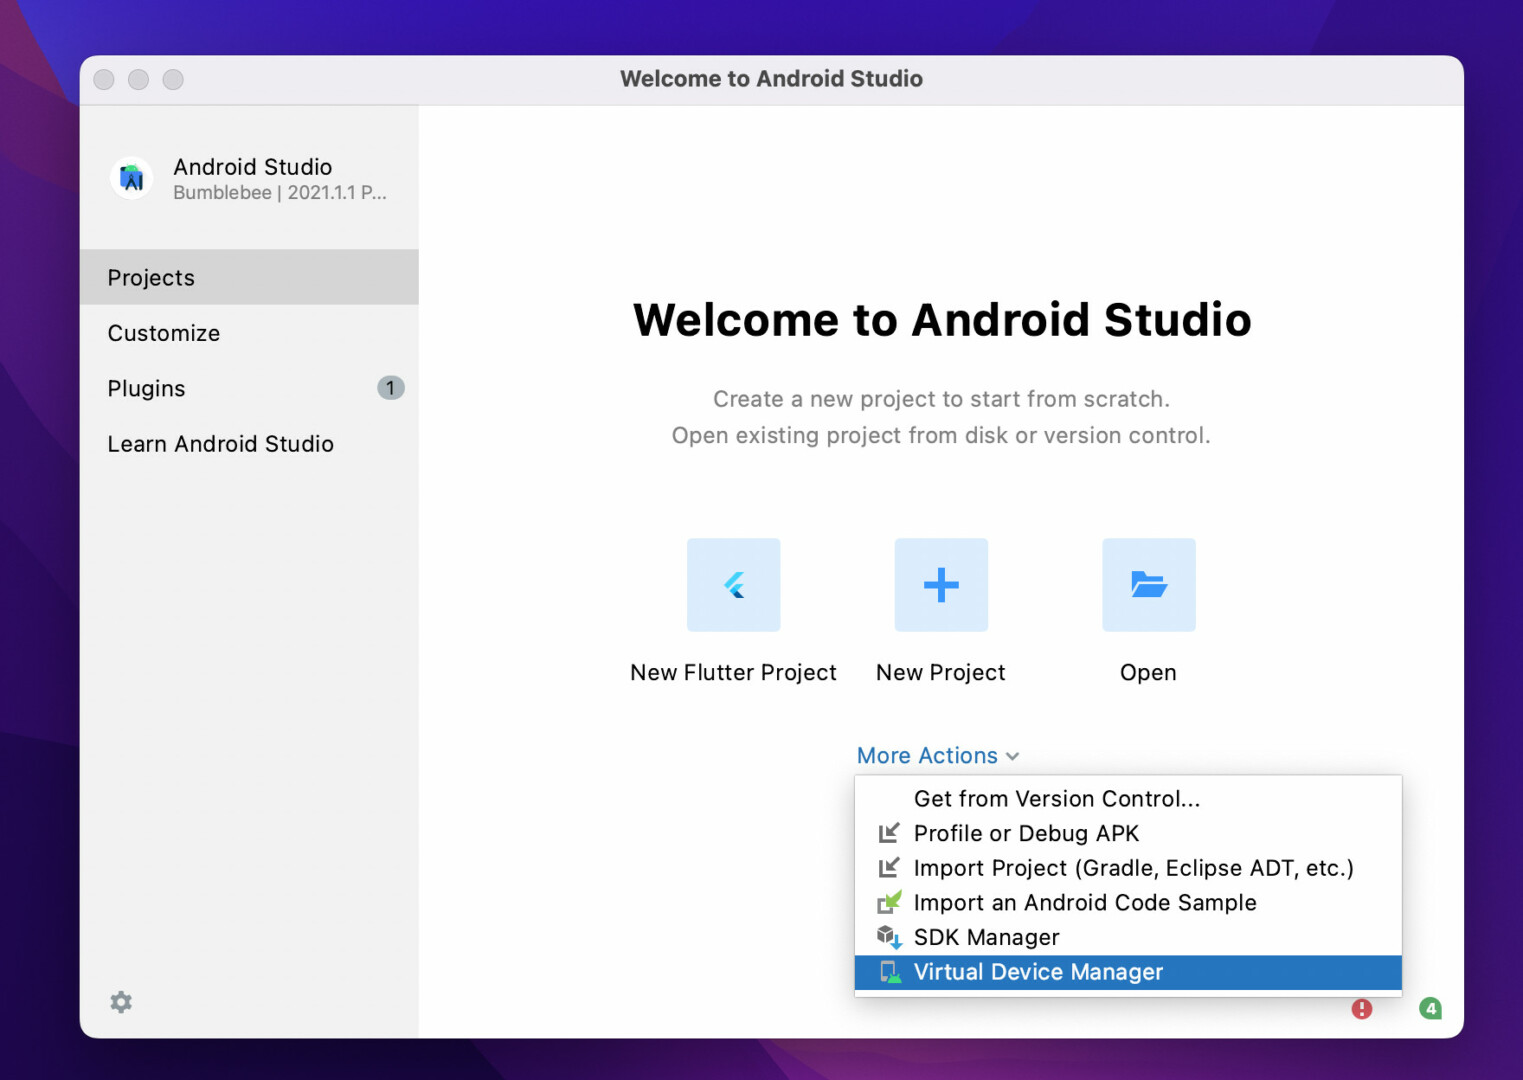
1. Launch your Android Studio, click on the More Actions button and select Virtual Device Manager from the drop-down menu:
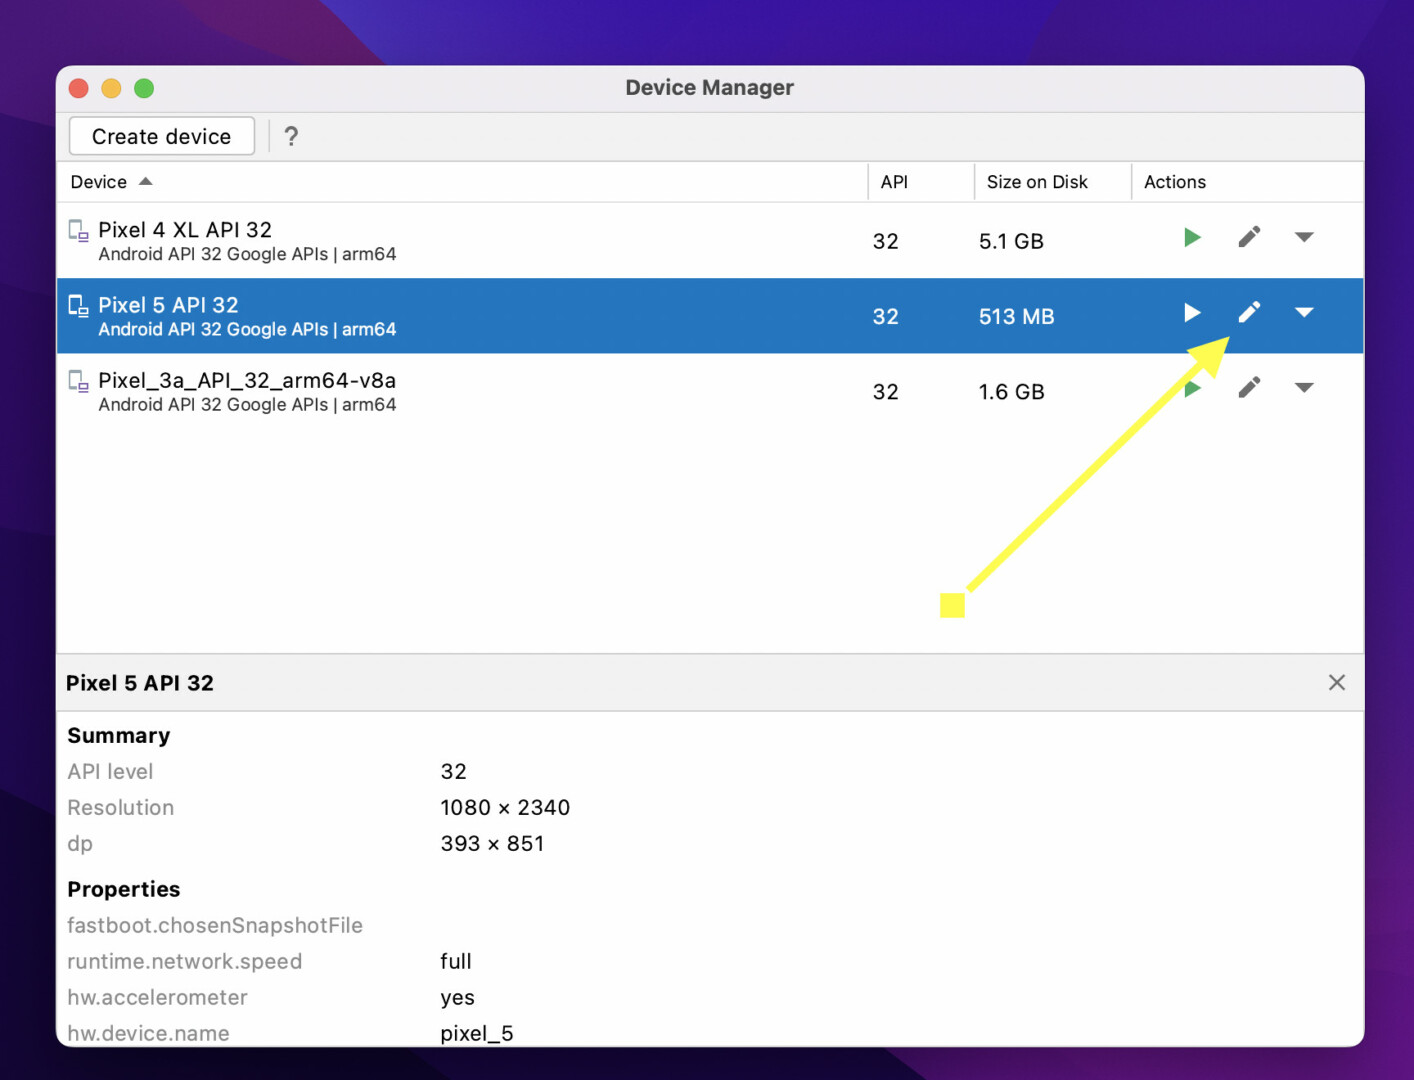
2. Select the emulator which you want to make changes then click on the edit button associated to it:
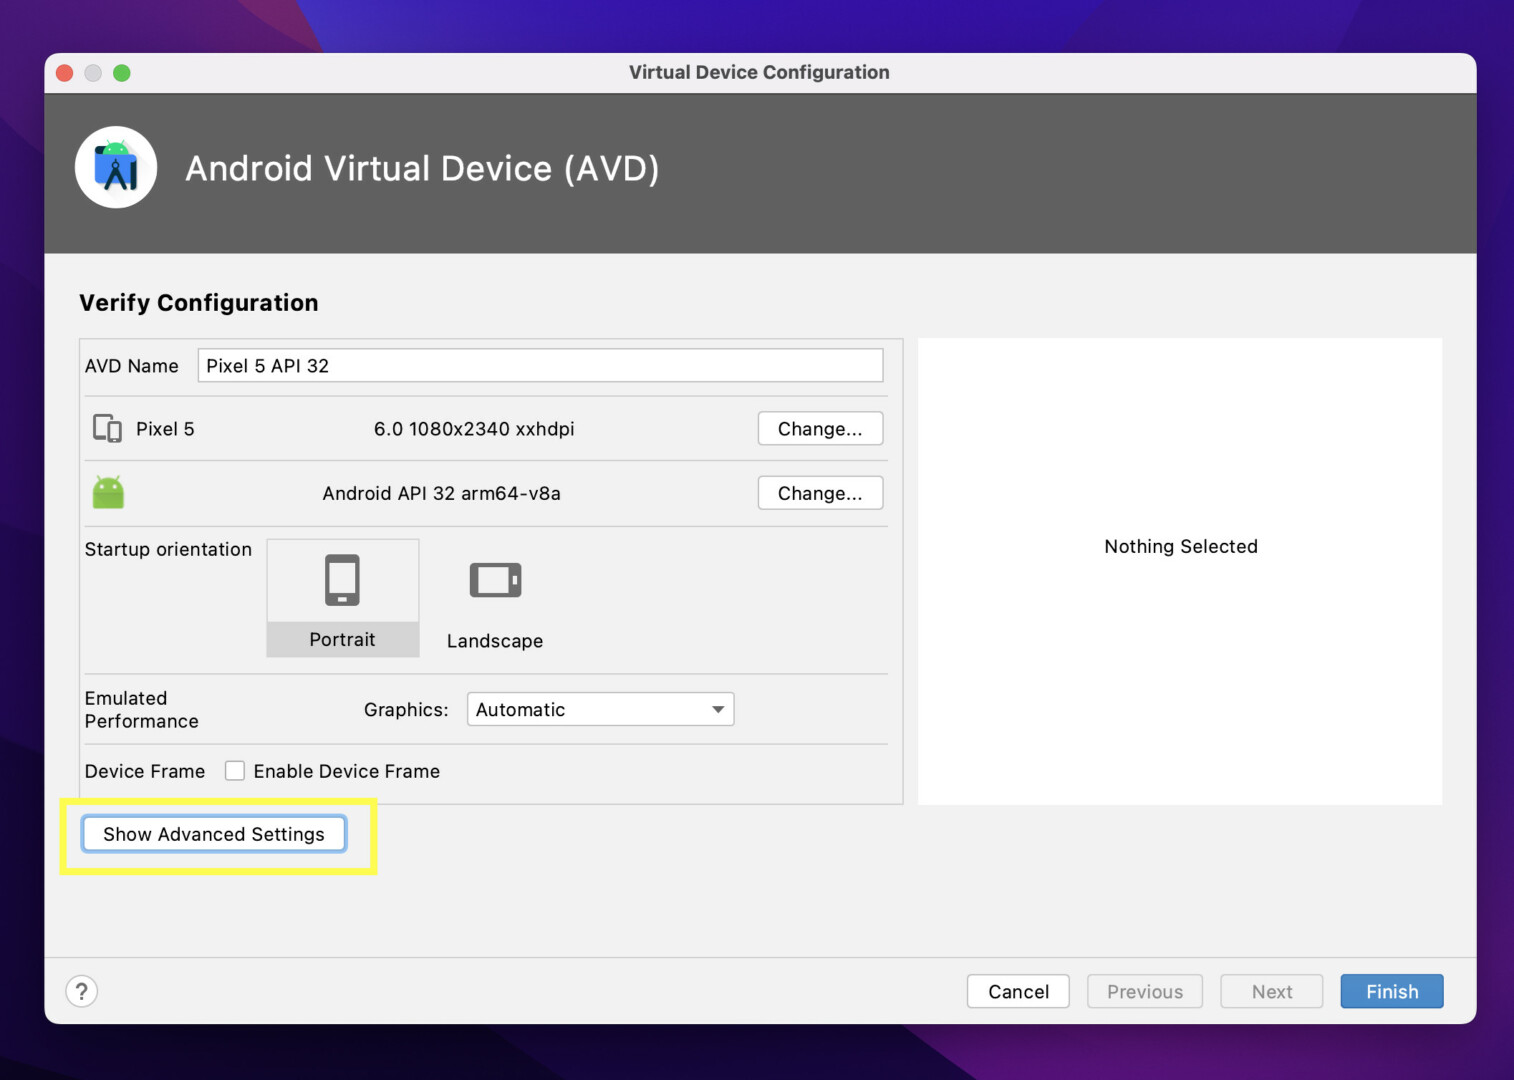
3. Click on the Show Advanced Settings button to expose hidden things:
4. Scroll down a little bit to the Memory and Storage section. Here you can set your desired amount of RAM and memory. See the screenshot below for more clarity:
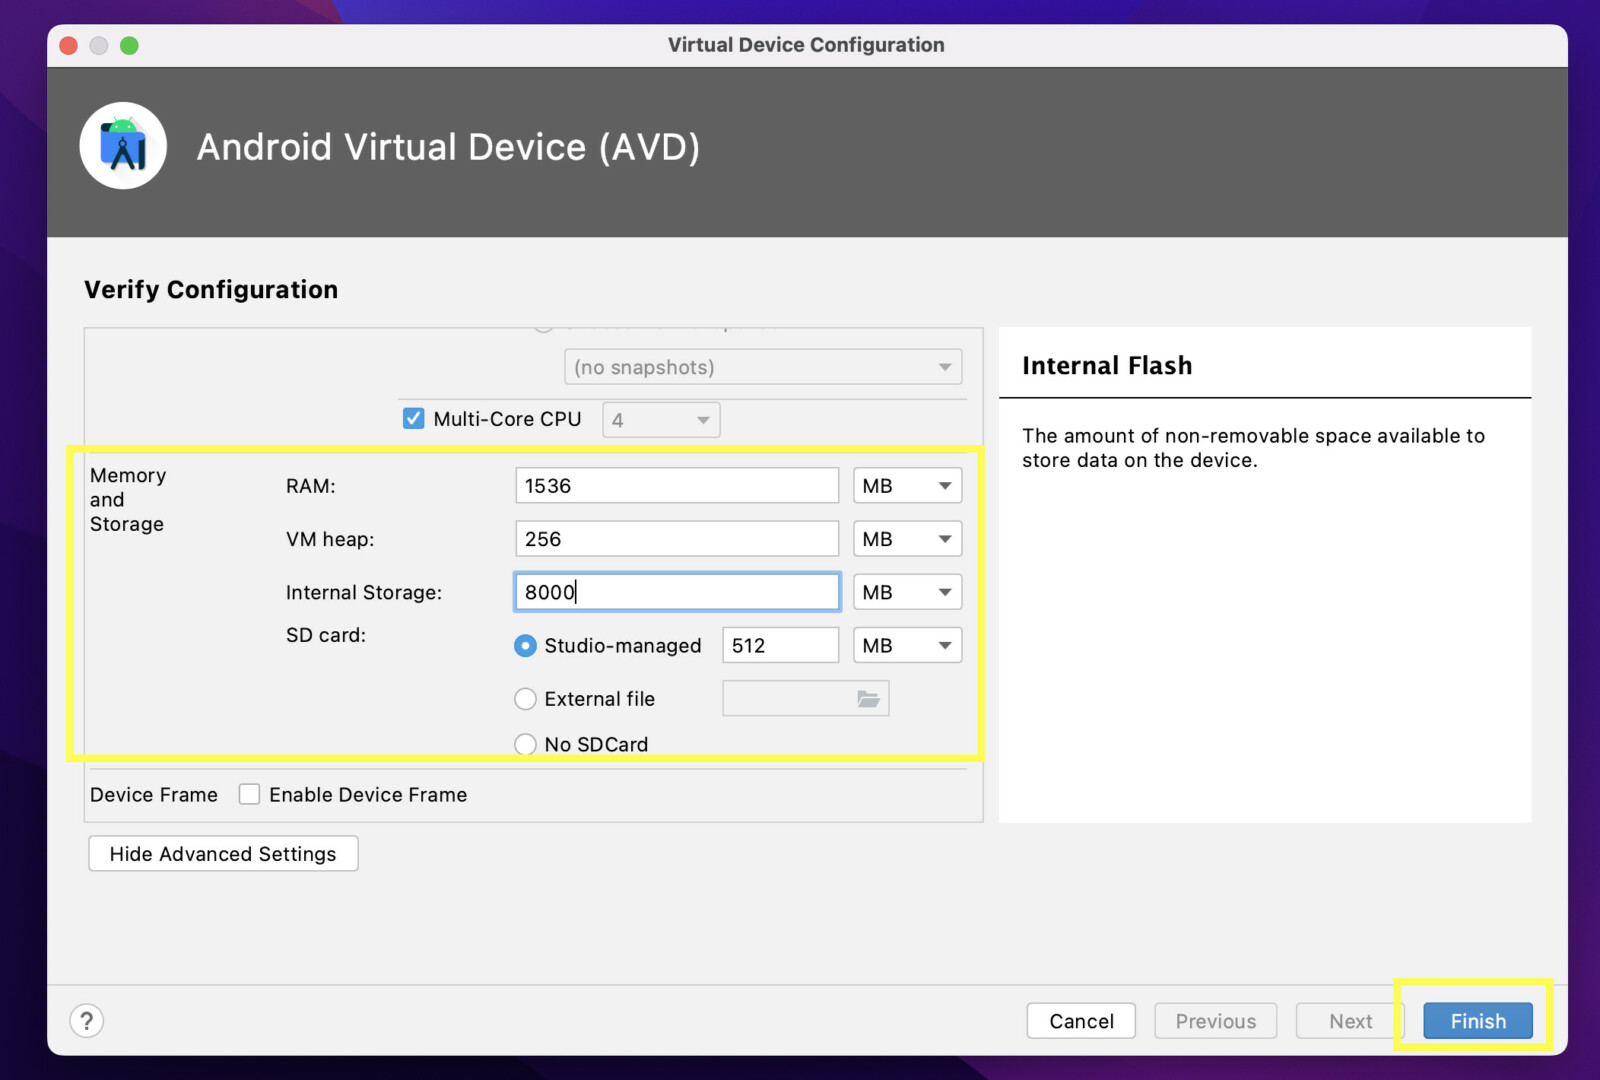
Finally, hit the Finish button to apply your changes. Reboot your Android emulator to ensure everything will work as expected.
That’s it. Further reading:
- 2 Ways to Change Theme in Android Studio
- How to Reset Android Studio to the Default Settings
- How to check your Android Studio version
- VS Code: How to Render Whitespace Characters
- Android: How to Get SHA Certificate Fingerprints
I have made every effort to ensure that every step in this article works properly, but I may have made some mistakes or omissions. If so, please send me an email at [email protected] or leave a comment to report errors.
