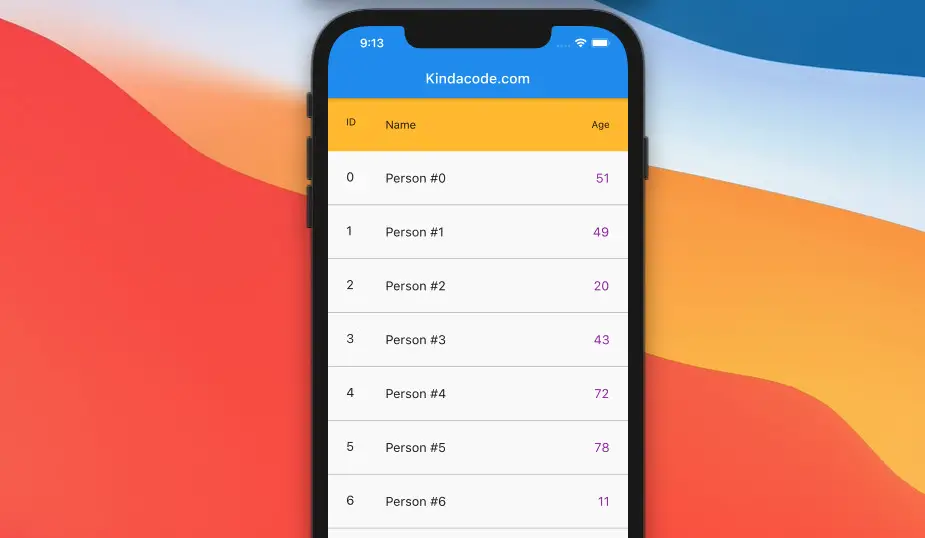
At this time, the ListView widget in Flutter doesn’t come with an out-of-the-box option that lets us create a header section. However, we can make a beautiful header within a few lines of code.
Strategies
There are several ways to add a header to a list view.
Unfixed header
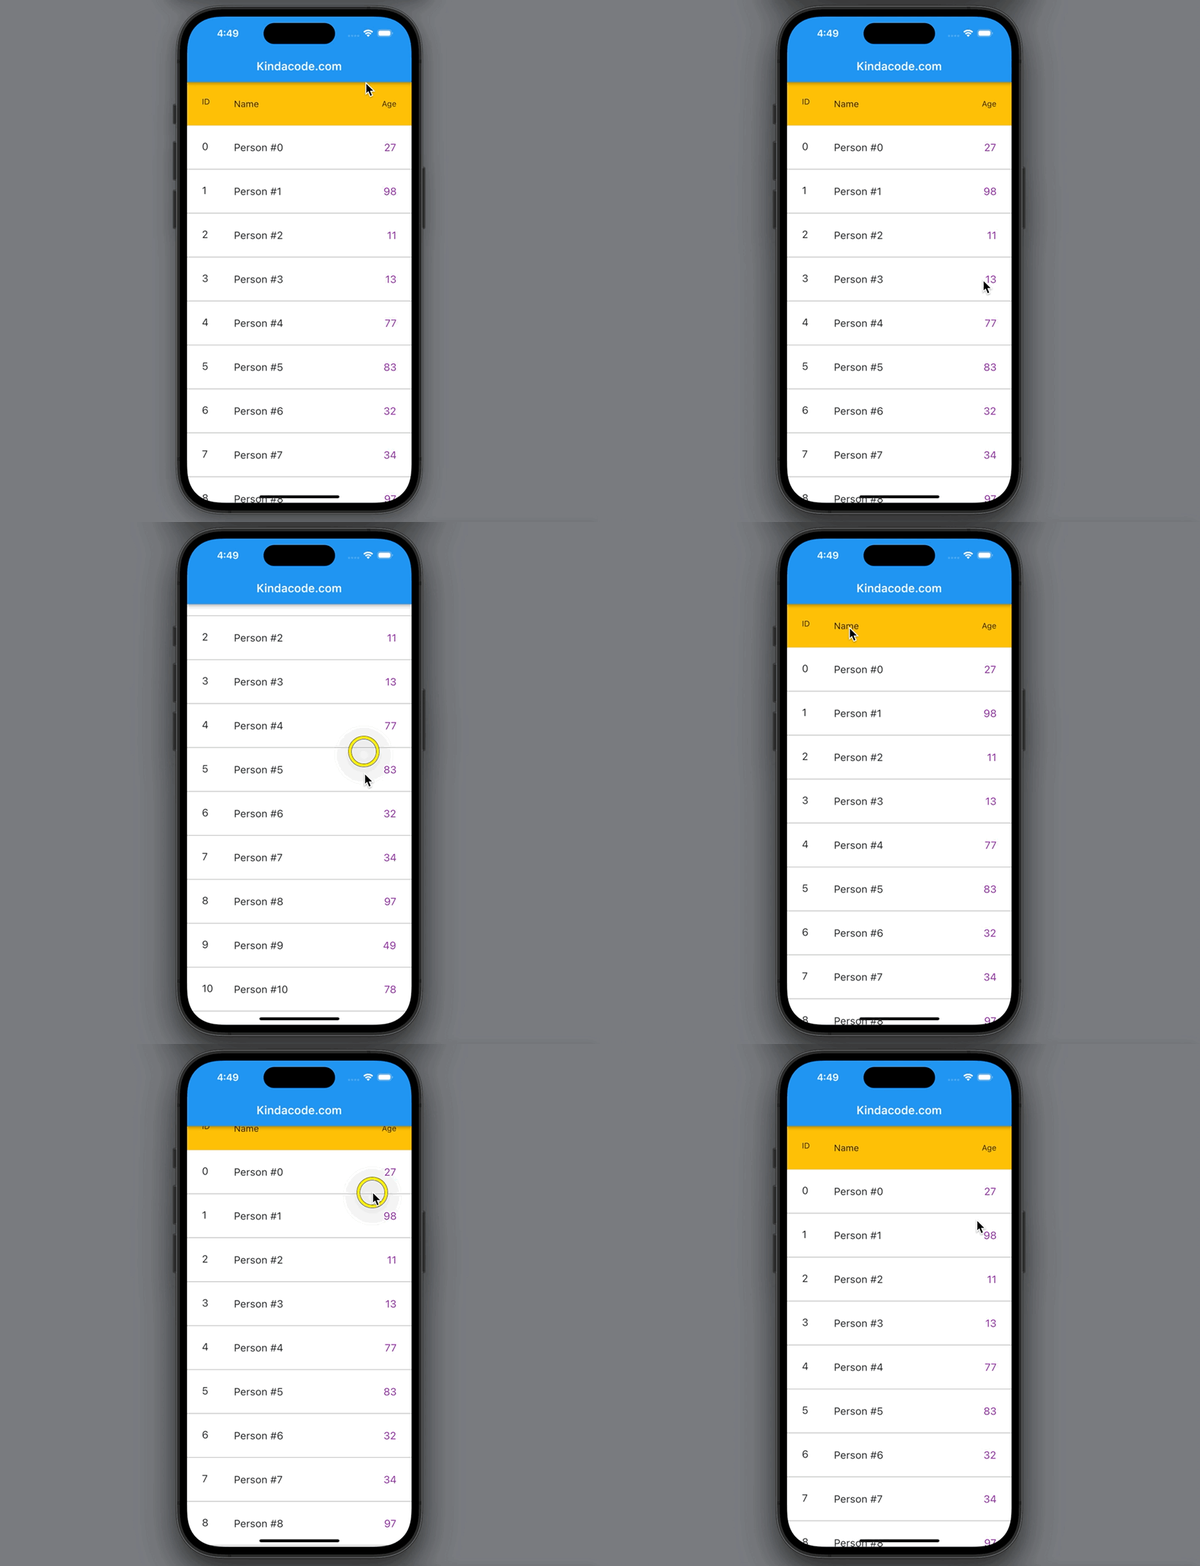
The header acts like a list item, and it will become invisible when scrolling down.
In this case, what we need to do is to return an extra widget when index = 0, as below:
body: ListView.builder(
            itemCount: // The length,
            itemBuilder: (_, index) {
              if (index == 0) {
                return Column(
                  children: [
                    // The header
                    Container(

                    ),

                    // The fist list item
                    _listItem(index)
                  ],
                );
              }
              // If index != 0
              return _listItem(index);
})
Please check example 1 for more clarity.
Fixed header
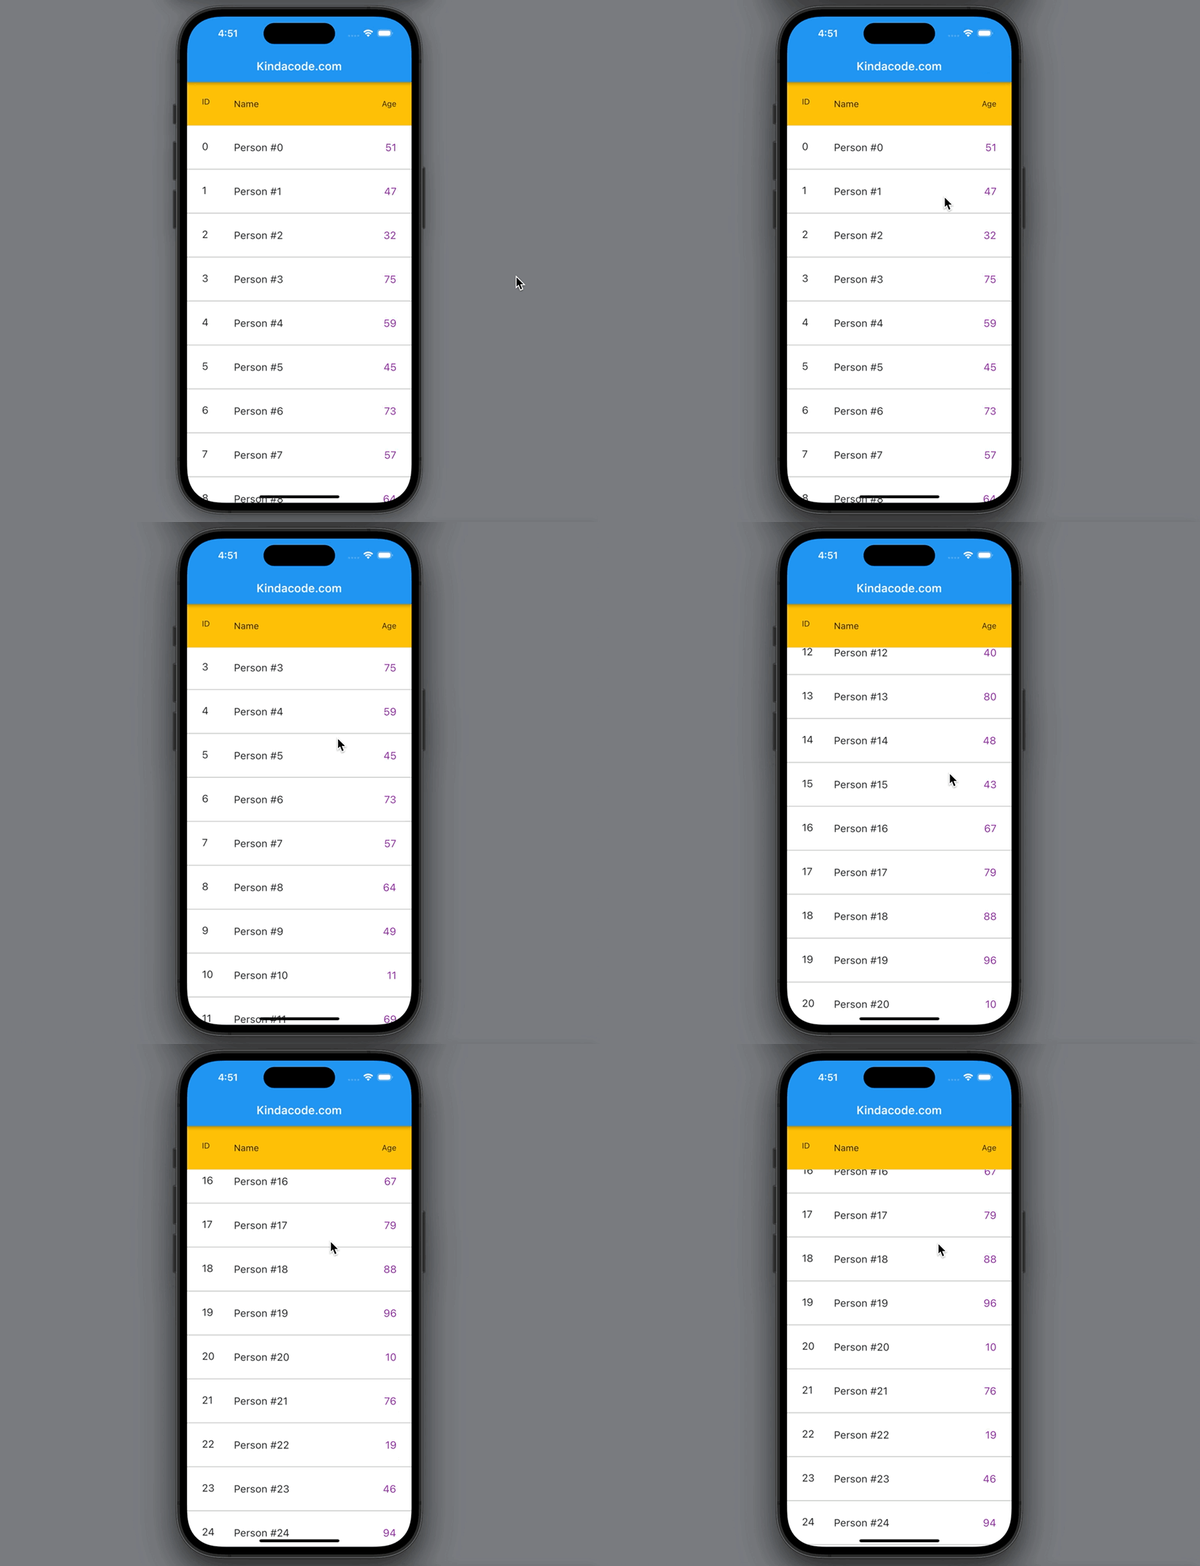
The header is always on top of the ListView.
In this case, we nest the ListView inside an Expanded widget, then wrap this Expanded widget and our custom header with a Column widget, like this:
body: Column(
          children: [
            Container(
              // The header will be here
            ),
            Expanded(
              // The ListView
              child: ListView.builder(
                  itemCount: // The length,
                  itemBuilder: (_, index) {
                    return //List Item Widget Here
                  }),
            ),
          ],
)
Please check example 2 for a better understanding.
Note: The Expanded widget is necessary because it will prevent the error “Vertical viewport was given unbounded height” that occurs when a ListView is a child of a Column.
Example 1 – Unfixed Header Bar
Preview
As you can see, the header will become invisible when scrolling down.
The code
The full source code with explanations:
// main.dart
import 'package:flutter/material.dart';
import 'dart:math';

void main() {
  runApp(const MyApp());
}

class MyApp extends StatelessWidget {
  const MyApp({Key? key}) : super(key: key);

  @override
  Widget build(BuildContext context) {
    return const MaterialApp(
      debugShowCheckedModeBanner: false,
      title: 'Kindacode.com',
      home: HomePage(),
    );
  }
}

class HomePage extends StatefulWidget {
  const HomePage({Key? key}) : super(key: key);

  @override
  State<HomePage> createState() => _HomePageState();
}

class _HomePageState extends State<HomePage> {
  // Generate dummy data to feed the list view
  final List _peopleData = List.generate(1000, (index) {
    return {"name": "Person \#$index", "age": Random().nextInt(90) + 10};
  });

  // Item of the ListView
  Widget _listItem(index) {
    return Container(
      padding: const EdgeInsets.all(10),
      child: ListTile(
        leading: Text(index.toString(), style: const TextStyle(fontSize: 18)),
        title: Text(
          _peopleData[index]['name'].toString(),
          style: const TextStyle(fontSize: 18),
        ),
        trailing: Text(_peopleData[index]['age'].toString(),
            style: const TextStyle(fontSize: 18, color: Colors.purple)),
      ),
      decoration: const BoxDecoration(
          border: Border(bottom: BorderSide(width: 1, color: Colors.black26))),
    );
  }

  @override
  Widget build(BuildContext context) {
    return Scaffold(
        appBar: AppBar(
          title: const Text('Kindacode.com'),
        ),
        body: ListView.builder(
            itemCount: _peopleData.length,
            itemBuilder: (_, index) {
              if (index == 0) {
                return Column(
                  children: [
                    // The header
                    Container(
                      padding: const EdgeInsets.all(10),
                      color: Colors.amber,
                      child: const ListTile(
                        leading: Text('ID'),
                        title: Text('Name'),
                        trailing: Text('Age'),
                      ),
                    ),

                    // The fist list item
                    _listItem(index)
                  ],
                );
              }
              return _listItem(index);
            }));
  }
}
Example 2 – Fixed Header
Preview
The header stays on top forever.
The code
The complete code with explanations:
// main.dart
import 'package:flutter/material.dart';
import 'dart:math';

void main() {
  runApp(const MyApp());
}

class MyApp extends StatelessWidget {
  const MyApp({Key? key}) : super(key: key);

  @override
  Widget build(BuildContext context) {
    return const MaterialApp(
      debugShowCheckedModeBanner: false,
      title: 'Kindacode.com',
      home: HomePage(),
    );
  }
}

class HomePage extends StatefulWidget {
  const HomePage({Key? key}) : super(key: key);

  @override
  State<HomePage> createState() => _HomePageState();
}

class _HomePageState extends State<HomePage> {
  // Generate dummy data to feed the list view
  final List _peopleData = List.generate(1000, (index) {
    return {"name": "Person \#$index", "age": Random().nextInt(90) + 10};
  });

  // Item of the ListView
  Widget _listItem(index) {
    return Container(
      padding: const EdgeInsets.all(10),
      child: ListTile(
        leading: Text(index.toString(), style: const TextStyle(fontSize: 18)),
        title: Text(
          _peopleData[index]['name'].toString(),
          style: const TextStyle(fontSize: 18),
        ),
        trailing: Text(_peopleData[index]['age'].toString(),
            style: const TextStyle(fontSize: 18, color: Colors.purple)),
      ),
      decoration: const BoxDecoration(
          border: Border(bottom: BorderSide(width: 1, color: Colors.black26))),
    );
  }

  @override
  Widget build(BuildContext context) {
    return Scaffold(
        appBar: AppBar(
          title: const Text('Kindacode.com'),
        ),
        body: Column(
          children: [
            Container(
              padding: const EdgeInsets.all(10),
              color: Colors.amber,
              child: const ListTile(
                leading: Text('ID'),
                title: Text('Name'),
                trailing: Text('Age'),
              ),
            ),
            Expanded(
              child: ListView.builder(
                  itemCount: _peopleData.length,
                  itemBuilder: (_, index) {
                    return _listItem(index);
                  }),
            ),
          ],
        ));
  }
}
Conclusion
We’ve walked through 2 example projects that contain a ListView which has a custom header section. If you would like to learn more about ListView, take a look at the following articles:
- Flutter: Scrolling to a desired Item in a ListView
- Flutter: Highlight selected items in a ListView
- Flutter AnimatedList – Tutorial and Examples
- Flutter: Swipe to remove items from a ListView
- Flutter SliverList – Tutorial and Example
- How to Reverse/Shuffle a List in Dart
You can also check out our Flutter topic page or Dart topic page for the latest tutorials and examples.


