This article walks you through a complete example of implementing a Cupertino context menu (iOS-style context menu) in Flutter.
Table of Contents
Example
App Preview
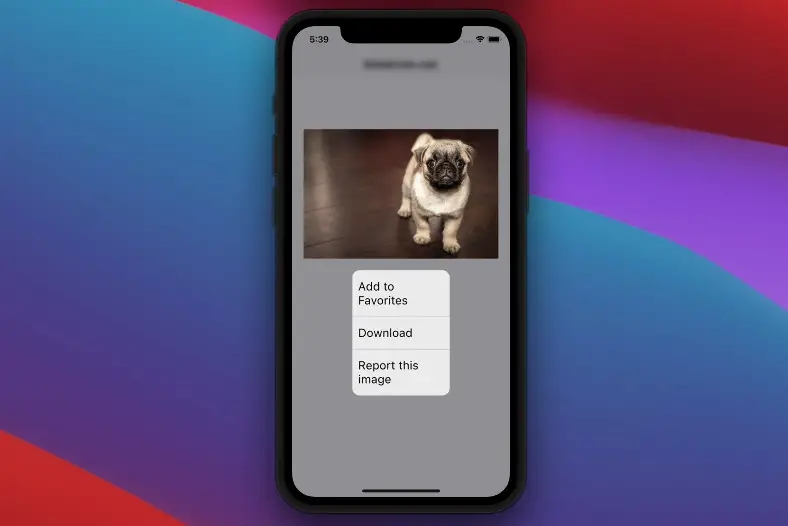
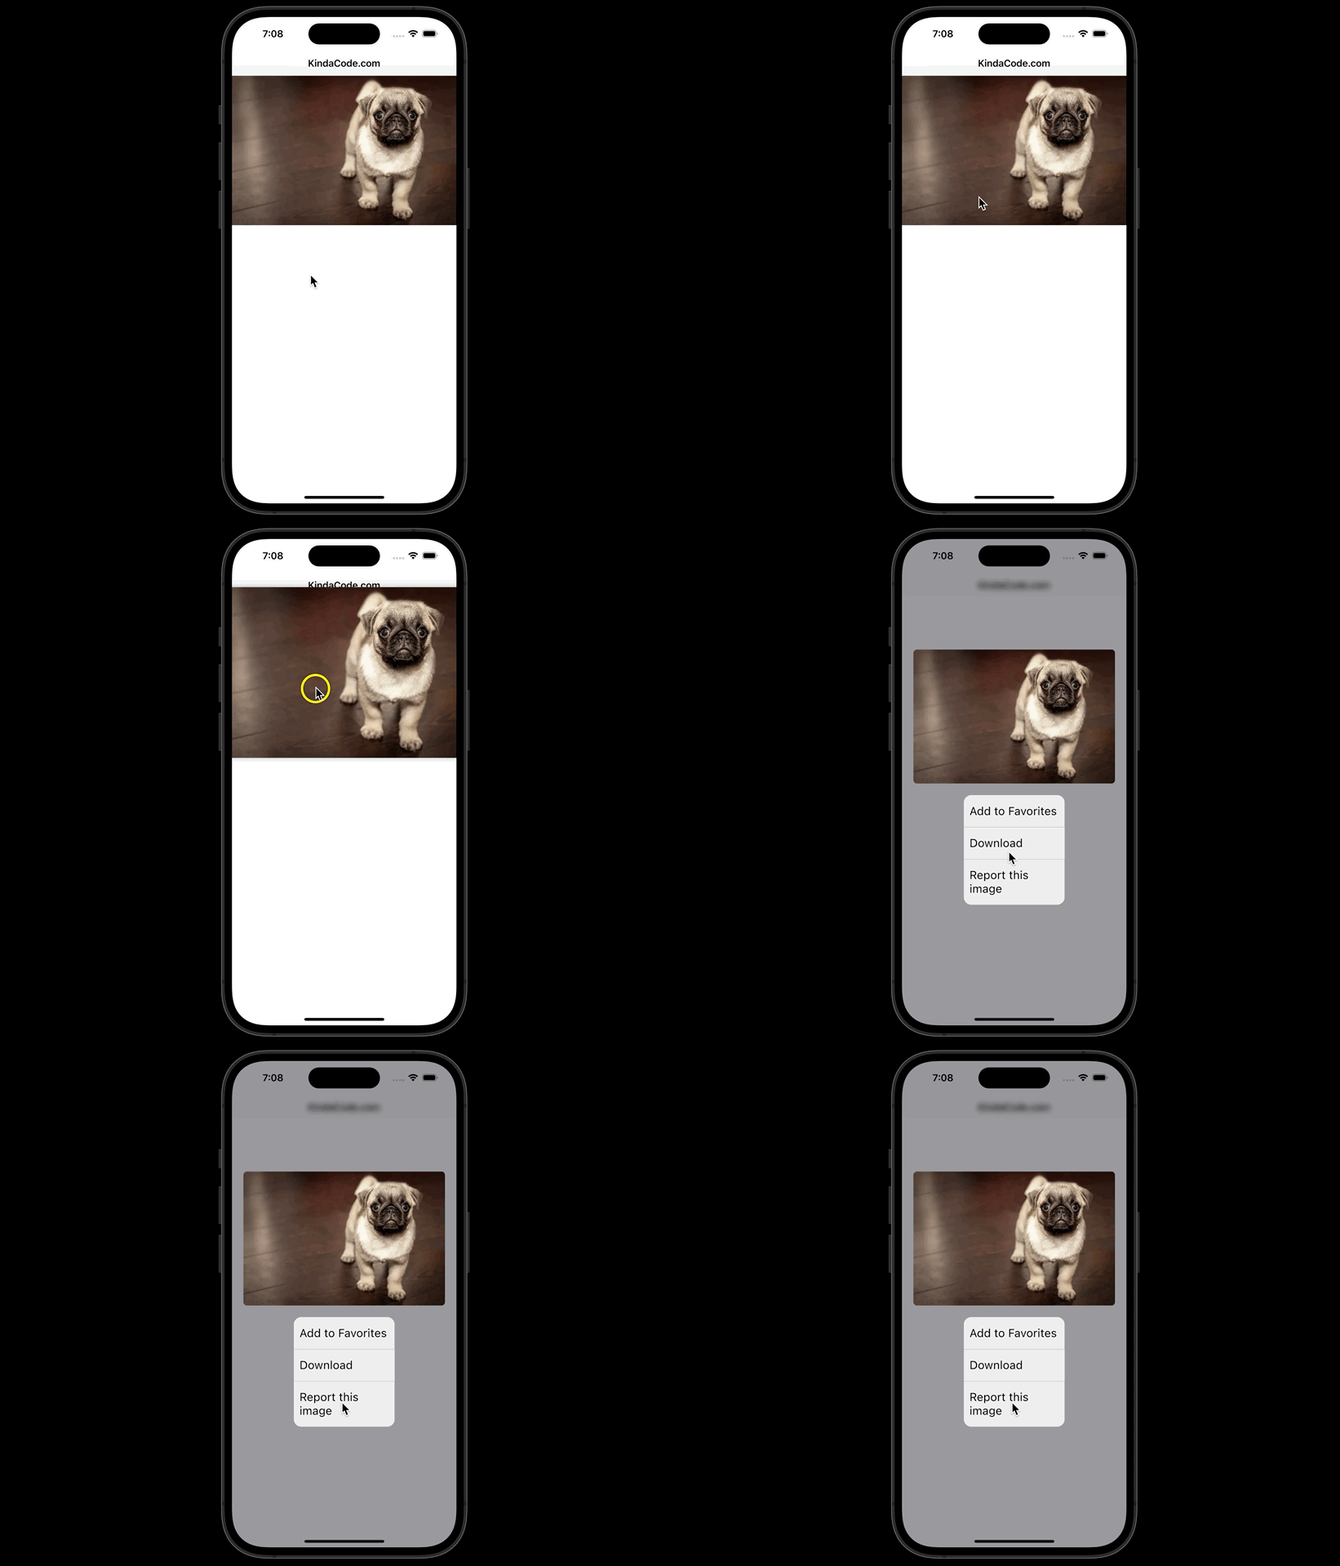
In this example, we’ll create a sample Fluter app that displays an image from the internet. When the user long presses on the image, the Cupertino Context Menu will show up with 3 options: Add to Favorites, Download, and Report this Image. When an option is selected, a message will be printed to the console.
Here’s how it works:

The Code
The CupertinoContextMenu code:
CupertinoContextMenu(
              actions: [
                CupertinoContextMenuAction(
                  child: const Text('Add to Favorites'),
                  onPressed: () {
                    // Implement your logic here
                    debugPrint('Added to Favorites');

                    // Then close the context menu
                    Navigator.of(context).pop();
                  },
                ),
                CupertinoContextMenuAction(
                  child: const Text('Download'),
                  onPressed: () {
                    // Implement your logic here
                    debugPrint('Downloaded');

                    // Then close the context menu
                    Navigator.of(context).pop();
                  },
                ),
                CupertinoContextMenuAction(
                  child: const Text('Report this image'),
                  onPressed: () {
                    // Your logic here
                    debugPrint('Reported');

                    // Close the context menu
                    Navigator.of(context).pop();
                  },
                )
              ],
              child: Image.network(
                  'https://www.kindacode.com/wp-content/uploads/2020/10/dog_sample.jpg')
),
Full source code in main.dart:
import 'package:flutter/cupertino.dart';

void main() {
  runApp(const MyApp());
}

class MyApp extends StatelessWidget {
  const MyApp({Key? key}) : super(key: key);

  @override
  Widget build(BuildContext context) {
    return const CupertinoApp(
      // Remove the debug banner
      debugShowCheckedModeBanner: false,
      title: 'Kindacode.com',
      home: MyHomePage(),
    );
  }
}

class MyHomePage extends StatelessWidget {
  const MyHomePage({Key? key}) : super(key: key);

  @override
  Widget build(BuildContext context) {
    return CupertinoPageScaffold(
        navigationBar:
            const CupertinoNavigationBar(middle: Text('KindaCode.com')),
        child: SafeArea(
          child: CupertinoContextMenu(
              actions: [
                CupertinoContextMenuAction(
                  child: const Text('Add to Favorites'),
                  onPressed: () {
                    // Implement your logic here
                    debugPrint('Added to Favorites');

                    // Then close the context menu
                    Navigator.of(context).pop();
                  },
                ),
                CupertinoContextMenuAction(
                  child: const Text('Download'),
                  onPressed: () {
                    // Implement your logic here
                    debugPrint('Downloaded');

                    // Then close the context menu
                    Navigator.of(context).pop();
                  },
                ),
                CupertinoContextMenuAction(
                  child: const Text('Report this image'),
                  onPressed: () {
                    // Your logic here
                    debugPrint('Reported');

                    // Close the context menu
                    Navigator.of(context).pop();
                  },
                )
              ],
              child: Image.network(
                  'https://www.kindacode.com/wp-content/uploads/2020/10/dog_sample.jpg')),
        ));
  }
}
Afterword
We’ve examined an end-to-end example of using an iOS-style context menu in a Flutter app. If you’d like to explore more about Cupertino stuff and other interesting things in Flutter, take a look at the following articles:
- Flutter Cupertino Button – Tutorial and Examples
- How to use Cupertino icons in Flutter
- Flutter CupertinoSegmentedControl Example
- Example of CupertinoSliverNavigationBar in Flutter
- Flutter: CupertinoPicker Example
- Flutter: Dynamic Text Color Based on Background Brightness
You can also check out our Flutter category page or Dart category page for the latest tutorials and examples.


