This practical, code-centric article shows you how to draw a triangle, quadrangle, pentagon, and hexagon using ClipPath in Flutter.
Table of Contents
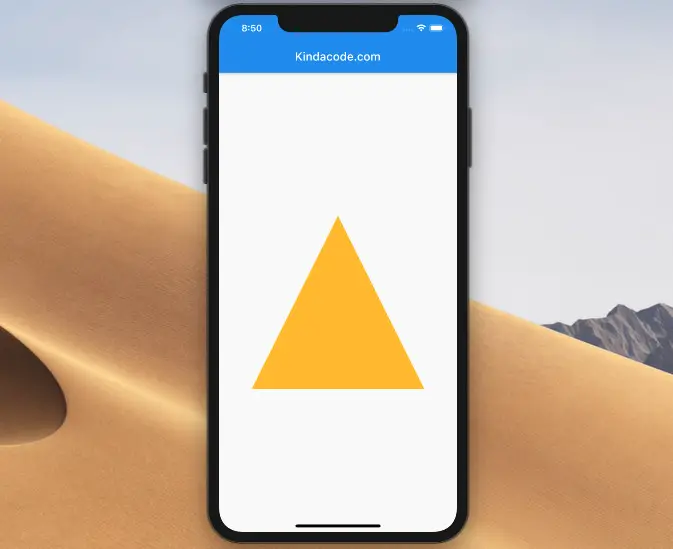
Triangle
Screenshot:
The code:
import 'package:flutter/material.dart';

void main() {
  runApp(const MyApp());
}

class MyApp extends StatelessWidget {
  const MyApp({Key? key}) : super(key: key);

  @override
  Widget build(BuildContext context) {
    return const MaterialApp(
      // Hide the debug banner
      debugShowCheckedModeBanner: false,
      title: 'Kindacode.com',
      home: HomePage(),
    );
  }
}

class HomePage extends StatelessWidget {
  const HomePage({Key? key}) : super(key: key);

  @override
  Widget build(BuildContext context) {
    return Scaffold(
        appBar: AppBar(
          title: const Text('Kindacode.com'),
        ),
        body: Center(
          child: ClipPath(
            clipper: MyTriangle(),
            child: Container(
              color: Colors.amber,
              width: 300,
              height: 300,
            ),
          ),
        ));
  }
}

// Define MyTriangle class
class MyTriangle extends CustomClipper<Path> {
  @override
  Path getClip(Size size) {
    Path path = Path();
    path.addPolygon([
      Offset(0, size.height),
      Offset(size.width / 2, 0),
      Offset(size.width, size.height)
    ], true);
    return path;
  }

  @override
  bool shouldReclip(covariant CustomClipper<Path> oldClipper) {
    return false;
  }
}
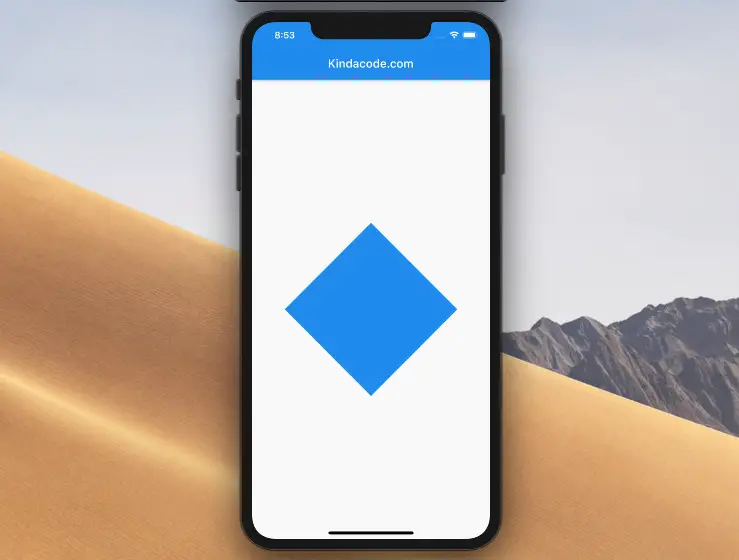
Quadrangle
Screenshot:
The code:
import 'package:flutter/material.dart';

void main() {
  runApp(const MyApp());
}

class MyApp extends StatelessWidget {
  const MyApp({Key? key}) : super(key: key);

  @override
  Widget build(BuildContext context) {
    return const MaterialApp(
      // Hide the debug banner
      debugShowCheckedModeBanner: false,
      title: 'Kindacode.com',
      home: HomePage(),
    );
  }
}

class HomePage extends StatelessWidget {
  const HomePage({Key? key}) : super(key: key);

  @override
  Widget build(BuildContext context) {
    return Scaffold(
        appBar: AppBar(
          title: const Text('Kindacode.com'),
        ),
        body: Center(
          child: ClipPath(
            clipper: MyPolygon(),
            child: Container(
              color: Colors.blue,
              width: 300,
              height: 300,
            ),
          ),
        ));
  }
}

class MyPolygon extends CustomClipper<Path> {
  @override
  Path getClip(Size size) {
    Path path = Path();
    path.addPolygon([
      Offset(0, size.height / 2),
      Offset(size.width / 2, 0),
      Offset(size.width, size.height / 2),
      Offset(size.width / 2, size.height)
    ], true);
    return path;
  }

  @override
  bool shouldReclip(covariant CustomClipper<Path> oldClipper) {
    return false;
  }
}
Pentagon
Screenshot:
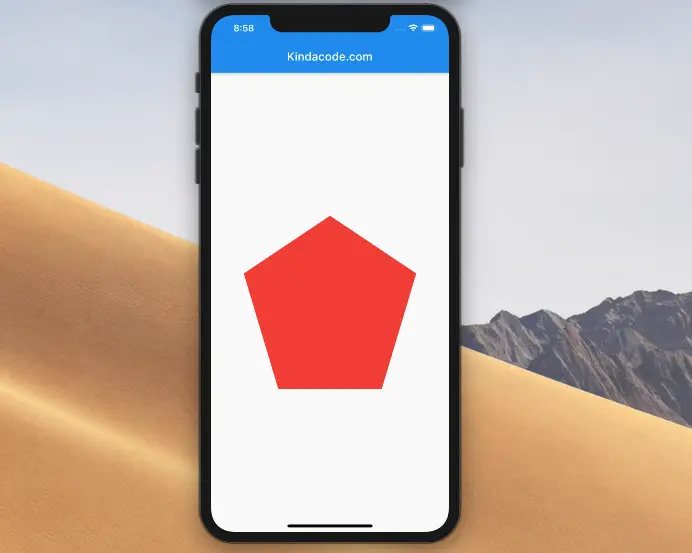
The code:
import 'package:flutter/material.dart';

void main() {
  runApp(const MyApp());
}

class MyApp extends StatelessWidget {
  const MyApp({Key? key}) : super(key: key);

  @override
  Widget build(BuildContext context) {
    return const MaterialApp(
      // Hide the debug banner
      debugShowCheckedModeBanner: false,
      title: 'Kindacode.com',
      home: HomePage(),
    );
  }
}

class HomePage extends StatelessWidget {
  const HomePage({Key? key}) : super(key: key);

  @override
  Widget build(BuildContext context) {
    return Scaffold(
        appBar: AppBar(
          title: const Text('Kindacode.com'),
        ),
        body: Center(
          child: ClipPath(
            clipper: MyPolygon(),
            child: Container(
              color: Colors.red,
              width: 300,
              height: 300,
            ),
          ),
        ));
  }
}

class MyPolygon extends CustomClipper<Path> {
  @override
  Path getClip(Size size) {
    Path path = Path();
    path.addPolygon([
      Offset(0, size.height * 1 / 3),
      Offset(size.width / 2, 0),
      Offset(size.width, size.height * 1 / 3),
      Offset(size.width * 4 / 5, size.height),
      Offset(size.width * 1 / 5, size.height),
    ], true);
    return path;
  }

  @override
  bool shouldReclip(covariant CustomClipper<Path> oldClipper) {
    return false;
  }
}
Hexagon
Screenshot (I guess it isn’t the most pretty hexagon):
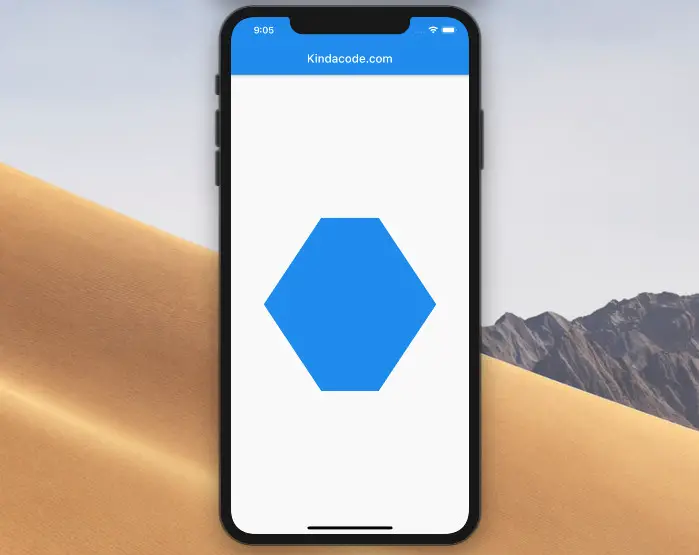
The code:
import 'package:flutter/material.dart';

void main() {
  runApp(const MyApp());
}

class MyApp extends StatelessWidget {
  const MyApp({Key? key}) : super(key: key);

  @override
  Widget build(BuildContext context) {
    return const MaterialApp(
      // Hide the debug banner
      debugShowCheckedModeBanner: false,
      title: 'Kindacode.com',
      home: HomePage(),
    );
  }
}

class HomePage extends StatelessWidget {
  const HomePage({Key? key}) : super(key: key);

  @override
  Widget build(BuildContext context) {
    return Scaffold(
        appBar: AppBar(
          title: const Text('Kindacode.com'),
        ),
        body: Center(
          child: ClipPath(
            clipper: MyPolygon(),
            child: Container(
              color: Colors.blue,
              width: 300,
              height: 300,
            ),
          ),
        ));
  }
}

class MyPolygon extends CustomClipper<Path> {
  @override
  Path getClip(Size size) {
    Path path = Path();
    path.addPolygon([
      Offset(0, size.height / 2),
      Offset(size.width * 1 / 3, size.height),
      Offset(size.width * 2 / 3, size.height),
      Offset(size.width, size.height / 2),
      Offset(size.width * 2 / 3, 0),
      Offset(size.width * 1 / 3, 0)
    ], true);
    return path;
  }

  @override
  bool shouldReclip(covariant CustomClipper<Path> oldClipper) {
    return false;
  }
}
Wrapping Up
We’ve walked through a couple of examples of drawing custom polygons from scratch in Flutter. At this point, you should get a better understanding and feel more comfortable when working with the ClipPath widget. Flutter is amazing, and there are many things to learn. Keep the ball rolling by taking a look at the following articles:
- Flutter: How to Draw a Heart with CustomPaint
- Flutter: Drawing an N-Pointed Star with CustomClipper
- 2 Ways to Create Flipping Card Animation in Flutter
- Flutter & Hive Database: CRUD Example
- Best Libraries for Making HTTP Requests in Flutter
- Dart: Convert Class Instances (Objects) to Maps and Vice Versa
You can also check out our Flutter category page or Dart category page for the latest tutorials and examples.


