Below are a few examples of using GridView, a common widget that is used to display a scrollable grid of child widgets, in Flutter.
Table of Contents
Example 1: Static Content
This example displays a grid view that contains a small number of static children.
Screenshot:
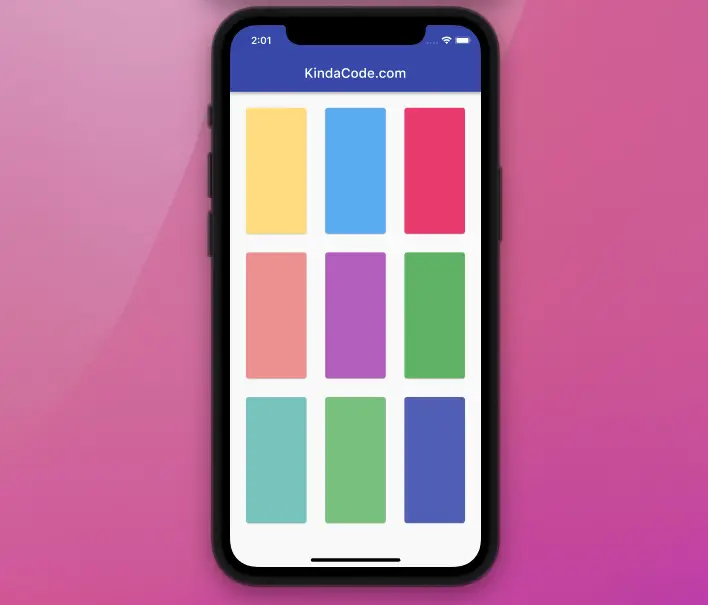
The code:
Scaffold(
      appBar: AppBar(
        title: const Text('KindaCode.com'),
      ),
      body: GridView(
        padding: const EdgeInsets.all(20),
        gridDelegate: const SliverGridDelegateWithMaxCrossAxisExtent(
            maxCrossAxisExtent: 120,
            childAspectRatio: 1 / 2,
            crossAxisSpacing: 20,
            mainAxisSpacing: 20),
        children: [
          Card(
            color: Colors.amber.shade200,
          ),
          Card(
            color: Colors.blue.shade300,
          ),
          Card(color: Colors.pink.shade400),
          Card(
            color: Colors.red.shade200,
          ),
          Card(
            color: Colors.purple.shade300,
          ),
          Card(color: Colors.green.shade400),
          Card(
            color: Colors.teal.shade200,
          ),
          Card(
            color: Colors.green.shade300,
          ),
          Card(color: Colors.indigo.shade400),
        ],
      ),
    );
Example 2: Dynamic Contents
This example creates a grid view that presents content from a dynamic list.
1. Generate some dummy data to feed the GridView:
final List numbers = List.generate(30, (index) => "Item $index");2. Implement the GridView:
// Implement the GridView
GridView(
          padding: const EdgeInsets.all(25),
          gridDelegate: const SliverGridDelegateWithMaxCrossAxisExtent(
              maxCrossAxisExtent: 200,
              childAspectRatio: 3 / 2,
              crossAxisSpacing: 20,
              mainAxisSpacing: 20),
          children: numbers
              .map((e) => Container(
                  color: Colors.amber,
                  alignment: Alignment.center,
                  child: Text(e)))
              .toList(),
)
Screenshot:
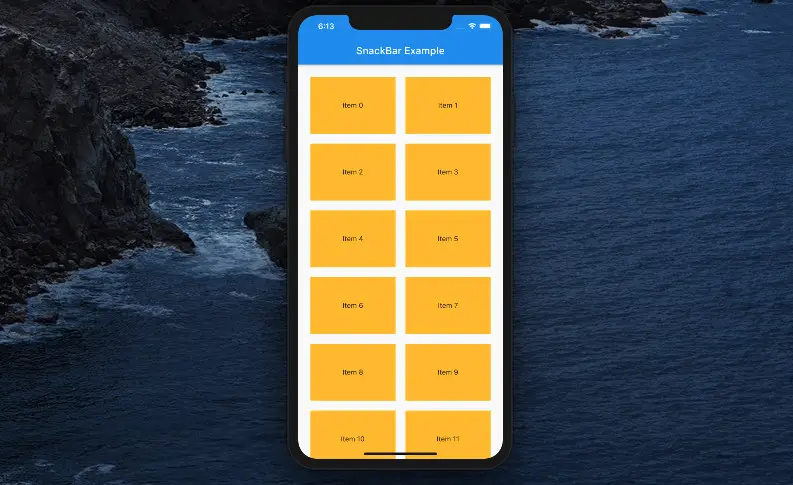
The complete code in main.dart:
// main.dart
import 'package:flutter/material.dart';

void main() {
  runApp(const MyApp());
}

class MyApp extends StatelessWidget {
  const MyApp({Key? key}) : super(key: key);

  @override
  Widget build(BuildContext context) {
    return MaterialApp(
      // Hide the debug banner
      debugShowCheckedModeBanner: false,
      title: 'Kindacode.com',
      home: MyHomePage(),
    );
  }
}

class MyHomePage extends StatelessWidget {
  MyHomePage({Key? key}) : super(key: key);

  // Generate a dummy list
  final List numbers = List.generate(30, (index) => "Item $index");

  @override
  Widget build(BuildContext context) {
    return Scaffold(
        appBar: AppBar(
          title: const Text('Kindacode.com'),
        ),
        // Implement the GridView
        body: GridView(
          padding: const EdgeInsets.all(25),
          gridDelegate: const SliverGridDelegateWithMaxCrossAxisExtent(
              maxCrossAxisExtent: 200,
              childAspectRatio: 3 / 2,
              crossAxisSpacing: 20,
              mainAxisSpacing: 20),
          children: numbers
              .map((e) => Container(
                  color: Colors.amber,
                  alignment: Alignment.center,
                  child: Text(e)))
              .toList(),
        ));
  }
}
If you have a big list with a lot of elements, consider using GridView.builder instead. See this article for more information: Flutter: GridView.builder() Example
Conclusion
We’ve examined a few examples of creating basic grid views. To learn more advanced and complex stuff about grid layout in Flutter, take a look at the following articles:
- Flutter: SliverGrid example
- Creating Masonry Layout in Flutter with Staggered Grid View
- Flutter: Safety nesting ListView, GridView inside a Column
- How to implement a horizontal GridView in Flutter
- 2 Ways to Get a Random Item from a List in Dart (and Flutter)
- How to Check if a Variable is Null in Flutter and Dart
You can also check out our Flutter category page or Dart category page for the latest tutorials and examples.
