A few examples of the ListTile widgets in Flutter.
Example 1 (Simple)
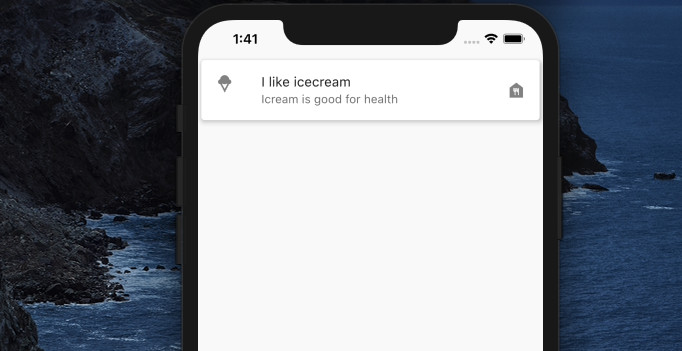
This example displays a card with a list tile inside. The list tile contains a leading icon, a title, a subtitle, and a trailing icon.
Screenshot:
The code:
const Scaffold(
      body: SafeArea(
        child: Card(
          elevation: 5,
          child: ListTile(
            leading: Icon(Icons.icecream),
            title: Text('I like icecream'),
            subtitle: Text('Icream is good for health'),
            trailing: Icon(Icons.food_bank),
          ),
        ),
      ),
);
Example 2: Using ListTile with ListVIew.builder
In this example, we’ll display a thousand of list tiles within a list view. Before seeing the code, let’s have a glance at the demo below:
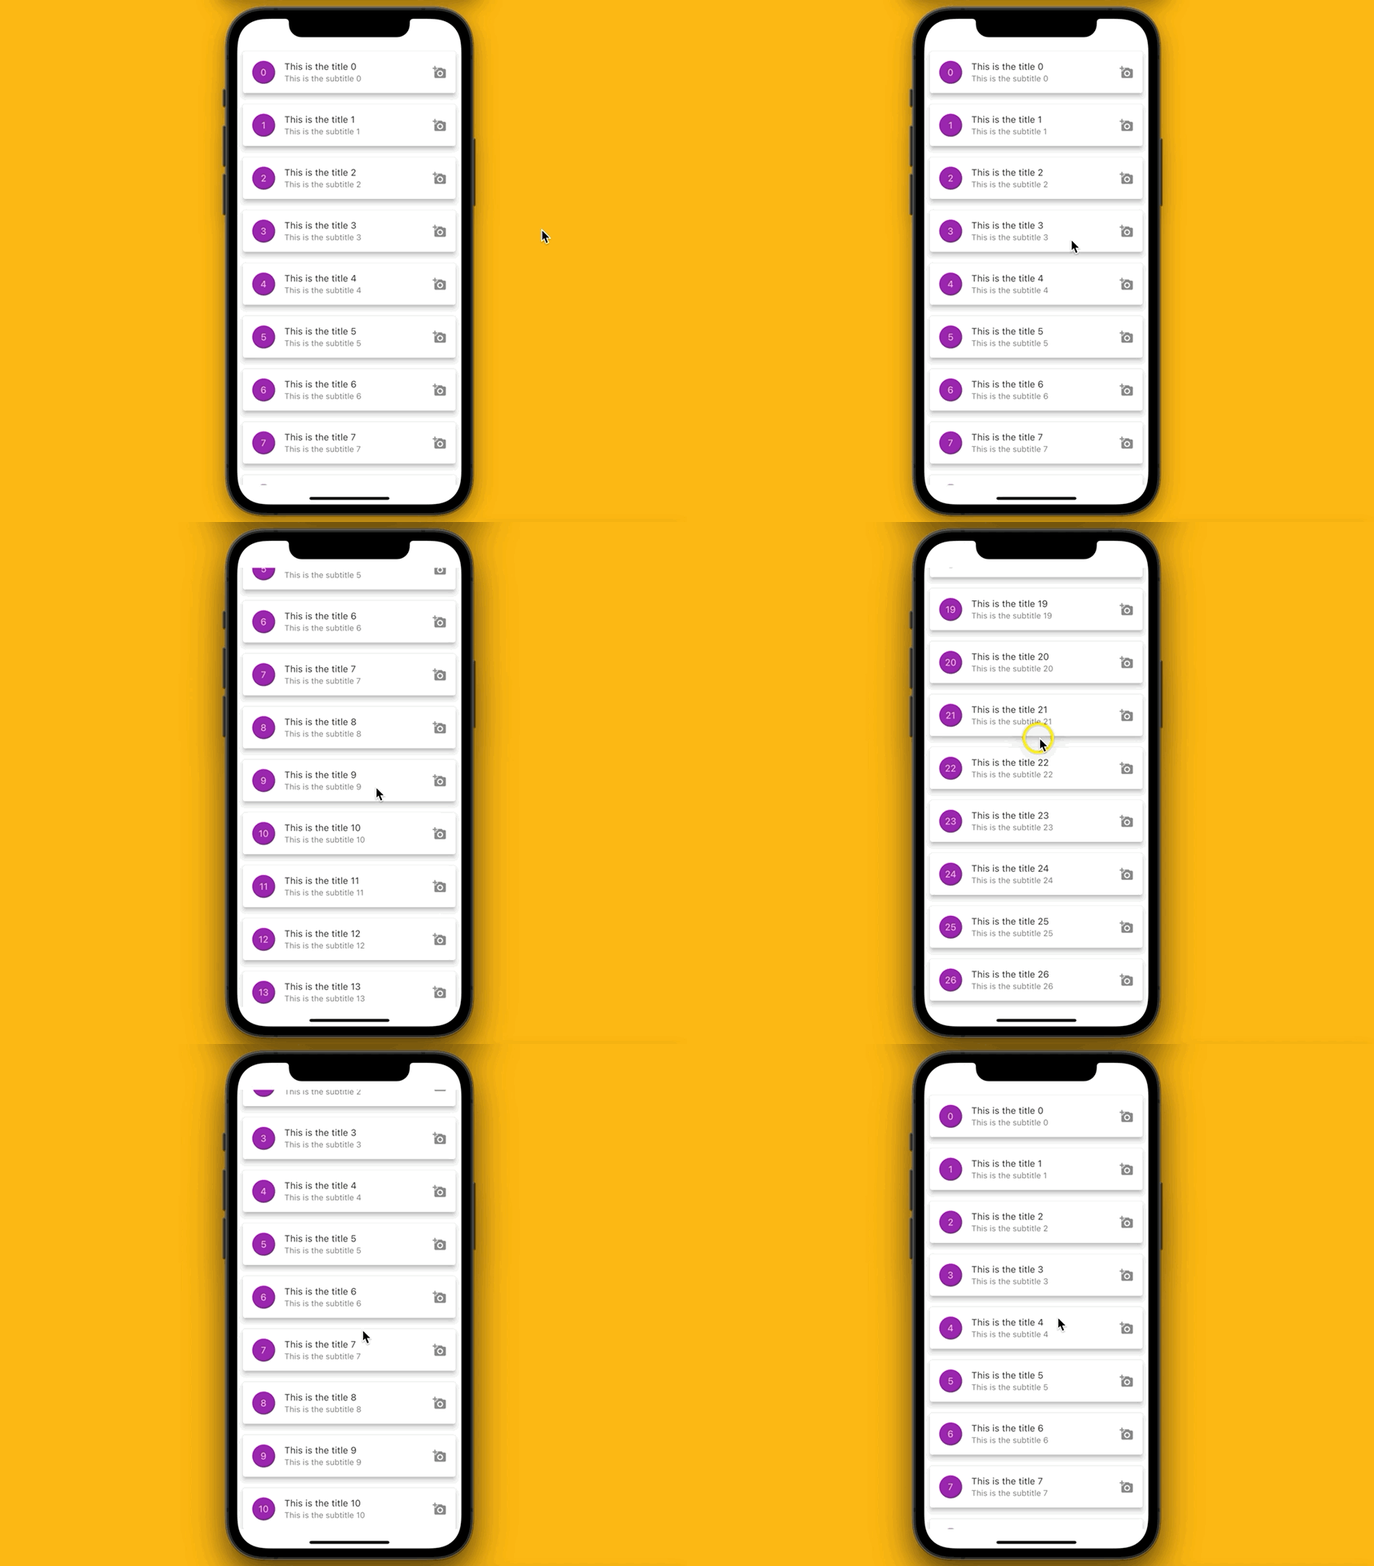
The code:
// KindaCode.com
// main.dart
import 'package:flutter/material.dart';

void main() {
  runApp(const MyApp());
}

class MyApp extends StatelessWidget {
  const MyApp({super.key});

  @override
  Widget build(BuildContext context) {
    return MaterialApp(
      // hide the debug banner
      debugShowCheckedModeBanner: false,
      title: 'KindaCode.com',
      theme: ThemeData(
        primarySwatch: Colors.blue,
      ),
      home: MyHomePage(),
    );
  }
}

class MyHomePage extends StatelessWidget {
  // Generate some dummy data
  final List dummyList = List.generate(1000, (index) {
    return {
      "id": index,
      "title": "This is the title $index",
      "subtitle": "This is the subtitle $index"
    };
  });

  MyHomePage({Key? key}) : super(key: key);

  @override
  Widget build(BuildContext context) {
    return Scaffold(
        body: SafeArea(
            child: ListView.builder(
      itemCount: dummyList.length,
      itemBuilder: (context, index) => Card(
        elevation: 6,
        margin: const EdgeInsets.all(10),
        child: ListTile(
          leading: CircleAvatar(
            backgroundColor: Colors.purple,
            child: Text(dummyList[index]["id"].toString()),
          ),
          title: Text(dummyList[index]["title"]),
          subtitle: Text(dummyList[index]["subtitle"]),
          trailing: const Icon(Icons.add_a_photo),
        ),
      ),
    )));
  }
}
Example 3: Using ListTile.divideTiles
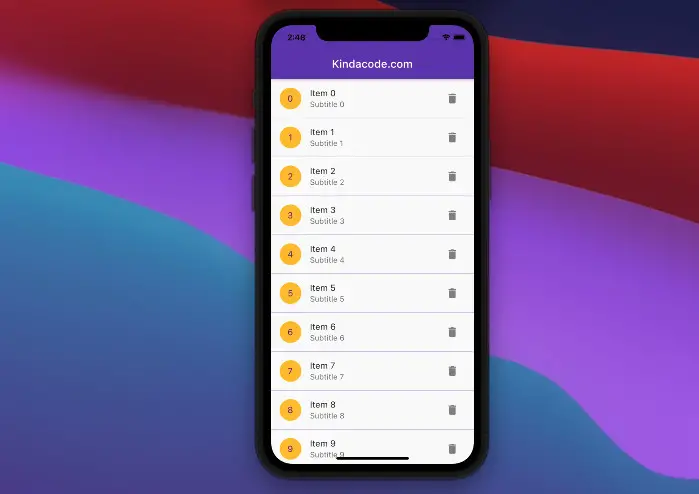
By using ListTile.divideTiles, a one-pixel border will be automatically added between each tile.
Screenshot:
The complete code:
// main.dart
import 'package:flutter/material.dart';

void main() {
  runApp(const MyApp());
}

class MyApp extends StatelessWidget {
  const MyApp({Key? key}) : super(key: key);

  @override
  Widget build(BuildContext context) {
    return MaterialApp(
        // Remove the debug banner
        debugShowCheckedModeBanner: false,
        title: 'Kindacode.com',
        theme: ThemeData(
          primarySwatch: Colors.deepPurple,
        ),
        home: HomePage());
  }
}

class HomePage extends StatelessWidget {
  // Generate some dummy data
  final List<Map<String, dynamic>> _items = List.generate(
      10,
      (index) =>
          {"id": index, "title": "Item $index", "subtitle": "Subtitle $index"});

  HomePage({Key? key}) : super(key: key);

  @override
  Widget build(BuildContext context) {
    return Scaffold(
        appBar: AppBar(
          title: const Text('Kindacode.com'),
        ),
        body: ListView(
            children: ListTile.divideTiles(
                color: Colors.deepPurple,
                tiles: _items.map((item) => ListTile(
                      leading: CircleAvatar(
                        backgroundColor: Colors.amber,
                        child: Text(item['id'].toString()),
                      ),
                      title: Text(item['title']),
                      subtitle: Text(item['subtitle']),
                      trailing: IconButton(
                        icon: const Icon(Icons.delete),
                        onPressed: () {},
                      ),
                    ))).toList()));
  }
}
Example 4: Using ListTileTheme
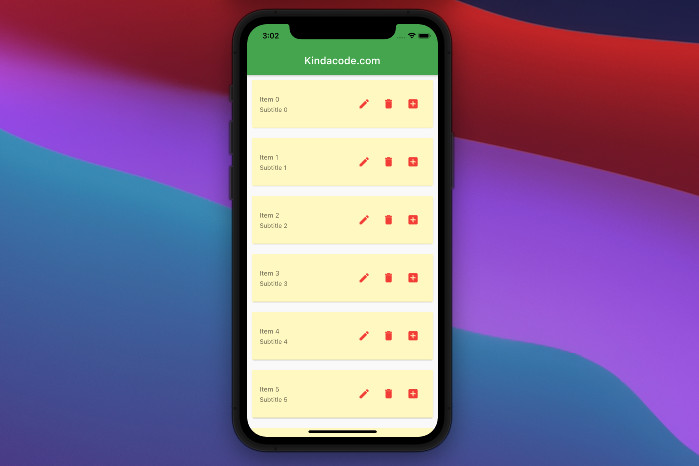
The ListTileTheme widget defines color and style parameters for its descendant ListTile widgets.
Screenshot:
The full code:
// main.dart
import 'package:flutter/material.dart';

void main() {
  runApp(const MyApp());
}

class MyApp extends StatelessWidget {
  const MyApp({Key? key}) : super(key: key);

  @override
  Widget build(BuildContext context) {
    return MaterialApp(
        // Remove the debug banner
        debugShowCheckedModeBanner: false,
        title: 'Kindacode.com',
        theme: ThemeData(
          primarySwatch: Colors.green,
        ),
        home: HomePage());
  }
}

class HomePage extends StatelessWidget {
  // Generate some dummy data
  final List<Map<String, dynamic>> _items = List.generate(
      100,
      (index) =>
          {"id": index, "title": "Item $index", "subtitle": "Subtitle $index"});

  HomePage({super.key});

  @override
  Widget build(BuildContext context) {
    return Scaffold(
        appBar: AppBar(
          title: const Text('Kindacode.com'),
        ),
        body: ListTileTheme(
          contentPadding: const EdgeInsets.all(15),
          iconColor: Colors.red,
          textColor: Colors.black54,
          tileColor: Colors.yellow[100],
          style: ListTileStyle.list,
          dense: true,
          child: ListView.builder(
            itemCount: _items.length,
            itemBuilder: (_, index) => Card(
              margin: const EdgeInsets.all(10),
              child: ListTile(
                title: Text(_items[index]['title']),
                subtitle: Text(_items[index]['subtitle']),
                trailing: Row(
                  mainAxisSize: MainAxisSize.min,
                  children: [
                    IconButton(onPressed: () {}, icon: const Icon(Icons.edit)),
                    IconButton(
                        onPressed: () {}, icon: const Icon(Icons.delete)),
                    IconButton(
                        onPressed: () {}, icon: const Icon(Icons.add_box)),
                  ],
                ),
              ),
            ),
          ),
        ));
  }
}
Wrapping Up
We’ve gone through some examples of using ListTile, a common widget in Flutter. If you’d like to explore more new and interesting stuff about Flutter and Dart, take a look at the following articles:
- How to Create Rounded ListTile in Flutter
- Flutter: ListTile with multiple Trailing Icon Buttons
- Flutter AnimatedList – Tutorial and Examples
- Adding and Customizing a Scrollbar in Flutter
- Flutter & SQLite: CRUD Example
- Flutter: Firebase Remote Config example
- Working with ElevatedButton in Flutter
You can also check out our Flutter category page or Dart category page for the latest tutorials and examples.


