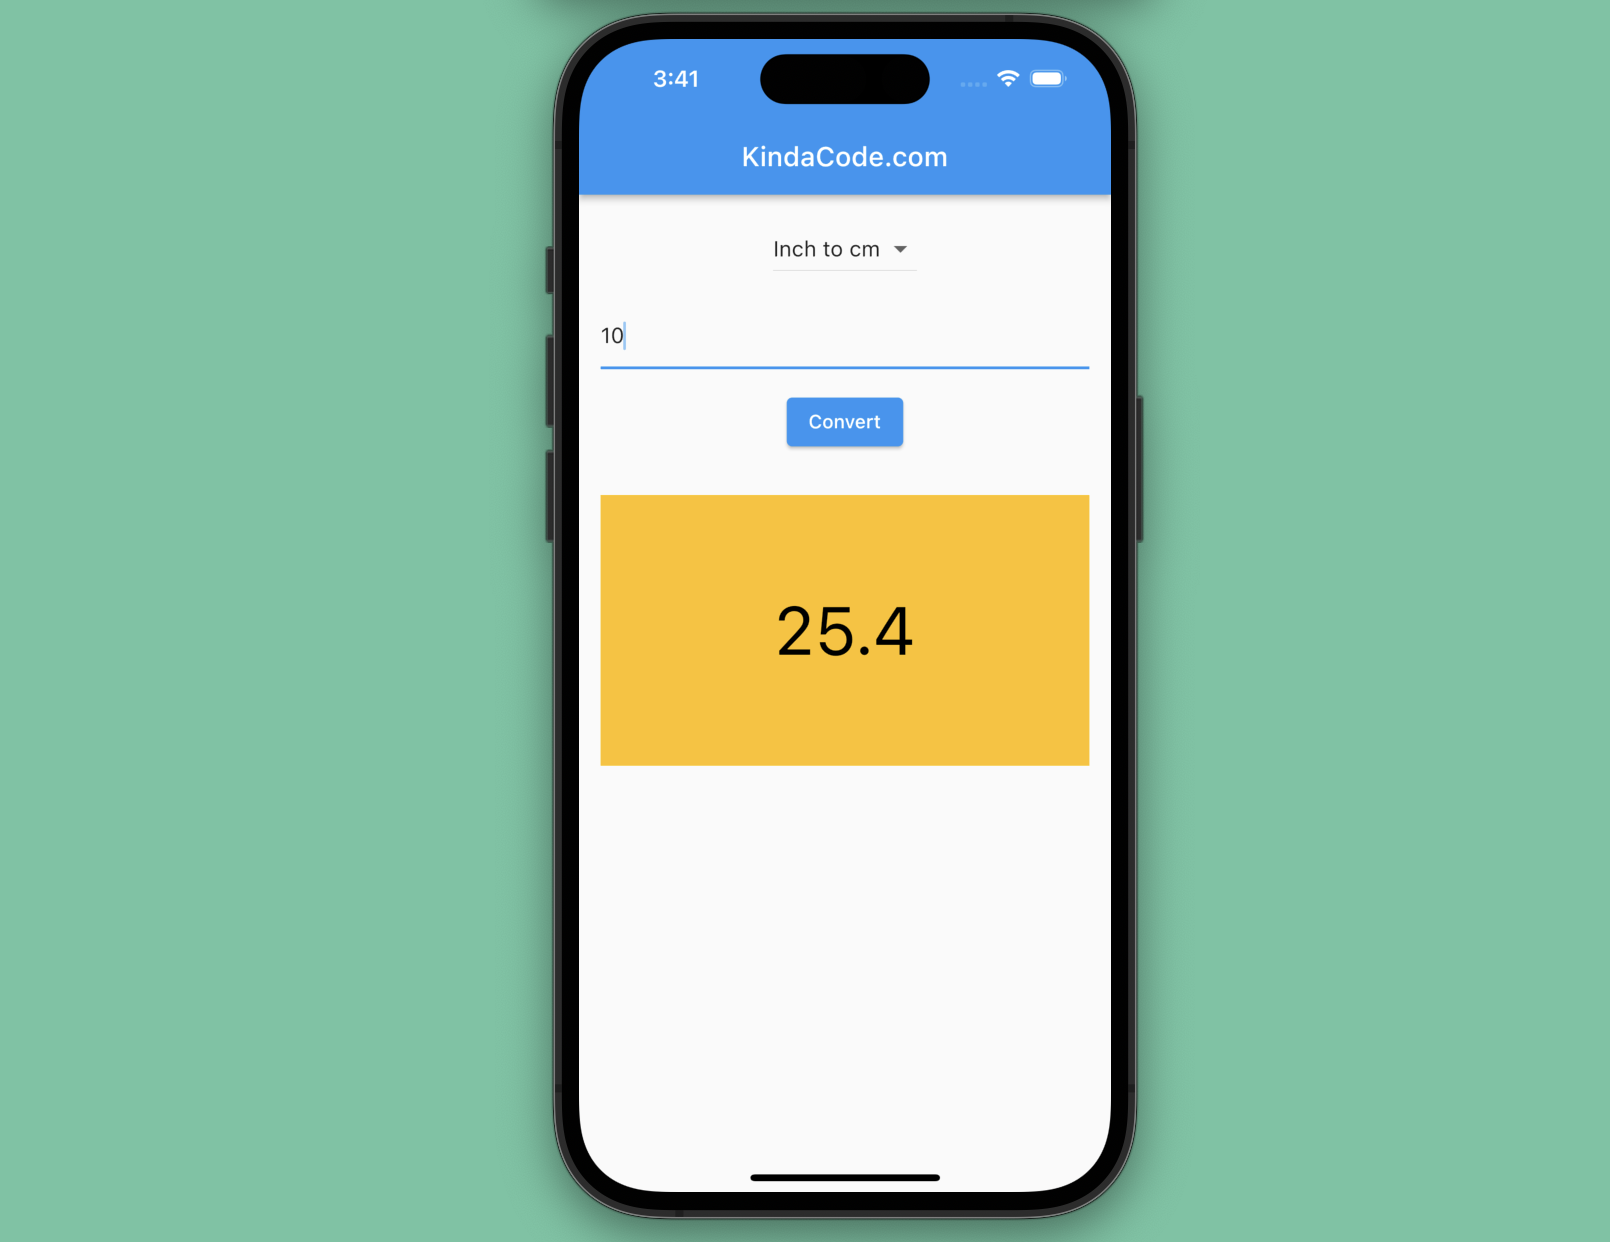
This code-focused article shows you how to create a simple length converter app with Flutter. You will learn how to implement the conversion features, use dropdown selection, and display results. The goal of this tutorial is to introduce you to some of the basic building blocks of Flutter, and by creating this app, you will gain hands-on experience that can be applied to your future projects.
Table of Contents
App Preview
The app we’re going to build contains 4 core components:
- A dropdown that lets the user choose the type of conversion they need
- A text field that takes input from the user
- A button that triggers the conversion
- An amber box that displays the result
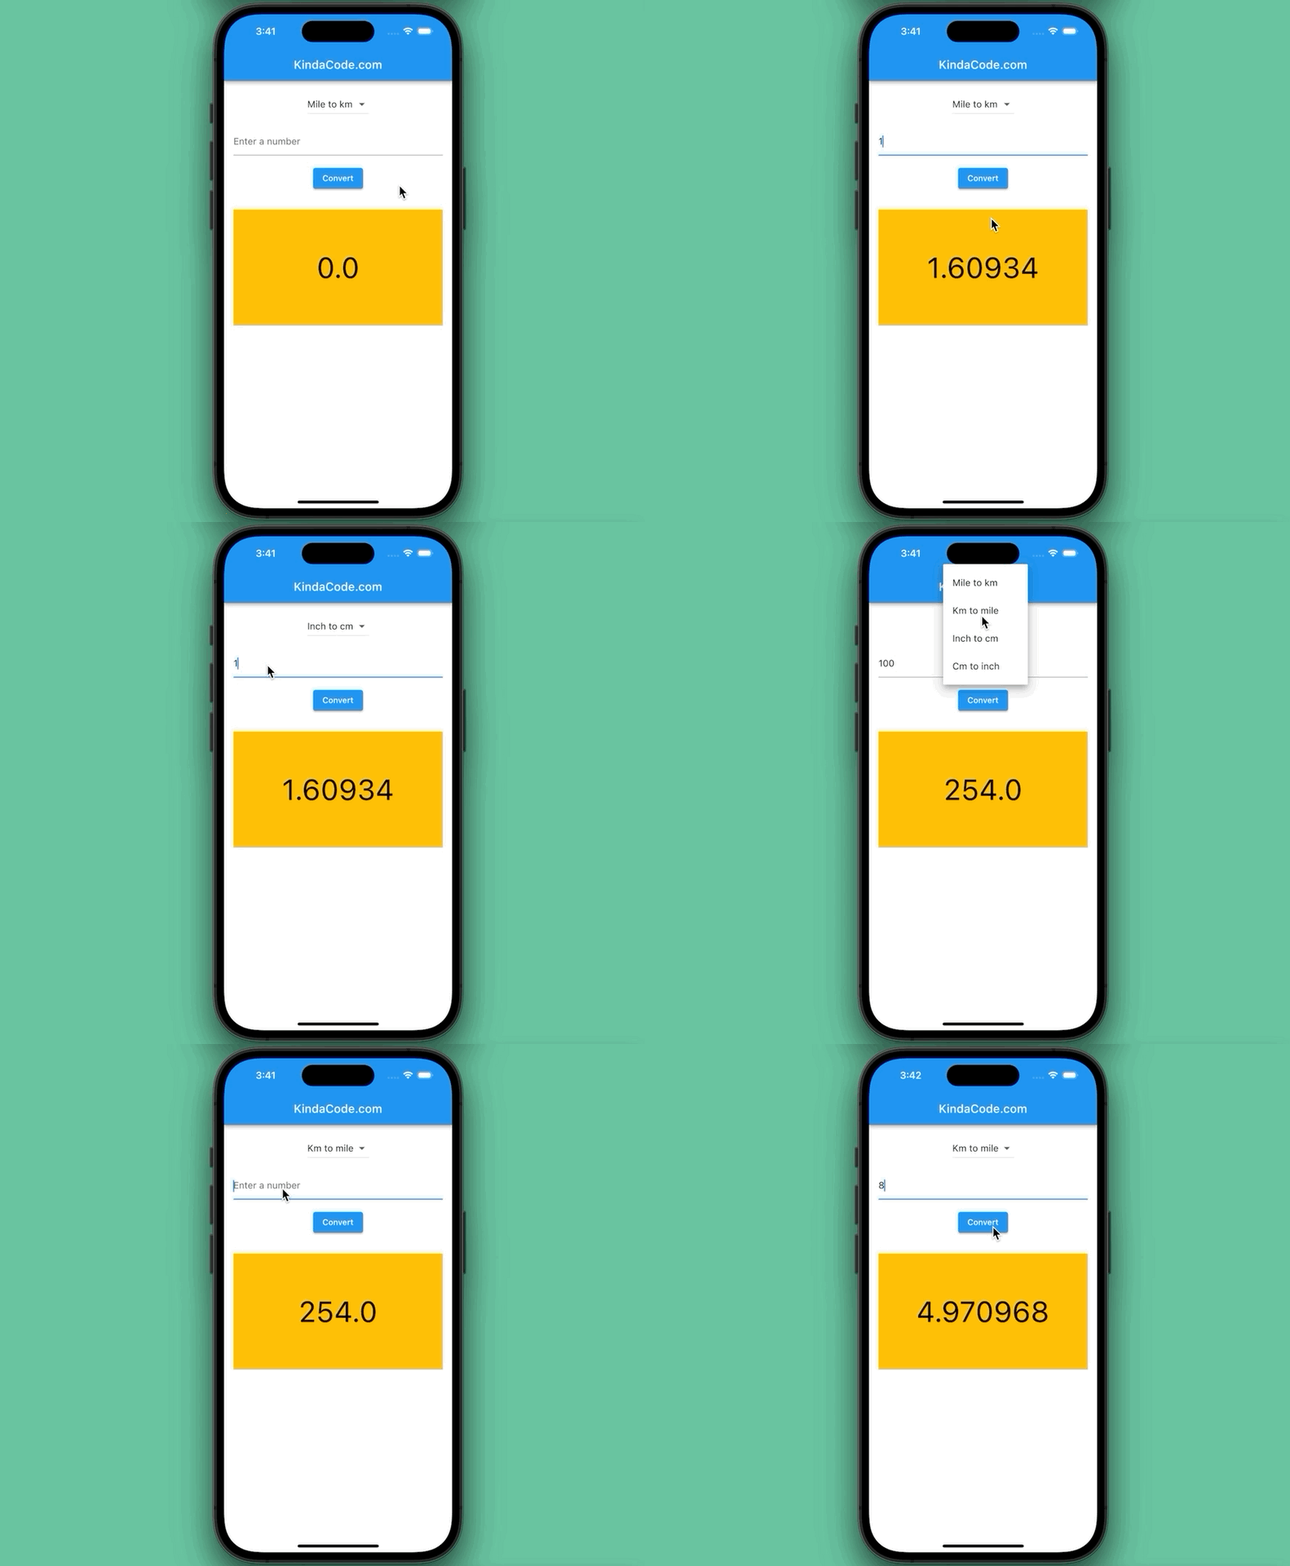
For simplicity’s sake, we will only make 4 types of conversions (you can easily add more if you like after seeing the code):
- Mile to kilometer (we’ll use US length units, which means 1 mile = 1.60934 km)
- Kilometer to mile
- Inch to centimeter
- Centimeter to Inch
A demo is worth more than a thousand words:
The Code
The complete source code with explanations in the comments:
import 'package:flutter/material.dart';

void main() => runApp(const MyApp());

class MyApp extends StatelessWidget {
  const MyApp({super.key});

  @override
  Widget build(BuildContext context) {
    return const MaterialApp(
      // remove the debug banner
      debugShowCheckedModeBanner: false,
      title: 'kindacode.com',
      home: KindaCodeDemo(),
    );
  }
}

class KindaCodeDemo extends StatefulWidget {
  const KindaCodeDemo({super.key});

  @override
  State<KindaCodeDemo> createState() => _KindaCodeDemoState();
}

class _KindaCodeDemoState extends State<KindaCodeDemo> {
  // we will use this variable to store the selected unit
  String dropdownValue = 'Mile to km';

  // we will use double for the result
  double result = 0.0;

  // we will use double for the input
  double input = 0.0;

  // This function will convert the input value
  // to the selected unit
  // and then display the result
  void convert() {
    setState(() {
      if (dropdownValue == 'Mile to km') {
        // we will use Amerian mile
        // that means 1 mile = 1.60934 km
        result = input * 1.60934;
      } else if (dropdownValue == 'Km to mile') {
        result = input * 0.621371;
      } else if (dropdownValue == 'Inch to cm') {
        result = input * 2.54;
      } else if (dropdownValue == 'Cm to inch') {
        result = input * 0.393701;
      }
    });
  }

  @override
  Widget build(BuildContext context) {
    return Scaffold(
      appBar: AppBar(
        title: const Text('KindaCode.com'),
      ),
      body: Padding(
        padding: const EdgeInsets.all(16.0),
        child: Column(
          children: [
            // we will use DropdownButton to select the unit
            DropdownButton<String>(
              value: dropdownValue,
              onChanged: (String? newValue) {
                setState(() {
                  if (newValue != null) {
                    dropdownValue = newValue;
                  }
                });
              },
              items: <String>[
                'Mile to km',
                'Km to mile',
                'Inch to cm',
                'Cm to inch'
              ].map<DropdownMenuItem<String>>((String value) {
                return DropdownMenuItem<String>(
                  value: value,
                  child: Text(value),
                );
              }).toList(),
            ),
            Padding(
              padding: const EdgeInsets.only(top: 16.0),
              // we will use TextField to get the input value
              child: TextField(
                onChanged: (text) {
                  input = double.tryParse(text) ?? 0;
                },
                decoration: const InputDecoration(
                  hintText: 'Enter a number',
                ),
                keyboardType: TextInputType.number,
              ),
            ),
            Padding(
              padding: const EdgeInsets.only(top: 16.0),
              // when this button gets pressed, the convert function will be called
              child: ElevatedButton(
                onPressed: convert,
                child: const Text('Convert'),
              ),
            ),
            const SizedBox(
              height: 30,
            ),
            // display the result
            Container(
              color: Colors.amber,
              width: double.infinity,
              height: 200,
              child: Center(
                child: FittedBox(
                  child: Text(
                    result.toString(),
                    style: const TextStyle(
                      fontSize: 50.0,
                      color: Colors.black,
                    ),
                  ),
                ),
              ),
            ),
          ],
        ),
      ),
    );
  }
}
Conclusion
Congratulations! You made it. From this point, you can improve and polish the app the way you like.
I hope you found this tutorial helpful and that you are excited to continue learning about Flutter and app development. If that is the case, consider taking a look at the following articles:
- Write a simple BMI Calculator with Flutter (Null Safety)
- Flutter: Make a simple Color Picker from scratch
- Flutter: Create a Password Strength Checker from Scratch
- Flutter and Firestore Database: CRUD example
- Flutter & Hive Database: CRUD Example
- Using Provider for State Management in Flutter
You can also tour around our Flutter topic page or Dart topic page for the most recent tutorials and examples.


