This succinct, practical article is about the PopupMenuButton widget in Flutter.
Table of Contents
Quick Overview
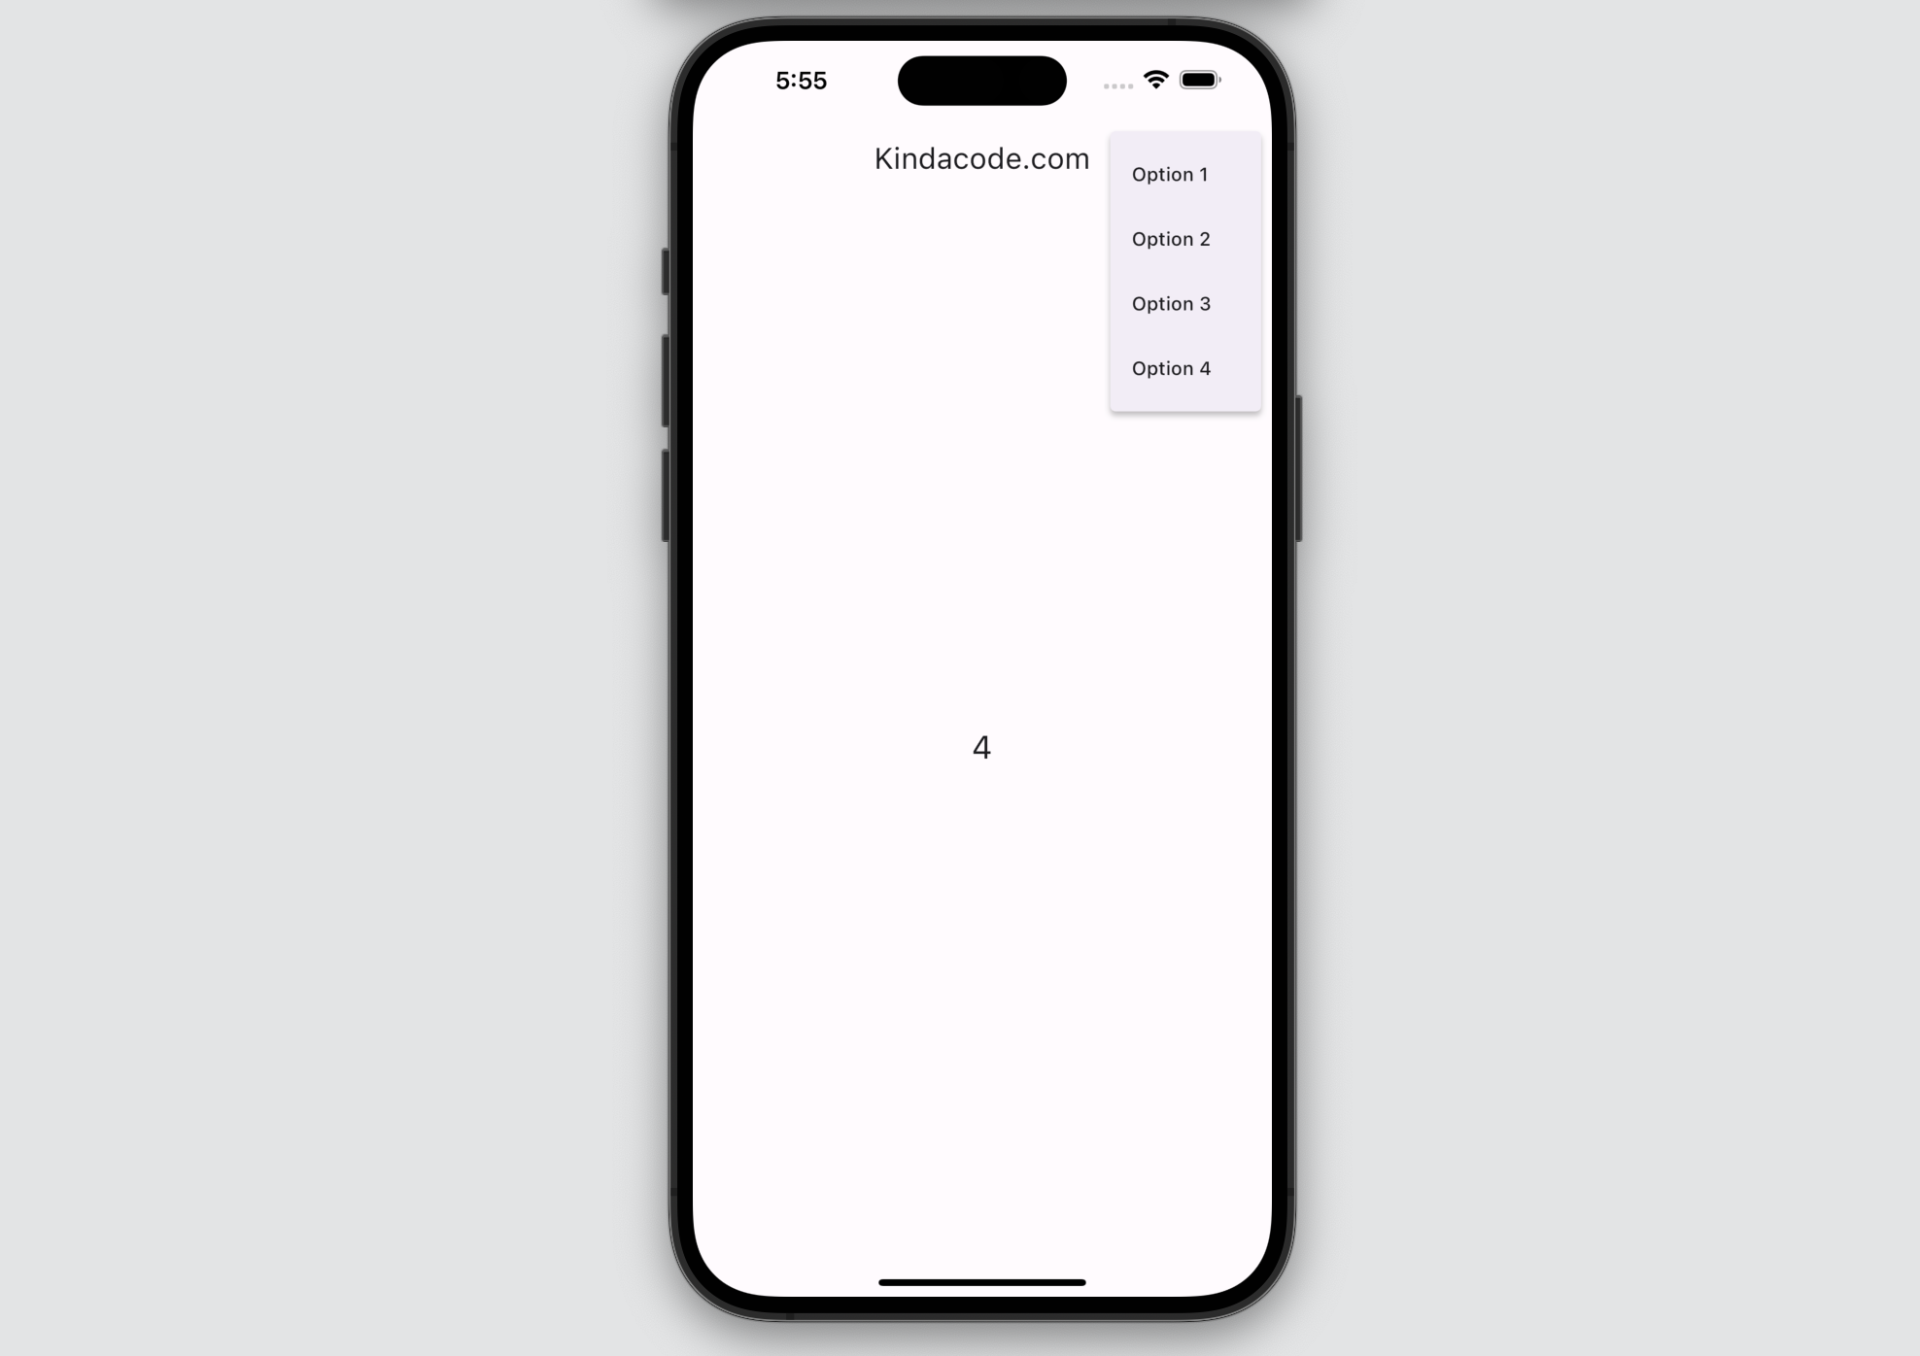
By default, the PopupMenuButton widget creates a three-dot icon. When the user taps this icon, a menu with one or multiple items will show up. After the user selects an item, the menu will be dismissed.
Sample code:
PopupMenuButton(
              onSelected: (String value) {
                    // do something with the selected value here
              },
              itemBuilder: (BuildContext ctx) => [
                    const PopupMenuItem(value: '1', child: Text('Option 1')),
                    const PopupMenuItem(value: '2', child: Text('Option 2')),
                    const PopupMenuItem(value: '3', child: Text('Option 3')),
                    const PopupMenuItem(value: '4', child: Text('Option 4')),
])
For more clarity, see the complete example below.
Example
App Preview
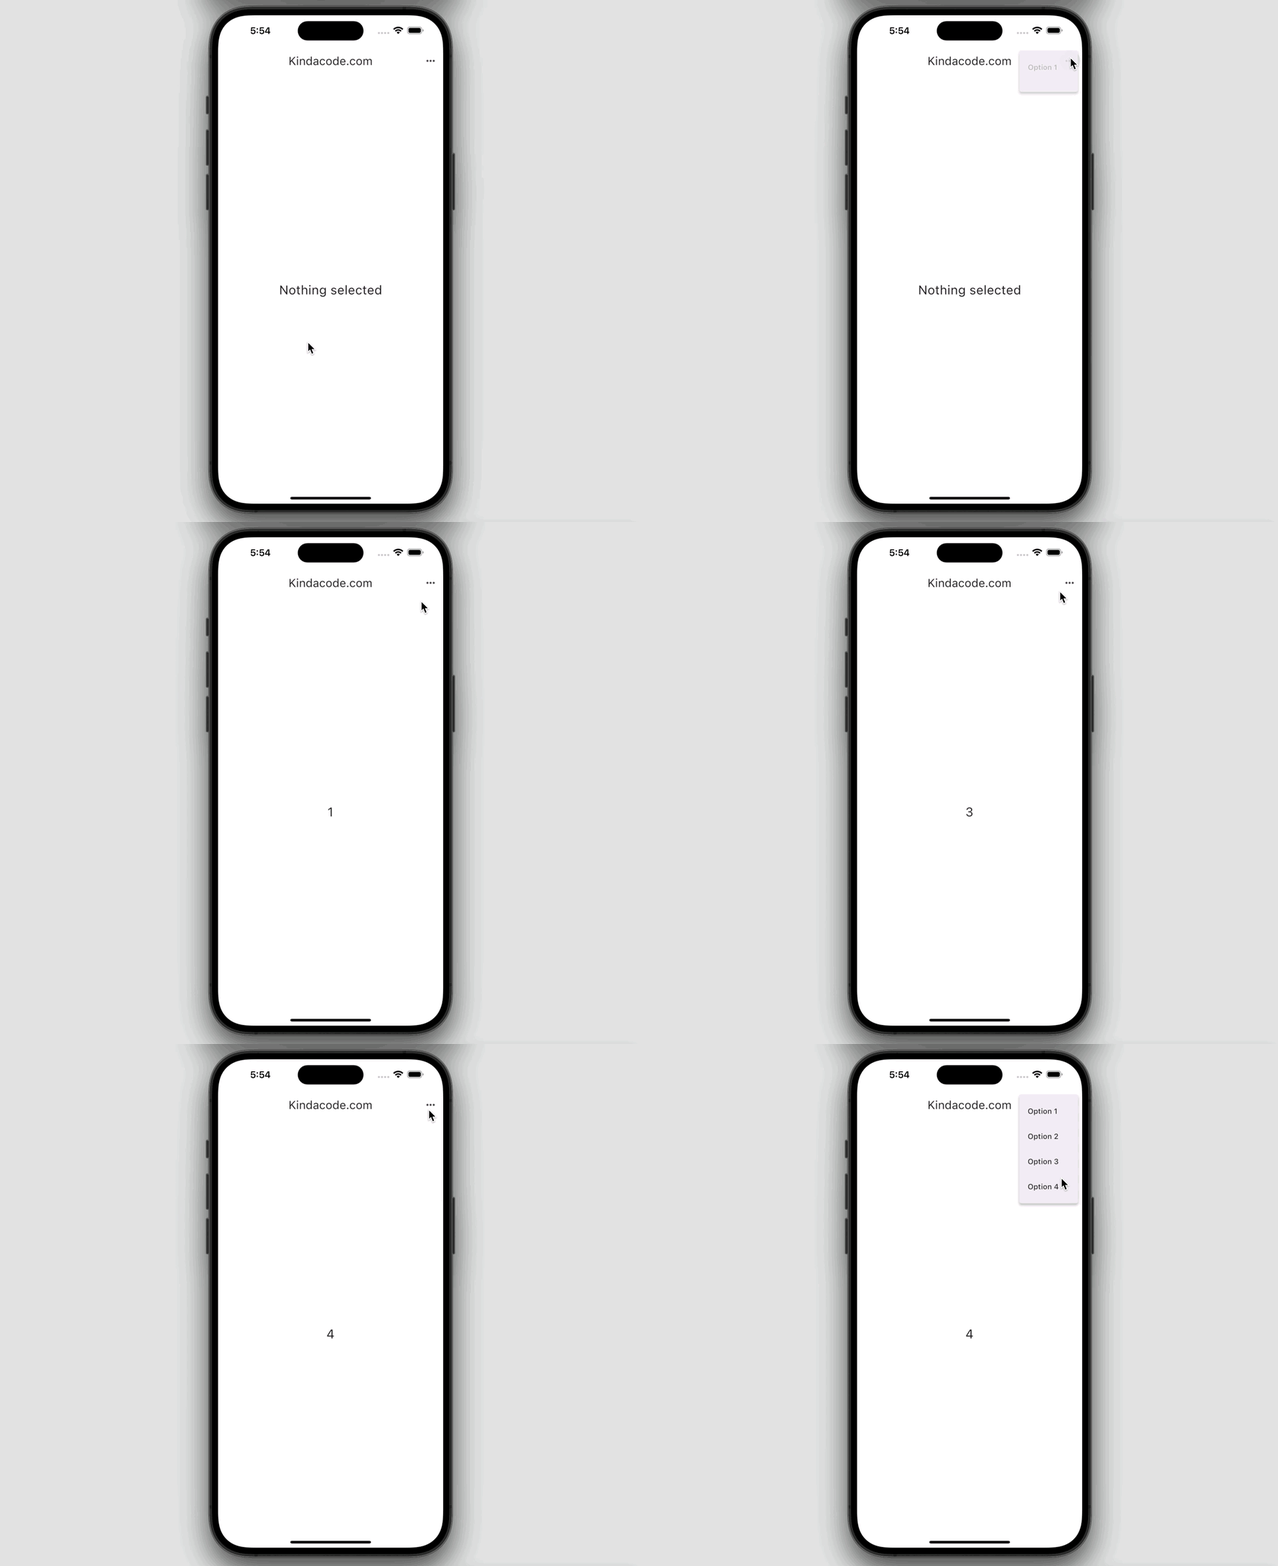
The tiny app we’re going to make has an app bar with a three-dot icon button on the right side. When this button is pressed, a popup menu will show up with four options (1, 2, 3, and 4). When an option is selected, the corresponding value will be displayed on the screen with a Text widget.
Here’s how it works in action:

The Code
Full code in main.dart (with explanations):
import 'package:flutter/material.dart';

void main() {
  runApp(const MyApp());
}

class MyApp extends StatelessWidget {
  const MyApp({Key? key}) : super(key: key);

  @override
  Widget build(BuildContext context) {
    return MaterialApp(
      // Hide the debug banner
      debugShowCheckedModeBanner: false,
      title: 'Kindacode.com',
      theme: ThemeData(useMaterial3: true),
      home: const HomeScreen(),
    );
  }
}

class HomeScreen extends StatefulWidget {
  const HomeScreen({Key? key}) : super(key: key);

  @override
  State<HomeScreen> createState() => _HomeScreenState();
}

class _HomeScreenState extends State<HomeScreen> {
  // the selected value from the dropdown
  // in the beginning, it is "Nothing selected"
  String _selectedValue = 'Nothing selected';

  @override
  Widget build(BuildContext context) {
    return Scaffold(
      appBar: AppBar(
        title: const Text('Kindacode.com'),
        actions: [
          // implement the popup menu button
          PopupMenuButton(
              onSelected: (String value) {
                setState(() {
                  _selectedValue = value;
                });
              },
              itemBuilder: (BuildContext ctx) => [
                    const PopupMenuItem(value: '1', child: Text('Option 1')),
                    const PopupMenuItem(value: '2', child: Text('Option 2')),
                    const PopupMenuItem(value: '3', child: Text('Option 3')),
                    const PopupMenuItem(value: '4', child: Text('Option 4')),
                  ])
        ],
      ),
      body: Center(
        // display the result
        child: Text(_selectedValue,
            style: const TextStyle(
              fontSize: 24,
            )),
      ),
    );
  }
}
Conclusion
We’ve successfully implemented a simple PopupMenuButton in an app bar. If you’d like to explore more new and interesting stuff in Flutter, take a look at the following articles:
- Flutter & SQLite: CRUD Example
- Flutter: Making a Dropdown Multiselect with Checkboxes
- Working with dynamic Checkboxes in Flutter
- Flutter: Add a Search Field to an App Bar (2 Approaches)
- Flutter: Caching Network Images for Big Performance gains
- Flutter: ValueListenableBuilder Example
You can also take a tour around our Flutter topic page and Dart topic page to see the latest tutorials and examples.


