This article shows you some different ways to programmatically scroll to a desired item in a ListView in Flutter, for instance, scrolling to the item with the index of N when the user presses a floating button. Each approach mentioned in this tutorial comes along with a complete example to make it easier to understand. Without any further ado, let’s have a look at the first one.
Using ScrollController
If your ListView has items of the same height, then this approach works just fine (fortunately, ListView generally contains a bunch of same-type and same-height children). In case the heights of the items are different and not set, move on to another method in this article.
Example
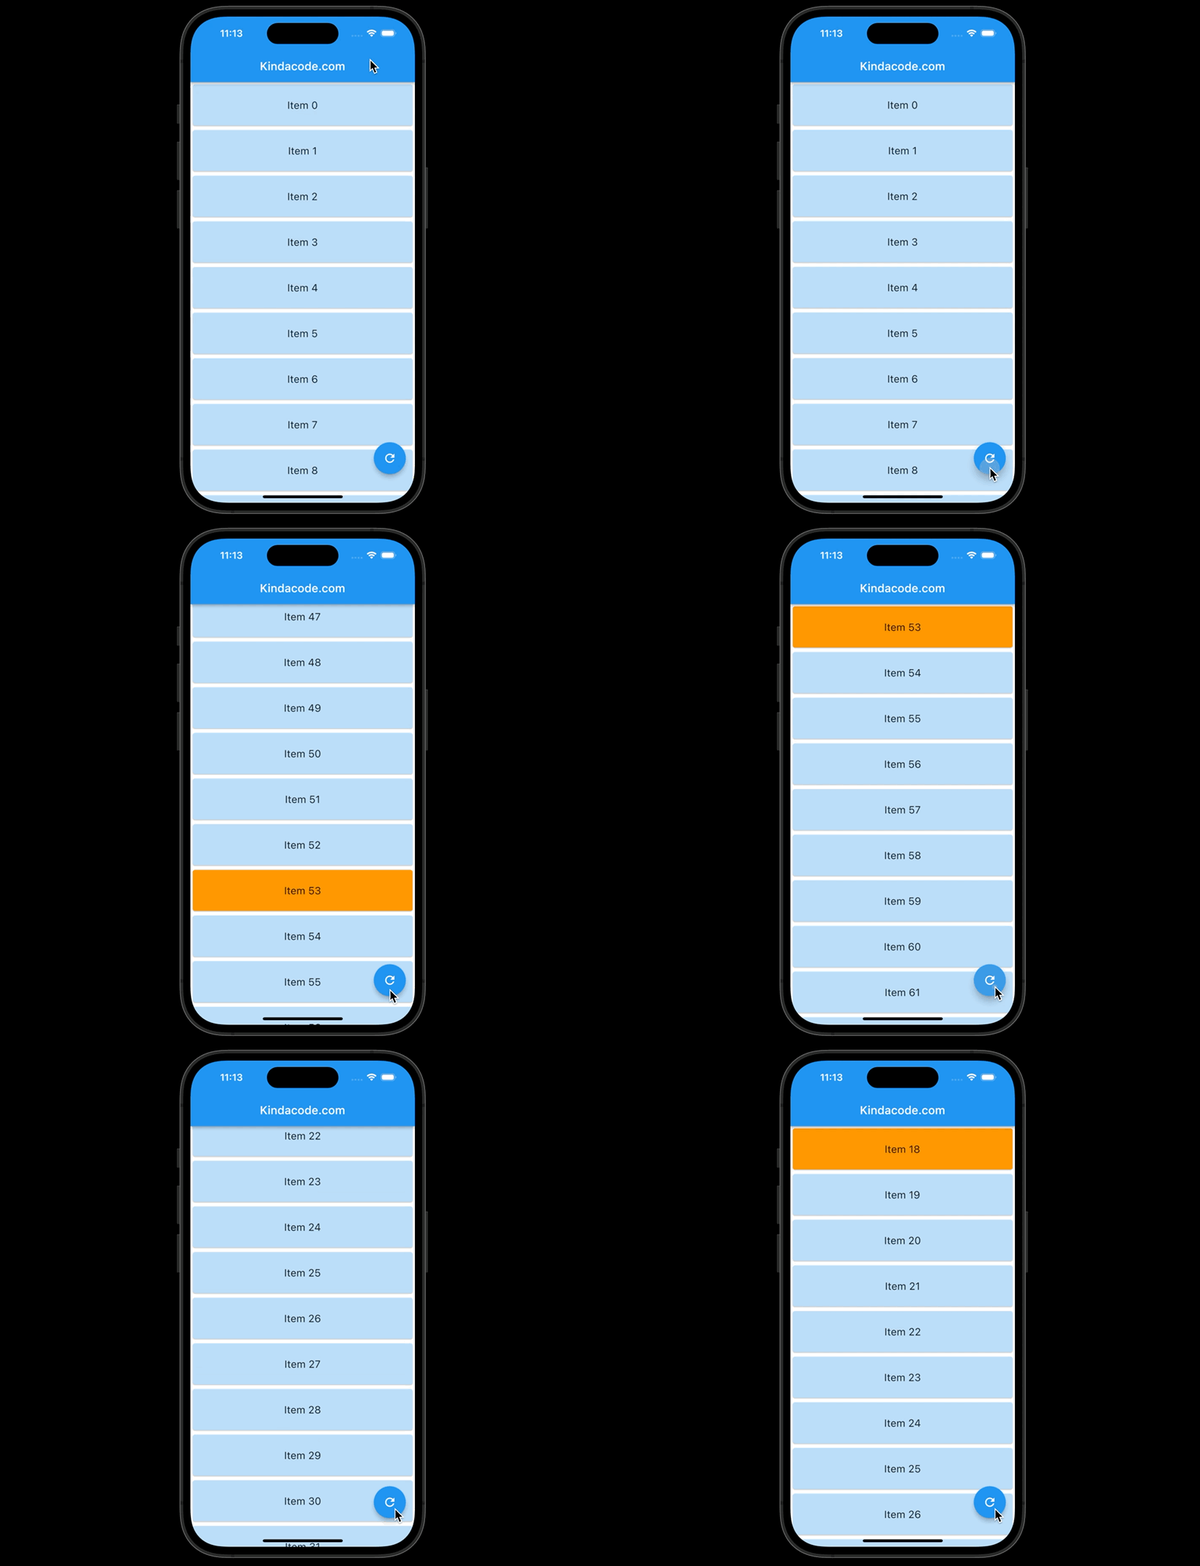
This example app contains a ListView with 100 items and a floating button. When the user presses the floating button, the view will scroll to a random item (you can replace it with a constant number if you want to). This item will also be highlighted with an orange background.
Preview:
The full code:
import 'package:flutter/material.dart';
import 'dart:math';

void main() {
  runApp(const MyApp());
}

class MyApp extends StatelessWidget {
  const MyApp({Key? key}) : super(key: key);

  @override
  Widget build(BuildContext context) {
    return const MaterialApp(
      debugShowCheckedModeBanner: false,
      title: 'Kindacode.com',
      home: HomePage(),
    );
  }
}

class HomePage extends StatefulWidget {
  const HomePage({Key? key}) : super(key: key);

  @override
  State<HomePage> createState() => _HomePageState();
}

class _HomePageState extends State<HomePage> {
  final _scrollController = ScrollController();

  // Generate dummy data to fill the ListView
  final List<String> listItems = List.generate(100, (i) => "Item $i");

  // Define the fixed height for an item
  final double _height = 80;

  // Define the function that scroll to an item
  void _scrollToIndex(index) {
    _scrollController.animateTo(_height * index,
        duration: const Duration(seconds: 2), curve: Curves.easeIn);
  }

  // The index of the destination item
  // It is a random number
  int? _destinationIndex;

  // This is ued for creating a random number
  final _random = Random();

  @override
  Widget build(BuildContext context) {
    return Scaffold(
      appBar: AppBar(
        title: const Text('Kindacode.com'),
      ),
      body: ListView.builder(
          controller: _scrollController,
          itemCount: listItems.length,
          itemBuilder: (_, index) {
            return SizedBox(
                height: _height,
                child: Card(
                    color: index == _destinationIndex
                        ? Colors.orange // Highlight item
                        : Colors.blue[100],
                    child: Center(
                        child: Text(
                      listItems[index],
                      style: const TextStyle(fontSize: 18),
                    ))));
          }),
      floatingActionButton: FloatingActionButton(
          onPressed: () {
            setState(() {
              _destinationIndex = _random.nextInt(100);
            });
            _scrollToIndex(_destinationIndex);
          },
          child: const Icon(Icons.refresh)),
    );
  }
}
Using scrollable_positioned_list plugin
This plugin is officially published on pub.dev by Google. It gives us a widget named ScrollablePositionedList that not only provides features like ListView.builder but also supports stuff called scrollToIndex. Now the heights of the list items can be anything.
To install the latest version of the plugin, execute the following command:
flutter pub add scrollable_positioned_listThen run:
flutter pub getExample
Preview
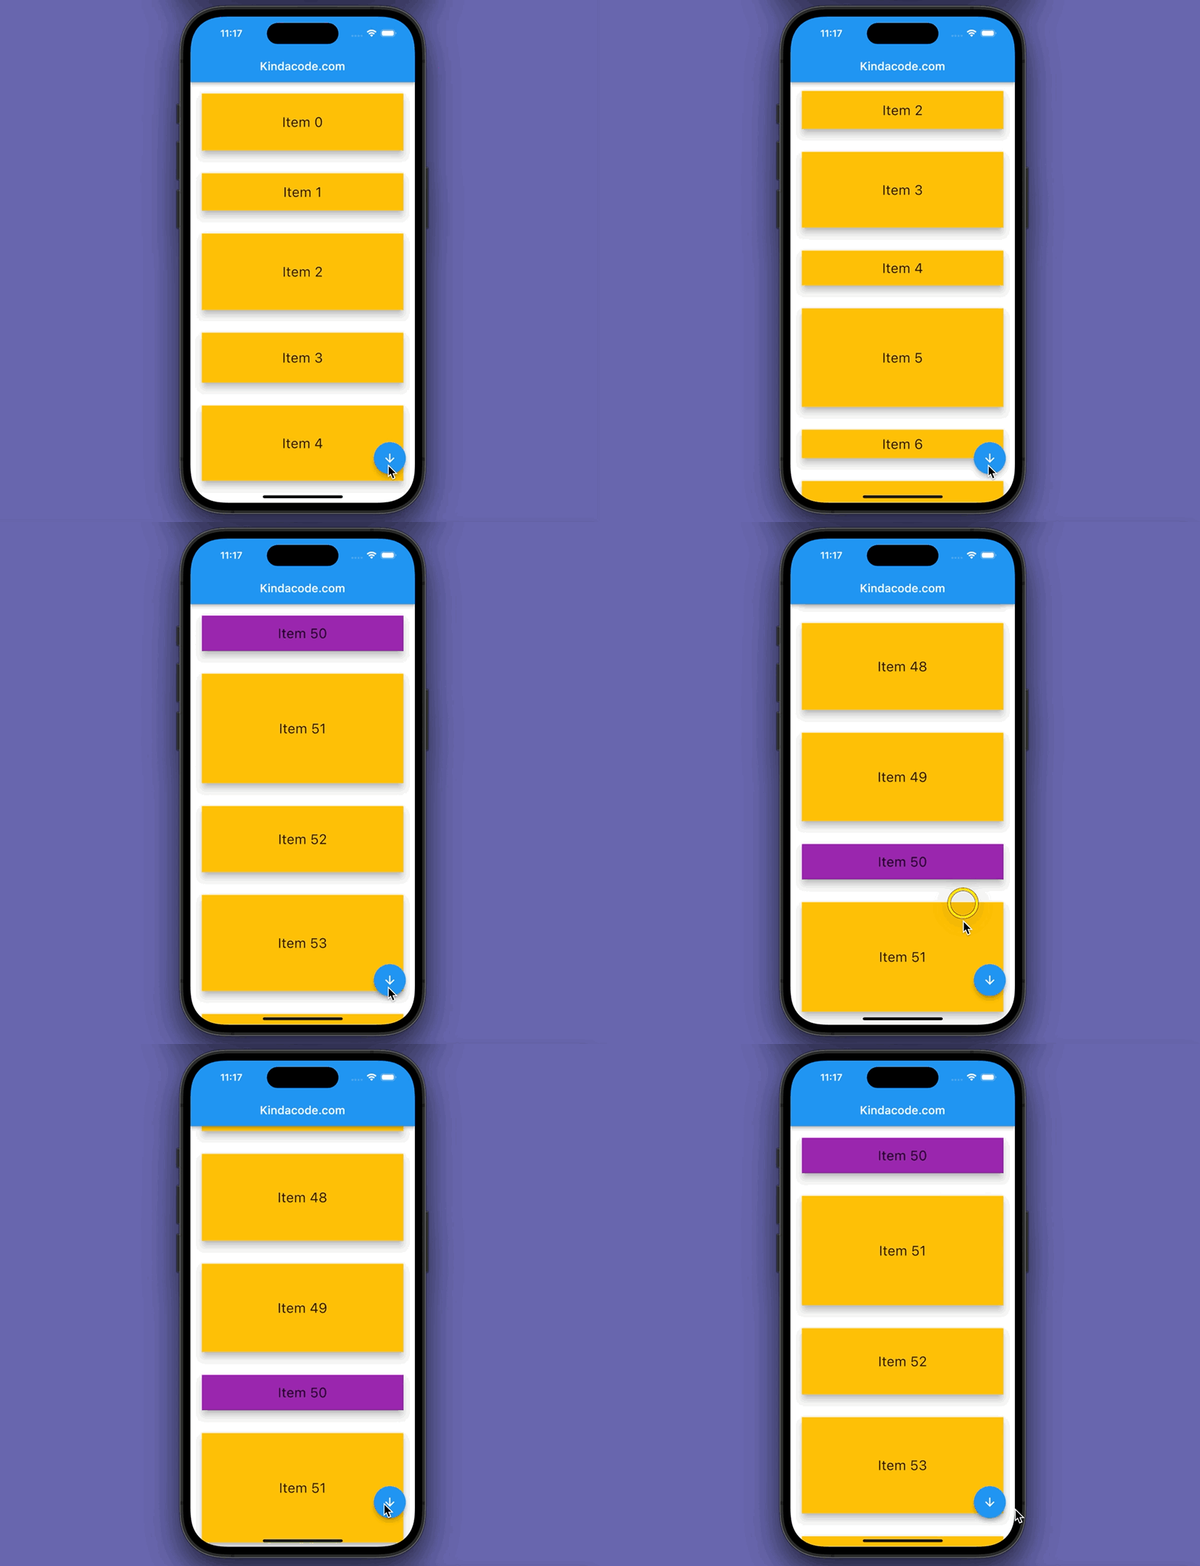
Our app has a floating button and a list of 100 items of different heights. When the user presses the button, the view will scroll to the item which has an index of 50 (you can replace 50 with any integer between 0 and 100).
The full code:
import 'package:flutter/material.dart';
import 'package:scrollable_positioned_list/scrollable_positioned_list.dart';
import 'dart:math';

const totalItems = 100;

void main() {
  runApp(const MyApp());
}

class MyApp extends StatelessWidget {
  const MyApp({Key? key}) : super(key: key);

  @override
  Widget build(BuildContext context) {
    return const MaterialApp(
      debugShowCheckedModeBanner: false,
      title: 'Kindacode.com',
      home: HomePage(),
    );
  }
}

class HomePage extends StatefulWidget {
  const HomePage({Key? key}) : super(key: key);

  @override
  State<HomePage> createState() => _HomePageState();
}

class _HomePageState extends State<HomePage> {
  final random = Random();

  // Generate dummy data
  final List<String> _myList = List.generate(totalItems, (i) => "Item $i");

  final ItemScrollController _itemScrollController = ItemScrollController();

  // This function will be triggered when the user presses the floating button
  void _scrollToIndex(int index) {
    _itemScrollController.scrollTo(
        index: index,
        duration: const Duration(seconds: 2),
        curve: Curves.easeInOutCubic);
  }

  // The view will scroll to the item which has the index of 50
  // You can specify another number if you like
  final _desiredItemIndex = 50;

  @override
  Widget build(BuildContext context) {
    return Scaffold(
      appBar: AppBar(
        title: const Text('Kindacode.com'),
      ),
      body: ScrollablePositionedList.builder(
        itemScrollController: _itemScrollController,
        itemCount: _myList.length,
        itemBuilder: (context, index) {
          return Card(
            key: ValueKey(_myList[index]),
            margin: const EdgeInsets.all(20),
            elevation: 10,
            child: Container(
              // give each container a random height
              height: random.nextDouble() * 150 + 50,
              color: _desiredItemIndex == index ? Colors.purple : Colors.amber,
              alignment: Alignment.center,
              child: Text(
                _myList[index],
                style: const TextStyle(fontSize: 24),
              ),
            ),
          );
        },
      ),
      floatingActionButton: FloatingActionButton(
          onPressed: () => _scrollToIndex(_desiredItemIndex),
          child: const Icon(Icons.arrow_downward)),
    );
  }
}
Wrap Up
In this article, we have explored more than one approach to scrolling to a specific item in a ListView. The first approaches use only the built-in features of Flutter, and the second one uses an alternative to ListView called ScrollablePositionedList. Depending on the needs and the situation that you are dealing with, choose an appropriate method from them.
If you would like to learn more about Flutter, take a look at the following articles: Flutter SliverList – Tutorial and Example, Using Stack and IndexedStack in Flutter, Working with dynamic Checkboxes in Flutter, Flutter AnimationController examples, or check out our Flutter category page and Dart category page for the latest stuff.


