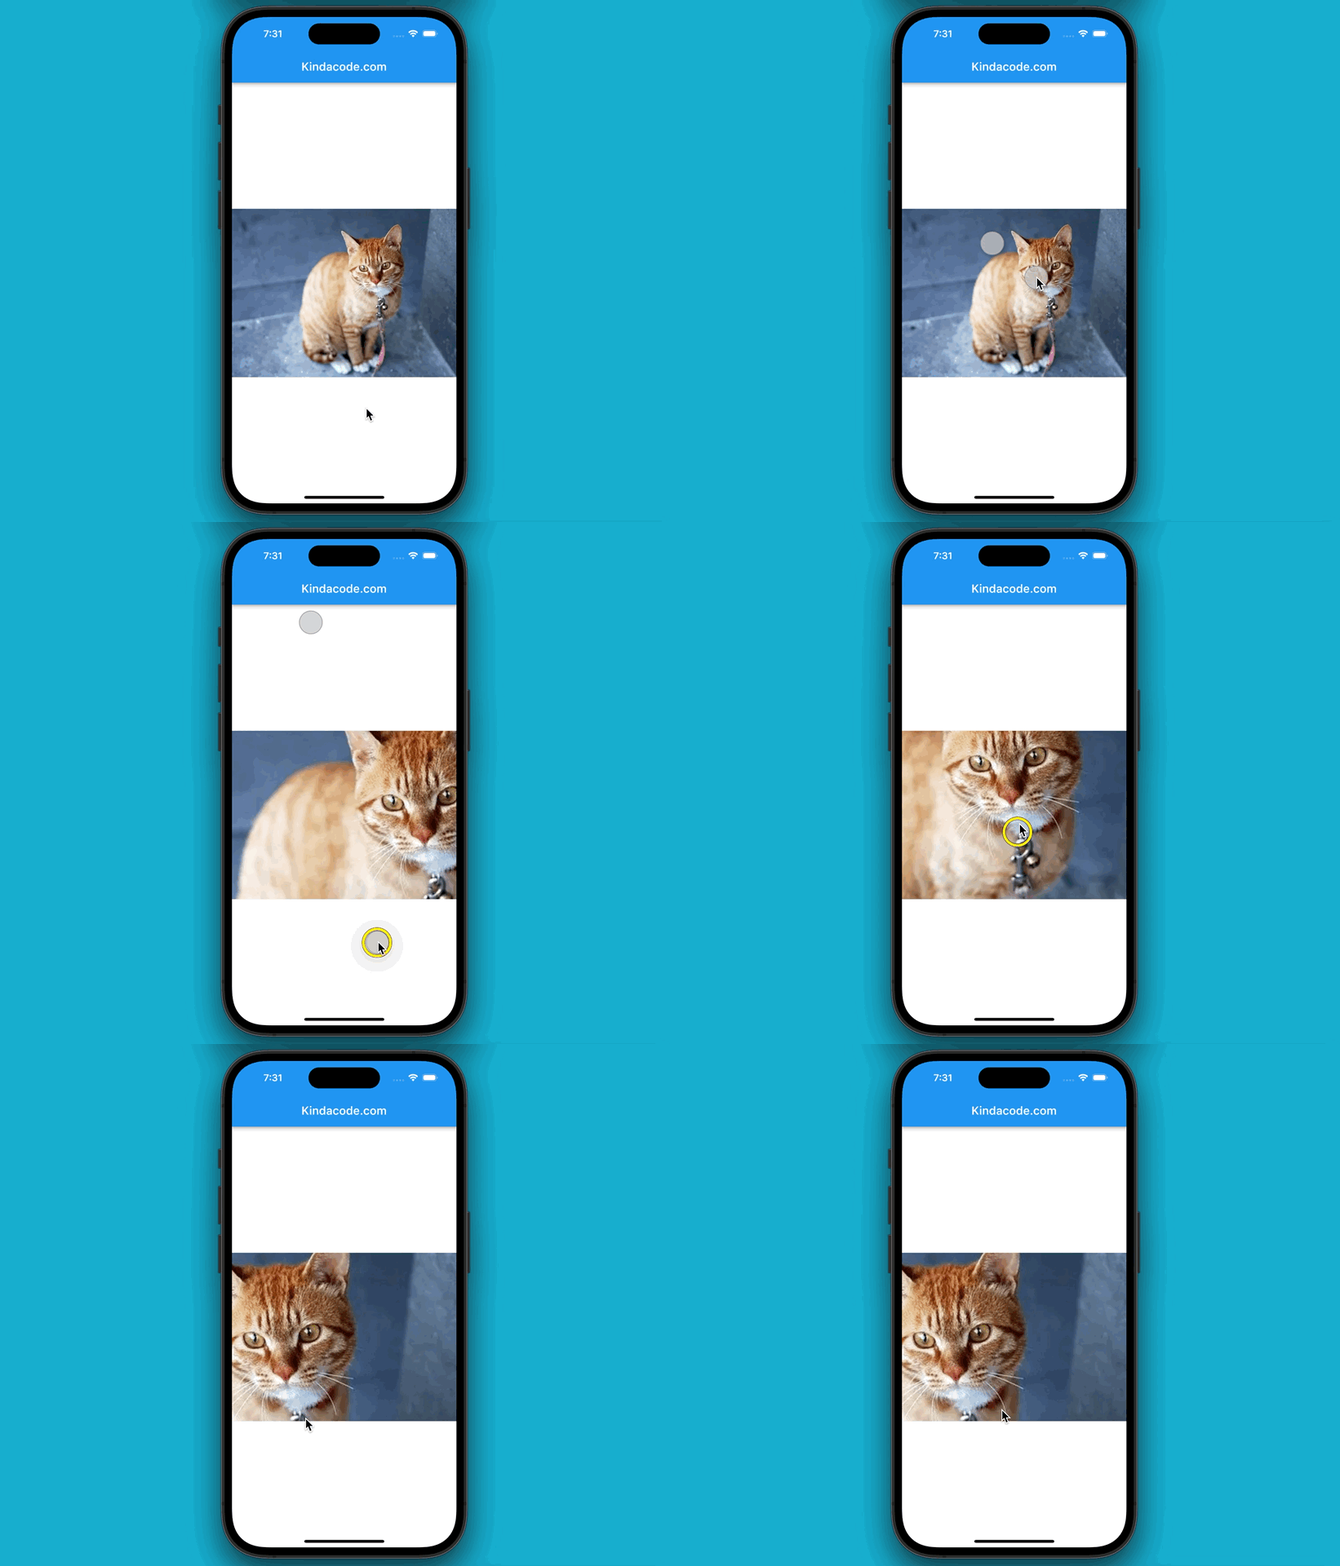
There may be times when your Flutter applications display large pictures in a small area of the screen. To see these images clearly, users will have to enlarge them. In the old days, we have to use a third-party plugin or write lots of code for zooming but since Flutter 1.2, we can easily implement zoom-in / zoom-out by using InteractiveViewer.
An InteractiveViewer widget lets users transform its child by dragging to pan or pinching to zoom. To prevent InteractiveViewer from drawing outside of its original size, you can wrap it with a ClipRect widget.
Table of Contents
Example
Preview
This tiny Flutter app displays an image that can be zoomed and panned around.
- If you run it with an iOS simulator, you can perform zooming in & out by holding the Option key and moving your mouse.
- If you’re working with an Android emulator, press and hold Ctrl (Windows) or Command (Mac) and double-click your mouse.

The code
import 'package:flutter/material.dart';

void main() {
  runApp(const MyApp());
}

class MyApp extends StatelessWidget {
  const MyApp({Key? key}) : super(key: key);

  @override
  Widget build(BuildContext context) {
    return const MaterialApp(
      // Remove the debug banner
      debugShowCheckedModeBanner: false,
      home: MyHomePage(),
    );
  }
}

class MyHomePage extends StatelessWidget {
  const MyHomePage({Key? key}) : super(key: key);

  @override
  Widget build(BuildContext context) {
    return Scaffold(
        appBar: AppBar(
          title: const Text('Kindacode.com'),
        ),
        body: Center(
          child: ClipRect(
            child: InteractiveViewer(
              child: Image.network(
                  'https://www.kindacode.com/wp-content/uploads/2020/12/the-cat.jpg'),
            ),
          ),
        ));
  }
}
API
Constructors
InteractiveViewer({
  Key? key,
  Clip clipBehavior = Clip.hardEdge,
  bool alignPanAxis = false,
  EdgeInsets boundaryMargin = EdgeInsets.zero,
  bool constrained = true,
  double maxScale = 2.5,
  double minScale = 0.8,
  GestureScaleEndCallback? onInteractionEnd,
  GestureScaleStartCallback? onInteractionStart,
  GestureScaleUpdateCallback? onInteractionUpdate,
  bool panEnabled = true,
  bool scaleEnabled = true,
  TransformationController? transformationController,
  required Widget child
})
Options
| Name | Type | Description |
|---|---|---|
| alignPanAxis | bool | f true, panning is only allowed in the direction of the horizontal axis or the vertical axis |
| boundaryMargin | EdgeInsets | A margin for the visible boundaries of the child |
| child (required) | Widget | The Widget to perform the transformations on |
| constrained | bool | Whether the normal size constraints at this point in the widget tree are applied to the child |
| maxScale | double | The maximum allowed scale |
| minScale | double | The minimum allowed scale |
| onInteractionEnd | void | Called when the user ends a pan or scale gesture on the widget |
| onInteractionStart | void | Called when the user begins a pan or scale gesture on the widget |
| onInteractionUpdate | void | Called when the user updates a pan or scale gesture on the widget |
| panEnabled | bool | If false, the user will be prevented from panning |
| scaleEnabled | bool | If false, the user will be prevented from scaling |
| transformationController | TransformationController | A TransformationController for the transformation performed on the child |
Conclusion
This article walked you through an example of using InteractiveViewer which is useful in adding a zoom effect to images or other kinds of content. If you’d like to explore more new and interesting stuff in the Flutter and mobile development world, take a look at the following articles:
- Flutter: Columns with Percentage Widths
- Flutter: Caching Network Images for Big Performance gains
- How to make an image carousel in Flutter
- How to implement an image picker in Flutter
- How to implement Star Rating in Flutter
You can also check out our Flutter category page or Dart category page for the latest tutorials and examples.


