Shadow effects for text are increasingly used in web and mobile applications, aiming to enhance the user experience. In this article, you’ll learn how to add shadow effects to Text widgets in Flutter through some instructions and a few complete examples.
Overview
Once upon a time, in the very old days of Flutter, creating a drop shadow for a Text widget is kind of tedious stuff and you have to write a lot of code. However, things change. Nowadays, you can archive the same result more easily with the shadow property of the TextStyle class.
Sample code:
Text(
  'Some Text',
  style: TextStyle(
    shadows: [
      Shadow(
        color: /*...*/,
        offset: /*...*/,
        blurRadius: /*...*/,
      ),
      // You can add as many Shadow as you want
      Shadow(/*...*/),
    ],
  ),
),
Note that shadows will be drawn in the order. For more clarity, see the following examples.
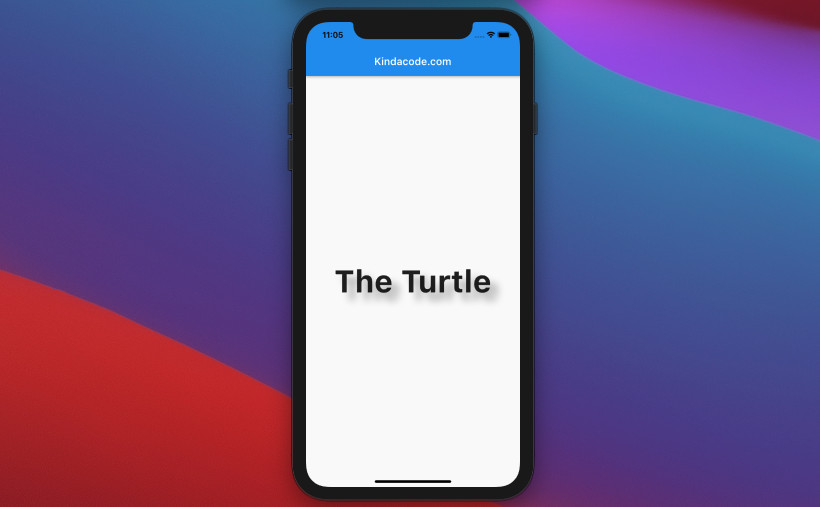
Example 1: Simple
This example creates a single drop shadow.
Screenshot:
The code:
Scaffold(
      appBar: AppBar(
        title: const Text('Kindacode.com'),
      ),
      body: Center(
        child: Text(
          'The Turtle',
          style: TextStyle(fontSize: 60, fontWeight: FontWeight.bold, shadows: [
            Shadow(
                color: Colors.black.withOpacity(0.3),
                offset: const Offset(15, 15),
                blurRadius: 15),
          ]),
        ),
      ),
);
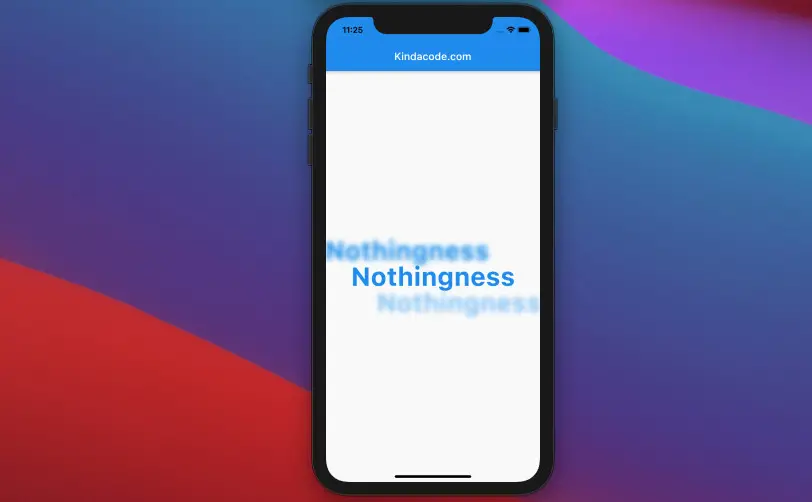
Example 2: Multiple Shadows
This example produces multiple shadows with a standalone Text widget.
Screenshot:
The code:
Scaffold(
      appBar: AppBar(
        title: const Text('Kindacode.com'),
      ),
      body: Center(
        child: Text(
          'Nothingness',
          style: TextStyle(
            color: Colors.blue,
            fontSize: 50,
            fontWeight: FontWeight.bold,
            shadows: [
              Shadow(
                  color: Colors.blue.shade500,
                  offset: const Offset(-50, -50),
                  blurRadius: 10),
              Shadow(
                  color: Colors.blue.shade200,
                  offset: const Offset(50, 50),
                  blurRadius: 10),
            ],
          ),
        ),
      ),
);
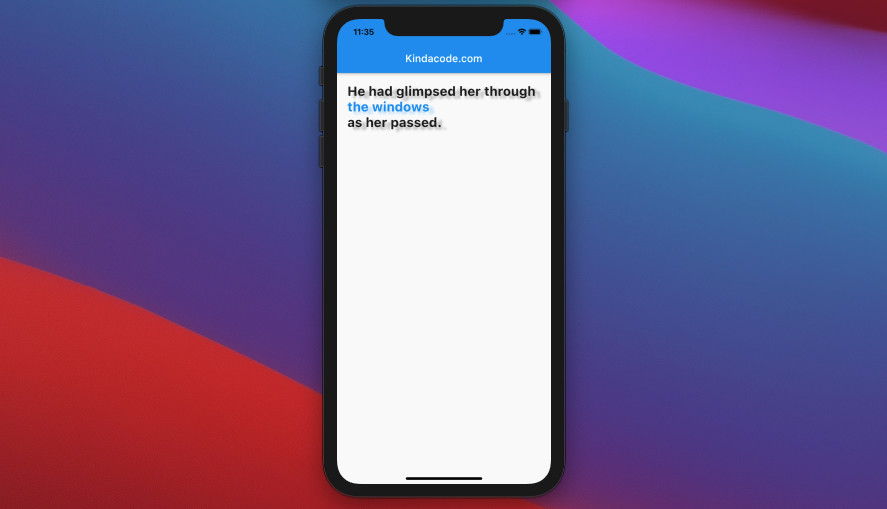
Example 3: Using DefaultTextStyle widget
This example uses a DefaultTextStyle widget to add shadow effects for its descendant Text widgets.
Screenshot:
The complete code:
// main.dart
import 'package:flutter/material.dart';

void main() {
  runApp(const MyApp());
}

class MyApp extends StatelessWidget {
  const MyApp({Key? key}) : super(key: key);

  @override
  Widget build(BuildContext context) {
    return const MaterialApp(
      // Remove the debug banner
      debugShowCheckedModeBanner: false,
      title: 'Kindacode.com',
      home: HomePage(),
    );
  }
}

class HomePage extends StatelessWidget {
  const HomePage({Key? key}) : super(key: key);

  @override
  Widget build(BuildContext context) {
    return Scaffold(
      appBar: AppBar(
        title: const Text('Kindacode.com'),
      ),
      body: Padding(
        padding: const EdgeInsets.all(20),
        child: DefaultTextStyle(
          style: const TextStyle(
              fontSize: 25,
              color: Colors.black87,
              fontWeight: FontWeight.bold,
              shadows: [
                Shadow(
                    color: Colors.black26, offset: Offset(10, 5), blurRadius: 5)
              ]),
          child: Column(
            crossAxisAlignment: CrossAxisAlignment.start,
            children: [
              const Text('He had glimpsed her through'),
              Text(
                'the windows',
                style: TextStyle(color: Colors.blue, shadows: [
                  Shadow(
                      color: Colors.blue.shade100,
                      offset: const Offset(10, 5),
                      blurRadius: 5)
                ]),
              ),
              const Text('as her passed.')
            ],
          ),
        ),
      ),
    );
  }
}
Conclusion
You’ve learned about the technique to add shadow effects to a Text widget and gone through some examples of using it in action. This is helpful when you need to polish your mobile or web apps thus the user experience will be improved.
Flutter is fascinating, and there are many wonderful things you might want to learn. Keep the ball rolling by taking a look at the following articles:
- Flutter: Make Text Clickable like Hyperlinks on the Web
- Flutter Gradient Text Examples
- Flutter and Firestore Database: CRUD example
- Example of CupertinoSliverNavigationBar in Flutter
- Flutter: Make a simple Color Picker from scratch
- Using AnimatedIcon in Flutter
You can also glimpse our Flutter category page and Dart category page for the latest tutorials and examples.


