This concise article shows you 2 different ways to increase or decrease the font size in VS Code (Visual Studio Code).
Method 1: Using hotkeys
For macOS users:
- Press
Cmd++to increase the font size - Press
Cmd+-to decrease the font size
For Windows users:
- Press
Ctrl++to increase the font size - Press
Ctrl+-to decrease the font size
Note: This approach changes both the code and the UI font size. If you only want to change the code font size and keep the UI font size, check the second method.
Method 2: Using GUI (Graphic User Interface)
1. Launch your VS Code and go to:
Code>Settings...>Settingsif you’re using macOS (shortcuts:Cmd+,).File>Preferences>Settingsin case you’re using Windows (hotkeys:Ctrl+,)
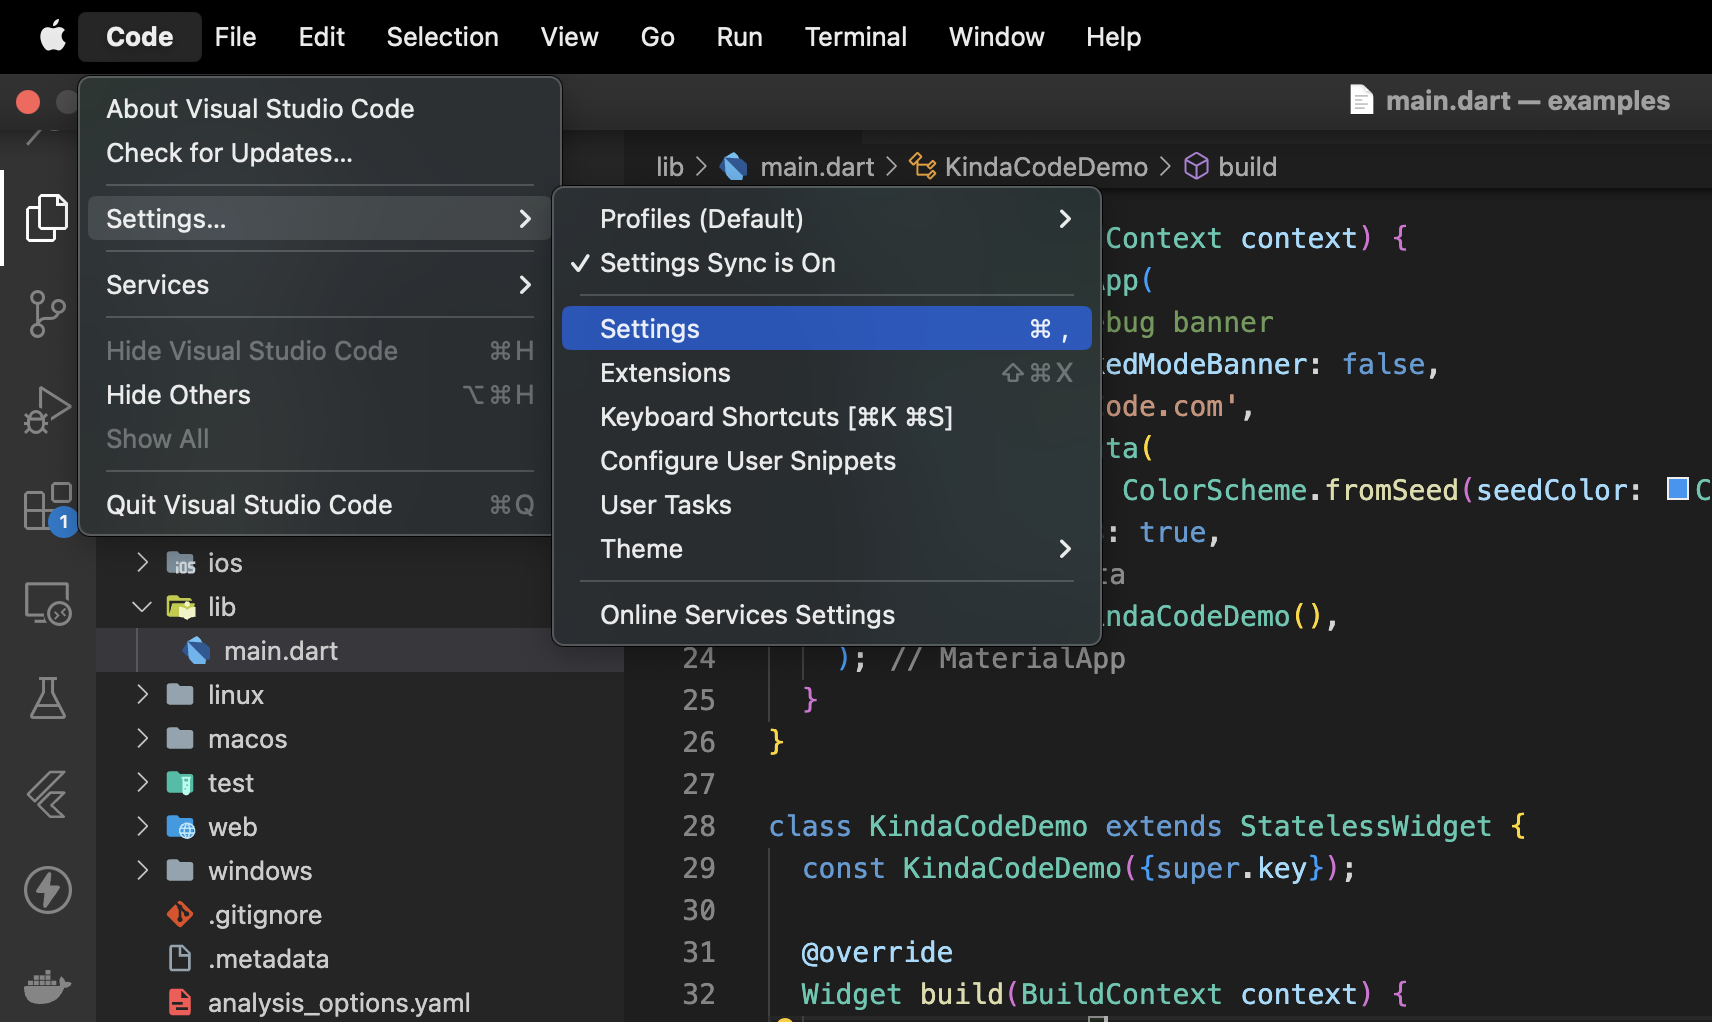
2. Select Text Editor > Font from the left-hand menu and head to the Font Size section (see the screenshot below for more clarity):
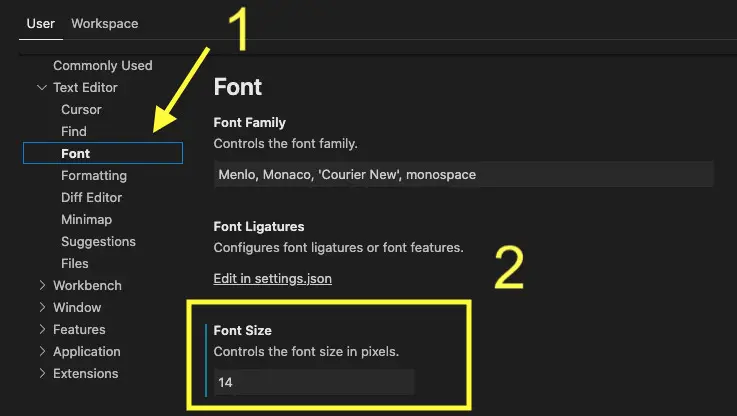
Enter your font size number into the box. Your change will automatically be saved and applied.
Note: This method doesn’t affect the UI text size.
Further reading:
- How to Change File Encoding in VS Code
- VS Code: 3 Ways to Change Terminal Font SIze
- VS Code: How To Change Indentation (2 spaces, 4 spaces)
- VS Code: How to Render Whitespace Characters
- VS Code: How to Compare Two Files (Find the Difference)
- VS Code: 3 Ways to Change Color of Comments
You can also check out our Visual Studio Code topic page for more tips and tricks to improve your producibility and coding experience.


