

This is a short guide on how to change the default text encoding in Xcode 13.x, Xcode 14.x, and later. Just follow the steps below.
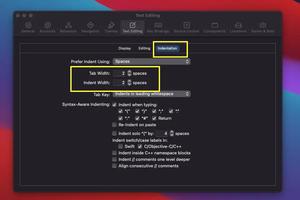
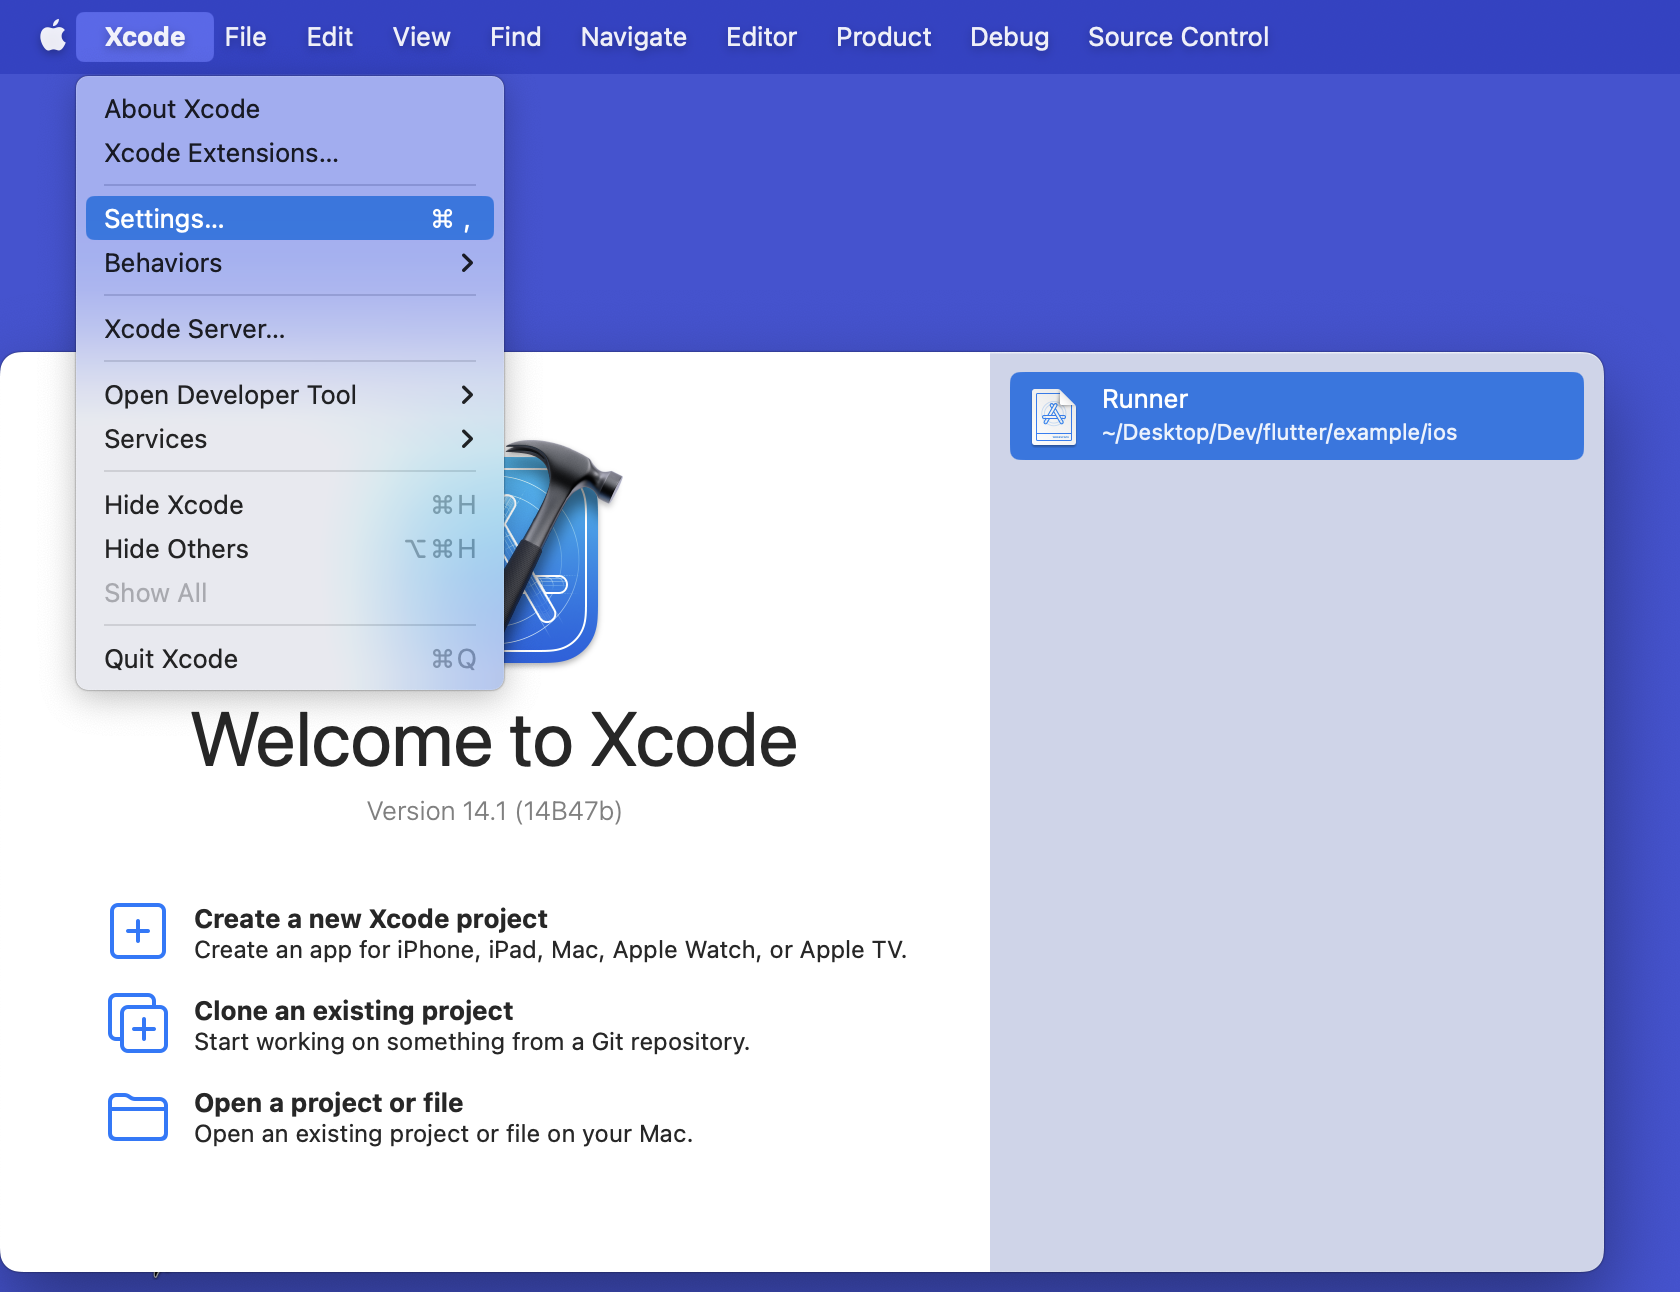
1. Start your Xcode and go to Xcode > Settings (or Preferences) from the top navigation.
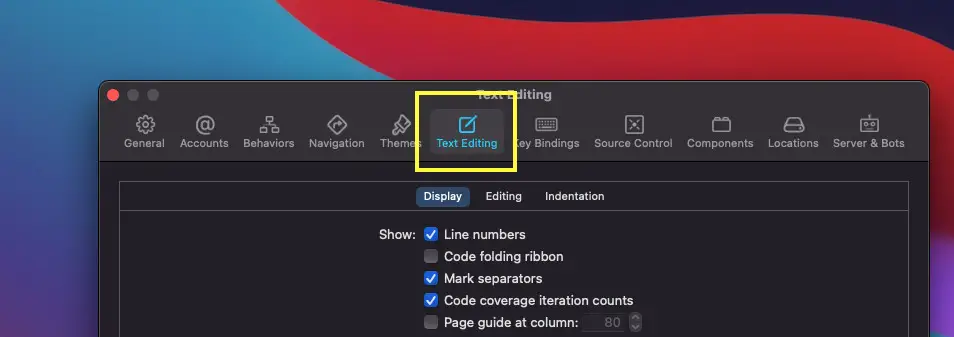
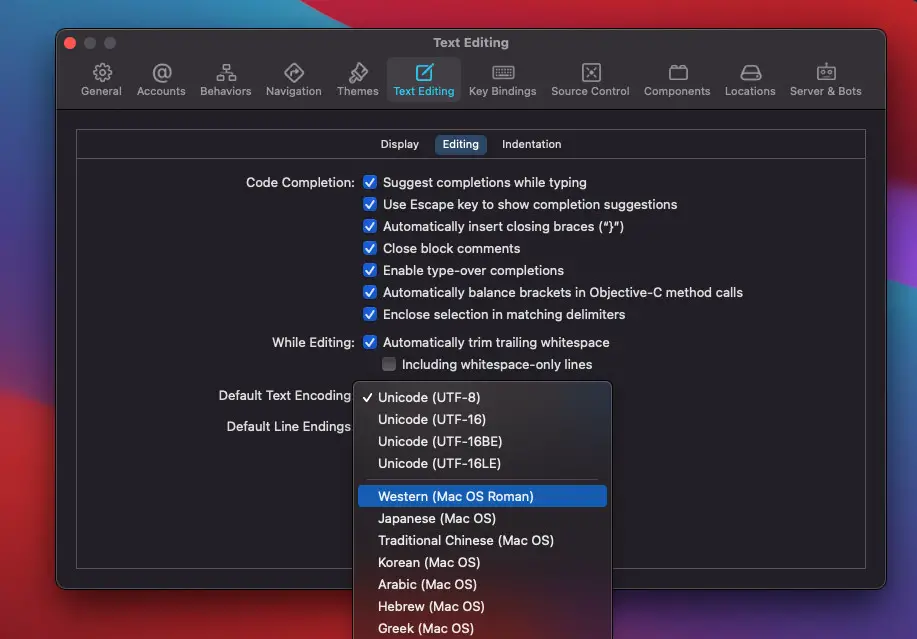
2. Select Text Editing from the menu.
3. Select the Editing tab the click on the select box labeled Default Text Encoding.
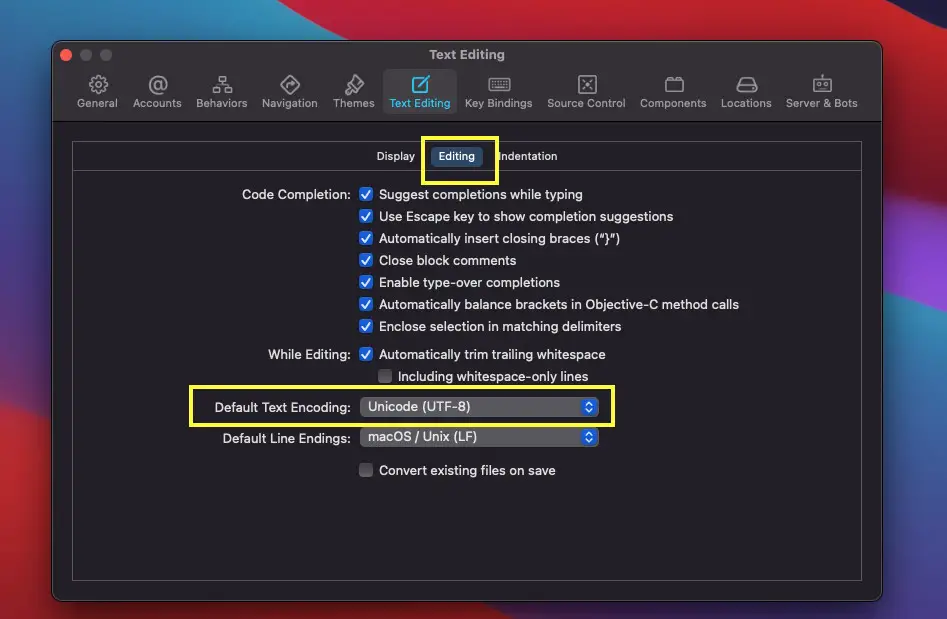
4. Select the encoding you want from the drop-down menu (UTF-8, UTF-16, Japanese, Korean, etc.).
Your changes will be automatically saved.
Further reading:
- How to Adjust Indents and Spacing in Xcode
- How to Download and Install an iOS Simulator in Xcode
- 2 ways to check your Xcode version
- How to use Legacy Build System in Xcode
- 2 Ways to Change Theme in Android Studio
I have made every effort to ensure that every piece of code in this article works properly, but I may have made some mistakes or omissions. If so, please send me an email at [email protected] or leave a comment to report errors.