If your goal with Flutter is just to build apps for Android and iOS, then you can disable web and desktop-related things. This makes your projects a little cleaner and lighter.

Solution
Web
In order to disable web in your future projects, execute this command:
flutter config --no-enable-webYou will see:
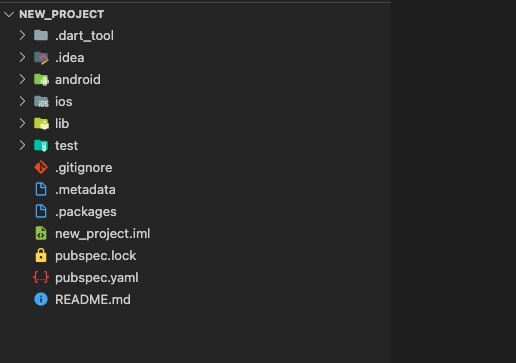
Setting "enable-web" value to "false".From now on, your NEW projects will not have a folder named “web”:
Desktop
To disable macOS, Windows, and Linux all at once, run:
flutter config --no-enable-macos-desktop --no-enable-windows-desktop --no-enable-linux-desktopOutput:
Setting "enable-linux-desktop" value to "false".
Setting "enable-macos-desktop" value to "false".
Setting "enable-windows-desktop" value to "false".
If you want to disable it separately for each operating system, try the following commands.
macOS:
flutter config --no-enable-macos-desktopWindows:
flutter config --no-enable-windows-desktopLinux:
flutter config --no-enable-linux-desktopYou can see more options and flags by running:
flutter configTo make sure everything works as expected, you should restart all of your open code editors (VS Code, Notepad, etc).
What if you want to enable Web and Desktop again?
If one day you want to make a web app with Flutter, you can enable it again by running:
flutter config --enable-webThe same goes for the desktop stuff:
flutter config --enable-macos-desktopflutter config --enable-windows-desktopflutter config --enable-linux-desktopConclusion
You’ve explored how to get rid of web and desktop stuff when creating a new Flutter project. Keep the ball rolling and continue learning more fascinating things by reading also:
- Flutter + Firebase Storage: Upload, Retrieve, and Delete files
- Flutter and Firestore Database: CRUD example
- Ways to Store Data Offline in Flutter
- Most Popular Packages for State Management in Flutter
- Flutter: Global, Unique, Value, Object, and PageStorage Keys
- How to Check if a Variable is Null in Flutter and Dart
You can also check out our Flutter topic page or Dart topic page for the latest tutorials and examples.


