This article shows you how to create a sortable list from the ground up in React. We’ll use modern React features like hooks and functional components. No third-party libraries are required.
Table of Contents
Sorting Technique
In the vast majority of cases, when we render a list, the data source will be an array of objects. What we need to do is to arrange these objects in ascending or descending order of a certain property. For example, you want to sort a list of products in order of price from low to high or high to low, sort users by age, sort employees in a company by salary, etc. Fortunately, in Javascript, we can conveniently get the job done by taking advantage of the Array.sort() method, like this:
// sort by price in ascending order
sortedProducts = products.sort((a, b) => a.price - b.price)
Or like this:
// sort by price in descending order
sortedProducts = products.sort((a, b) => b.price - a.price)
For more clarity, examine the complete example below.
The Example
Preview
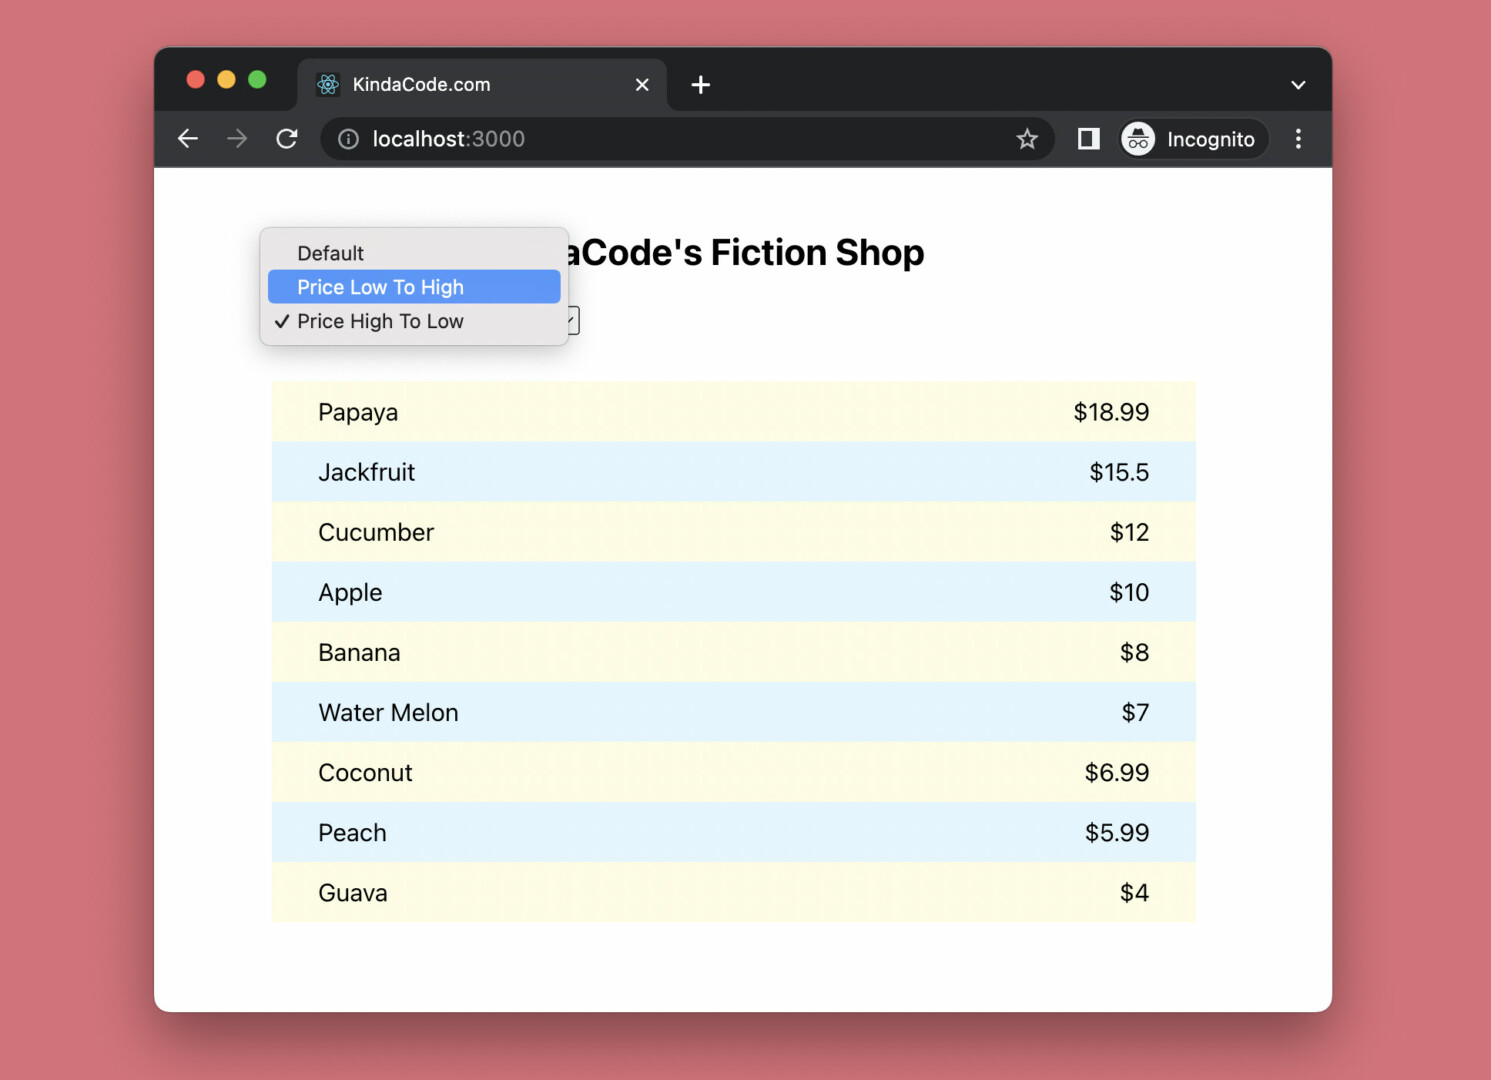
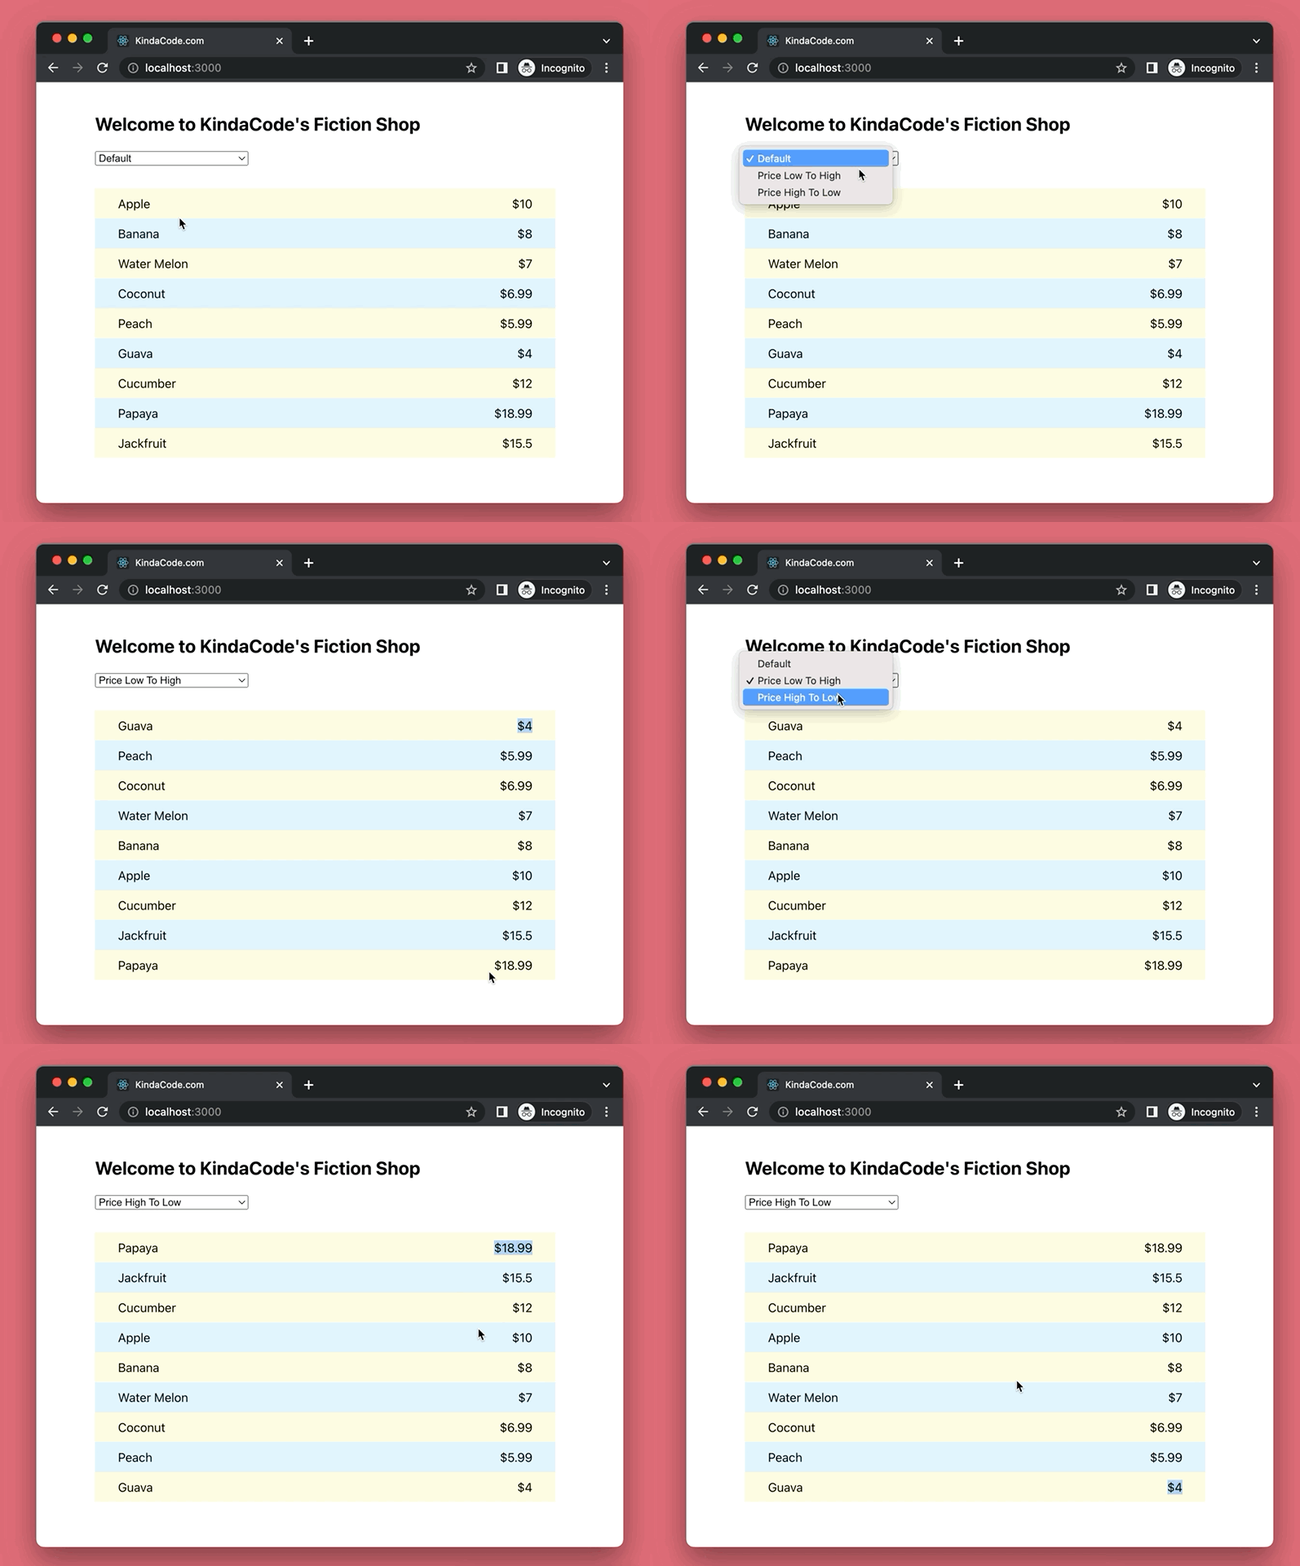
The app we’re going to build simulates a feature that major e-commerce platforms have, which is to sort products in ascending or descending order of price. Right above the list, there is a select element with 3 options:
- Default
- Price Low To High
- Price High To Low
Each time you change the selected option, the list will be rendered. Here’s how it works:
The Code
1. Initialize a new project:
npx create-react-app kindacode-exampleYou can choose whatever name you like. It doesn’t matter.
2. The full source code in src/App.js with explanations:
// KindaCode.com
// src/App.js
import { useState } from 'react';

// import CSS
import './App.css';

// dummy data
const products = [
  { id: 'p1', name: 'Apple', price: 10 },
  { id: 'p2', name: 'Banana', price: 8 },
  { id: 'p3', name: 'Water Melon', price: 7 },
  { id: 'p4', name: 'Coconut', price: 6.99 },
  { id: 'p5', name: 'Peach', price: 5.99 },
  { id: 'p6', name: 'Guava', price: 4 },
  { id: 'p7', name: 'Cucumber', price: 12 },
  { id: 'p8', name: 'Papaya', price: 18.99 },
  { id: 'p9', name: 'Jackfruit', price: 15.5 },
];

function App() {
  // sorted products list
  // in the beginning, the order id default
  const [sortedProducts, setSortedProducts] = useState(products);

  // the sorting function
  const sortHandler = (e) => {
    const sortType = e.target.value;

    // deep copy the products array
    const arr = [...products];

    // sort by price in ascending order
    if (sortType === 'asc') {
      setSortedProducts(arr.sort((a, b) => a.price - b.price));
    }

    // sort by price in descending order
    if (sortType === 'desc') {
      setSortedProducts(arr.sort((a, b) => b.price - a.price));
    }

    // restore the default order
    if (sortType === 'default') {
      setSortedProducts(arr);
    }
  };

  return (
    <div className='container'>
      <h2>Welcome to KindaCode's Fiction Shop</h2>

      {/* This select element is used to sort the list */}
      <select onChange={sortHandler} className="select">
        <option value='default'>Default</option>
        <option value='asc'>Price Low To High</option>
        <option value='desc'>Price High To Low</option>
      </select>

      {/* Render the product list */}
      <div className='list'>
        {sortedProducts.map((product) => (
          <div key={product.id} className='product'>
            <div>{product.name}</div>
            <div>${product.price}</div>
          </div>
        ))}
      </div>
    </div>
  );
}

export default App;
3. Don’t forget to replace all of the default code in your src/App.css with the following:
.container {
  width: 80%;
  margin: 40px auto;
}

.select {
    width: 200px;
}

/* Style the list */
.list {
  margin-top: 30px;
  width: 600px;
}

.product {
  display: flex;
  justify-content: space-between;
  padding: 10px 30px;
  font-size: 16px;
}

.product:nth-child(odd) {
  background: #fffce2;
}

.product:nth-child(even) {
  background: #e2f6ff;
}
4. Get the project up and running:
npm startAnd go to http://localhost:3000 to check the result.
Conclusion
We’ve gone through the steps to implement a simple reorderable list in React. The logic behind the scene stays the same in even complex and complicated situations. React is evolving over time, and as developers, we should keep constantly learning. To explore more new and interesting stuff about modern React, take a look at the following articles:
- React: 5+ Ways to Store Data Locally in Web Browsers
- React: How to Detect a Click Outside/Inside a Component
- Working with the useId() hook in React
- React Router: How to Highlight Active Link
- React Router: useParams & useSearchParams Hooks
- React + TypeScript: Multiple Dynamic Checkboxes
You can also check our React category page and React Native category page for the latest tutorials and examples.
