This tutorial is intended for developers who are new to React or looking to transition from using Javascript to TypeScript. We will build a simple app with functional components and hooks to demonstrate how to handle the onChange event of an input element.
Table of Contents
Project Preview
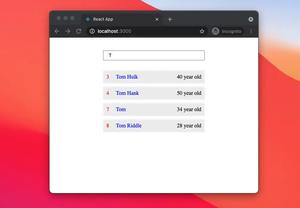
Let’s say we have a fiction store which sells some products like apples, bananas, books, tables. The job is to make an app so that customers can search for what they want to buy and see the pricing:
The Steps
1. Create a new React project with this command:
npx create-react-app my_fiction_store --template typescript2. Remove the entire default code in src/App.tsx and add the following:
// Kindacode.com
import React, { useState } from 'react';

import './App.css';

// Create an interface for product item
interface Item {
  id: number;
  name: string;
  price: number;
}

// This list holds some products of a fiction store
const PRODUCTS: Item[] = [
  {
    id: 1,
    name: 'Apple',
    price: 1,
  },
  {
    id: 2,
    name: 'Book',
    price: 5,
  },
  {
    id: 3,
    name: 'Banana',
    price: 0.5,
  },
  {
    id: 4,
    name: 'Table',
    price: 200,
  },
];

const App = (): JSX.Element => {
  const [query, setQuery] = useState('');
  const [result, setResult] = useState<Item[] | undefined>();

  // This function is called when the input changes
  const inputHandler = (event: React.ChangeEvent<HTMLInputElement>) => {
    const enteredName = event.target.value;
    setQuery(enteredName);
  };

  // This function is triggered when the Search buttion is clicked
  const search = () => {
    const foundItems = PRODUCTS.filter((item) =>
      item.name.toLowerCase().includes(query.toLowerCase())
    );
    setResult(foundItems);
  };

  return (
    <div className="container">
      <div className="wrapper">
        <input
          value={query}
          onChange={inputHandler}
          placeholder="Search products"
          className="input"
        />

        <button onClick={search}>Search</button>
      </div>

      {/* Display search result */}
      <div className="search-result">
        {result && result.length > 0 ? (
          result.map((item) => (
            <li key={item.id} className="item">
              <span className="item-id">{item.id}</span>
              <span className="item-name">{item.name}</span>
              <span className="item-price">{item.price}$</span>
            </li>
          ))
        ) : (
          <h2>No items found!</h2>
        )}
      </div>
    </div>
  );
};

export default App;
3. Replace the unwanted code in your src/App.css with the following:
.container {
  padding-top: 30px;
  width: 400px;
  margin: auto;
}

.wrapper {
  display: flex;
}

.input {
  padding: 5px 15px;
  width: 300px;
}

.search-result {
  margin-top: 30px;
}

.item {
  list-style: none;
  margin: 10px 0;
  padding: 10px;
  background: #acfacd;
  display: flex;
  justify-content: space-between;
}

.item-id {
  color: red;
  margin-right: 20px;
}

.item-name {
  color: blue;
}

.item-price {
  margin-left: auto;
}
4. Run the project with the command below then open your web browser and navigate to http://localhost:3000:
npm startConclusion
You’ve used a common event type (React.ChangeEvent<HTMLInputElement>) and made a simple web app with React and TypeScript. Continue learning more interesting stuff by taking a look at the following articles:
- React: “I agree to terms” checkbox example
- Top 4 React form validation libraries
- React useReducer hook – Tutorial and Examples
- React + TypeScript: Multiple Dynamic Checkboxes
- React + TypeScript: Working with Props and Types of Props
- React: Using inline styles with the calc() function
You can also check our React topic page and React Native topic page for the latest tutorials and examples.
