This short and straightforward article shows you how to use the CSS calc() function when using inline styles in React.
Table of Contents
Overview
The calc() function calculates the value for a property (addition, subtraction, multiplication, and division operations):
calc(expression)If your expression doesn’t contain any variable, you can wrap it with a pair of single quotes or double quotes:
<div style={{width: 'calc(100% - 99px)'}}></div>On the other hand, if your expression involves variables, you can use a template literal (template string) with backtick (`) characters, like so:
<div style={{width: `calc(100% / ${columns.length})`}}></div> To get a better understanding and more clarity, see the complete example below.
Full Example
The Demo
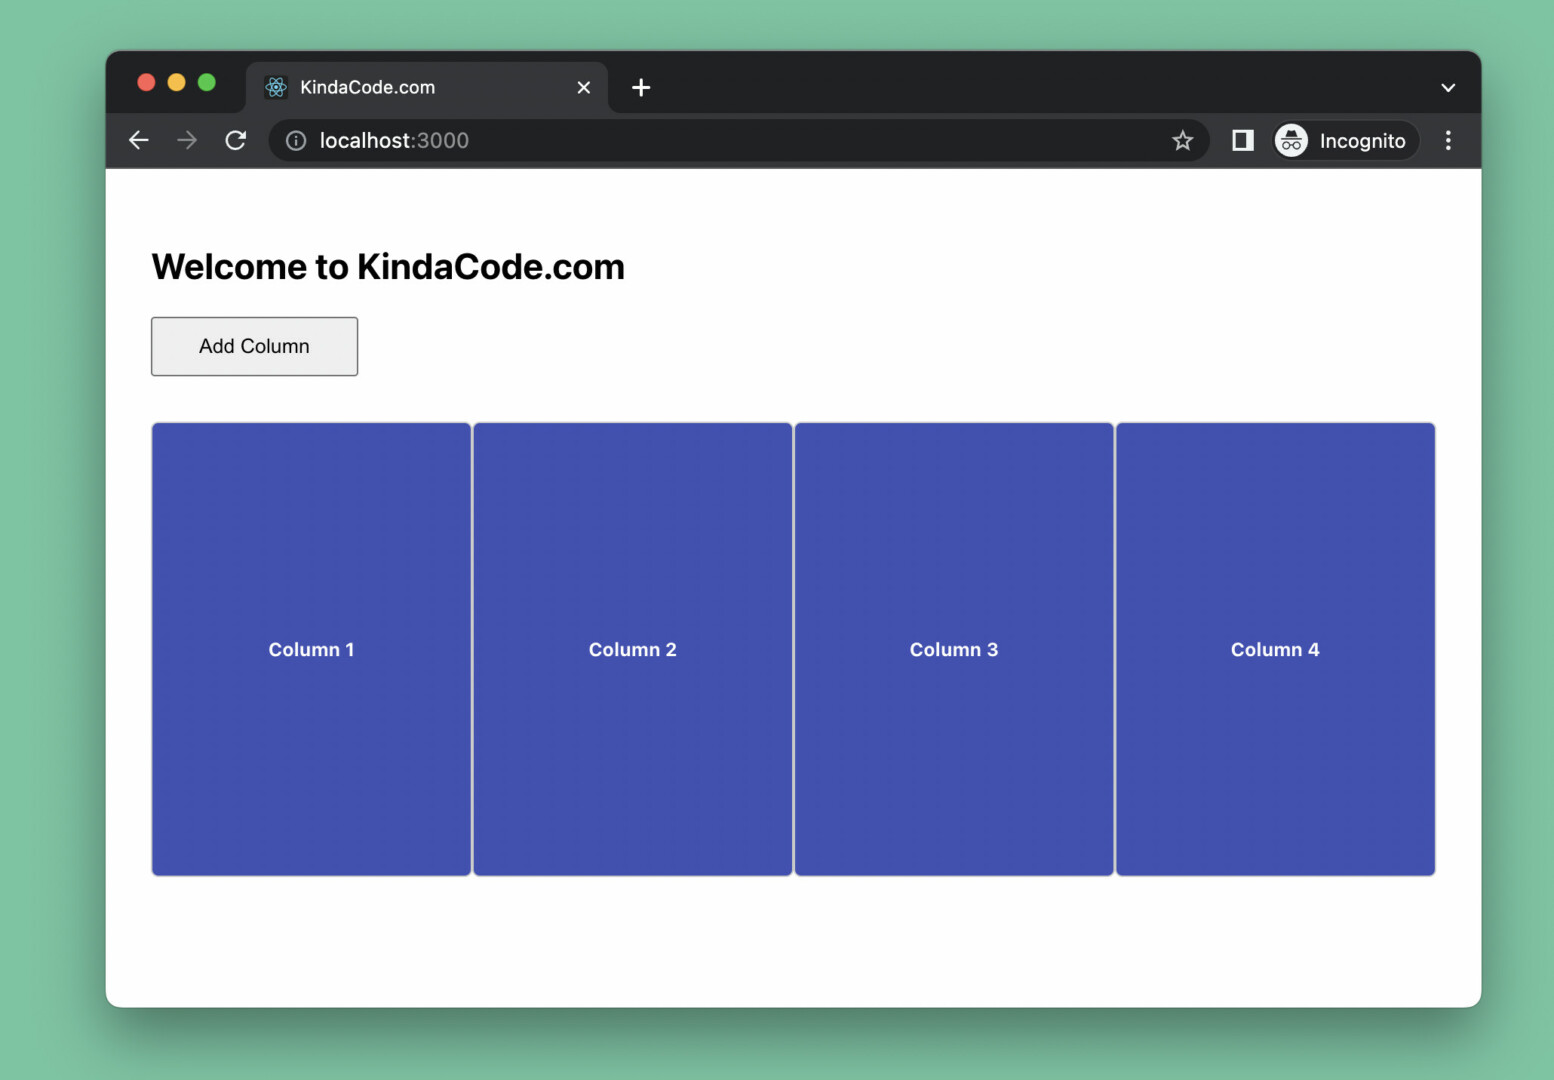
The small app we’re going to work with presents a button and a layout that is constituted by a row of columns. When the button is pressed, a new column will be added. The widths of the columns are evenly divided (with the help of the calc() function). Besides, the font size of the text in the columns also decreases as the number of columns increases.
Here’s how it works:

The Code
1. Create a new React project (to make sure we have the same starting point):
npx create-react-app kindacode-calc-exampleThe name doesn’t matter.
2. Remove all of the unwanted code in your src/App.js with the following:
// KindaCode.com
// src/App.js
import { useState } from 'react';

function App() {
  // This state holds the columns of the layout
  const [columns, setColumns] = useState([{ id: 1, name: 'Column 1' }]);

  // Add a new column
  // This function is called when the user clicks the "Add Column" button
  const addColumn = () => {
    const newColumns = [...columns];
    newColumns.push({
      id: newColumns.length + 1,
      name: `Column ${newColumns.length + 1}`,
    });
    setColumns(newColumns);
  };

  return (
    <div style={{ padding: 30 }}>
      <h2>Welcome to KindaCode.com</h2>
      {/* This button is used to add new columns */}
      <button onClick={addColumn} style={{ padding: '10px 30px' }}>
        Add Column
      </button>

      <div
        style={{
          display: 'flex',
          justifyContent: 'space-between',
          marginTop: 30,
        }}
      >

        {/* Render the columns */}
        {columns.map((column) => (
          <div
            key={column.id}
            style={{
              // Divide the width equally
              width: `calc(100% / ${columns.length})`,
              height: 300,
              display: 'flex',
              justifyContent: 'center',
              alignItems: 'center',
              background: '#3f51b5',
              // The more columns, the smaller the font size
              fontSize: `calc(60px / ${columns.length})`,
              color: '#fff',
              border: '1px solid #ccc',
              borderRadius: 5,
            }}
          >
            <h5>{column.name}</h5>
          </div>
        ))}
      </div>
    </div>
  );
}

export default App;
3. Launch the app:
npm startGo to http://localhost:3000 with your favorite web browser and see the result.
Afterword
This article covered the fundamentals of using the calc() function in inline styles in JSX. You also made a tiny but meaningful app that makes use of calc() to set elements’ widths and text font sizes dynamically. By creatively applying this knowledge, you can build amazing user interfaces.
If you’d like to explore more new and fascinating stuff about the vast world of React, consider taking a look at the following articles:
- How to Use Styled JSX in React: A Deep Dive
- How to Use Tailwind CSS in React
- How to Use Bootstrap 5 and Bootstrap Icons in React
- Using Range Sliders in React: Tutorial & Example
- React + TypeScript: Password Strength Checker example
- React + TypeScript: onMouseOver & onMouseOut events
You can also check our React category page and React Native category page for the latest tutorials and examples.
