


This concise article walks you through a couple of examples of creating horizontal lines with text in the middle. We’ll use the latest version of Tailwind CSS to style things.
Example 1: Using Divs with a Height of 1px
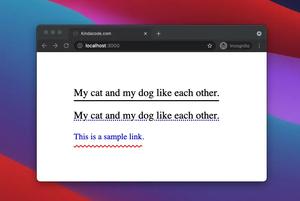
In this example, we put the text between two <div> elements with a height of 1px. We also give these <div> elements a gray background color (you can choose whatever color you like).
Screenshot:

The code:
<body class="p-40 bg-amber-100">
    <div class="flex items-center py-4">
        <!-- The left line -->
        <div class="flex-grow h-px bg-gray-400"></div>

        <!-- Your text here -->
        <span class="flex-shrink text-2xl text-gray-500 px-4 italic font-light">Welcome to KindaCode.com</span>

        <!-- The right line -->
        <div class="flex-grow h-px bg-gray-400"></div>
    </div>
</body>
Example 2: Using <fieldset> and <legend> tags
This example creates a horizontal divider line with a title in the center by using the <fieldset> and <legend> HTML tags.
Screenshot:

The code:
<body class="p-40 bg-purple-700">
    <fieldset class="border-t border-slate-300">
        <legend class="mx-auto px-4 text-white text-2xl italic">Your Title Here</legend>
        <div class="text-white pt-4">Some content here</div>
    </fieldset>
</body>
That’s it. Further reading:
- How to Create a Modal Dialog with Tailwind CSS
- Tailwind CSS: Custom Checkboxes and Radio Buttons
- :fisrt-child and :last-child in Tailwind CSS
- Form Validation with Tailwind CSS (without Javascript)
- Tailwind CSS: How to use calc() function
- Tailwind CSS: How to Create a Sticky/Affix NavBar
You can also check out our CSS category page for the latest tutorials and examples.