This concise and straight-to-the-point article shows you how to use radio buttons in React. We’ll have a look at the fundamentals and then walk through a complete example of applying that knowledge in practice.
Note: We’ll write code with modern features of React including hooks and functional components. Old-fashioned stuff like class-based components, render(), this.state, etc, won’t appear.
Table of Contents
Overview
In HTML and React, radio buttons let the user select only one thing from a given list of choices. In general, a collection of radio buttons describing a set of related options will go together in a group with the same name:
<input type="radio" name="age" value="0-17" />
<input type="radio" name="age" value="18-24" />
Like other input elements, a radio button has an onChange event that occurs when it has been checked or unchecked:
<input
     type="radio"
     name="age" value="0-17"
     onChange={(e) => {
         console.log(e.target.value);
     }}
/>
If you got confused, see the complete example below.
Example
App Preview
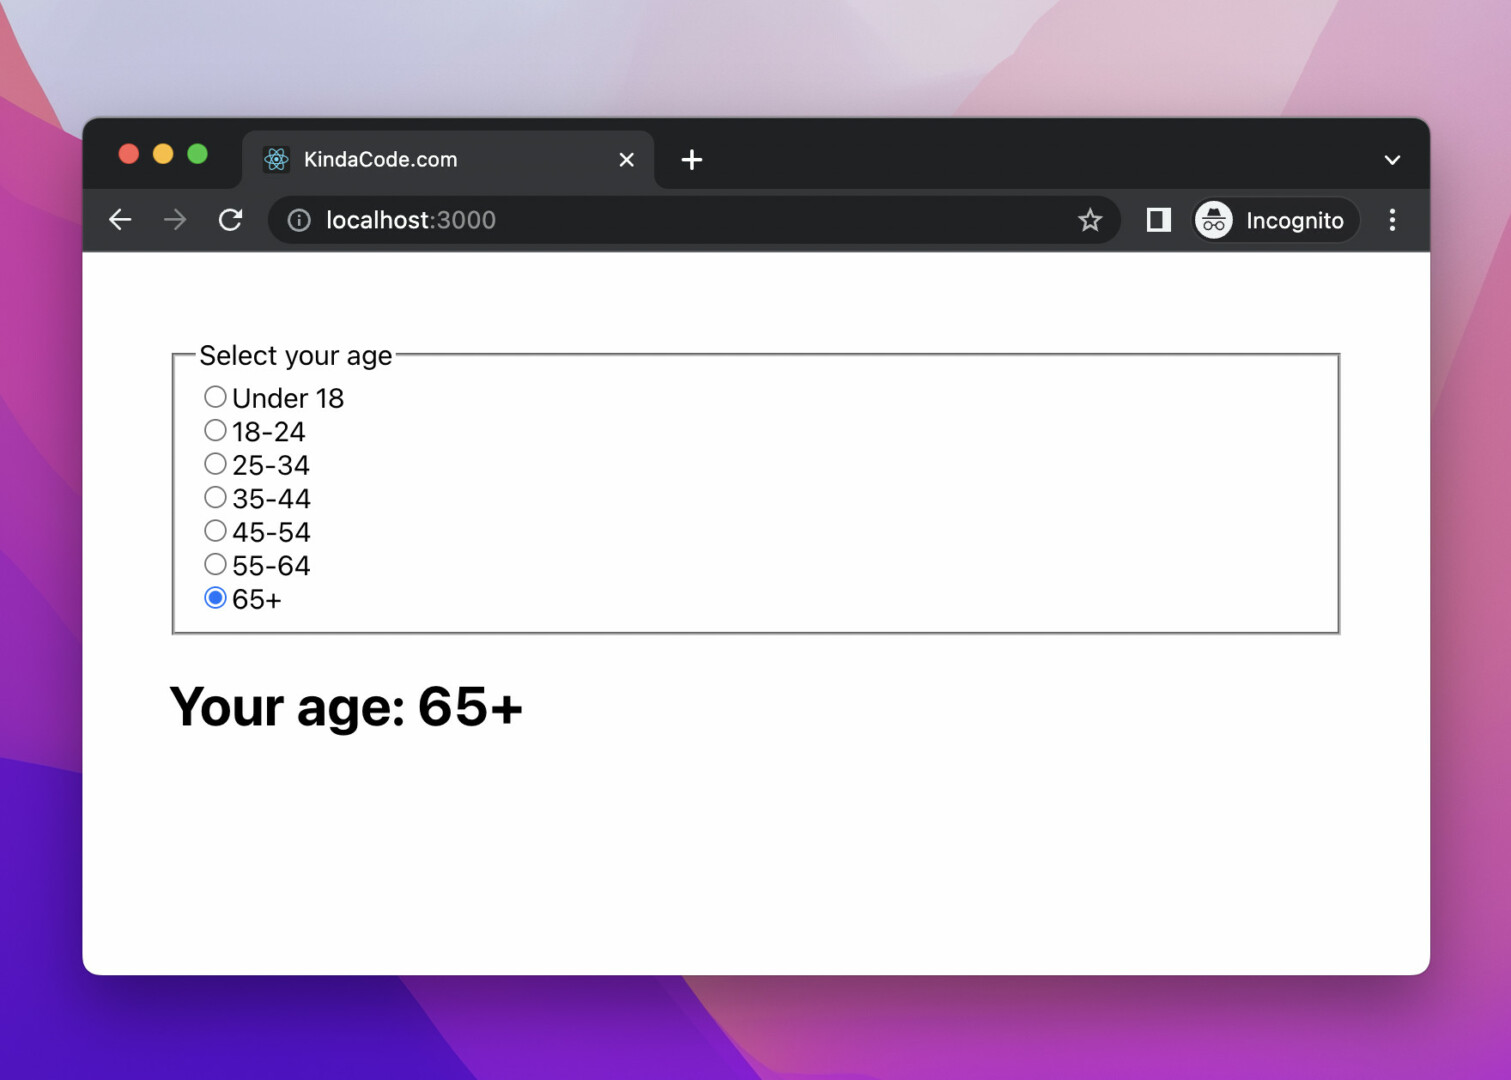
The tiny project we’re going to build has a radio group that let a user select their age range. When one radio button is checked, the result will be displayed on the screen immediately. Here’s the demo:
Note: If you’re using Safari, this demo video might not work nicely or not start at all. Please use Chrome, Edge, Firefox, or another web browser instead.
The Code
1. Create a new React project:
npx create-react-app kindacode-example2. Remove all the unwanted code in src/App.js then add the following:
// KindaCode.com
// src/App.js
import { useState } from 'react'

function App() {
  const [age, setAge] = useState();

  // this function will be called when a radio button is checked
  const handleChange = (e) => {
    setAge(e.target.value);
  }

  return (
    <div style={{ padding: 50 }}>
      <form>
        <fieldset>
          <legend>Select your age</legend>

          <input
            type="radio"
            name="age"
            id='age-range-1'
            value="0-17"
            onChange={handleChange}
            checked={age === '0-17'} />
          <label htmlFor="age-range-1">Under 18</label><br />

          <input
            type="radio"
            name="age"
            id='age-range-2'
            value="18-24"
            onChange={handleChange}
            checked={age === '18-24'} />
          <label htmlFor="age-range-2">18-24</label><br />

          <input
            type="radio"
            name="age"
            id='age-range-3'
            value="25-34"
            onChange={handleChange}
            checked={age === '25-34'} />
          <label htmlFor="age-range-3">25-34</label><br />

          <input
            type="radio"
            name="age"
            id='age-range-4'
            value="35-44"
            onChange={handleChange}
            checked={age === '35-44'} />
          <label htmlFor="age-range-4">35-44</label><br />

          <input
            type="radio"
            name="age"
            id='age-range-5'
            value="45-54"
            onChange={handleChange}
            checked={age === '45-54'} />
          <label htmlFor="age-range-5">45-54</label><br />

          <input
            type="radio"
            name="age"
            id='age-range-6'
            value="55-64"
            onChange={handleChange}
            checked={age === '55-64'} />
          <label htmlFor="age-range-6">55-64</label><br />

          <input
            type="radio"
            name="age"
            id='age-range-7'
            value="65+"
            onChange={handleChange}
            checked={age === '65+'} />
          <label htmlFor="age-range-7">65+</label><br />
        </fieldset>
      </form>
      <h1>{age === undefined ? 'Please select your age' : `Your age: ${age}`}</h1>
    </div>
  );
}

export default App;
3. Run it:
npm startThen head to http://localhost:3000 to test your work.
Conclusion
You’ve learned how to use radio buttons in React. If you want to write code in TypeScript instead of Javascript, see this article: React + TypeScript: Working with Radio Button Groups.
Keep the ball rolling and continue moving forward by taking a look at the following articles:
- React: Check if user device is in dark mode/light mode
- How to Use Styled JSX in React: A Deep Dive
- React: 2 Ways to Open an External Link in New Tab
- React Router: Redirecting with the Navigate component
- React Router: How to Highlight Active Link
You can also check our React category page and React Native category page for the latest tutorials and examples.
