This article is about the Stepper widget in Flutter.
Table of Contents
A Brief Overview
A stepper presents the progress through a sequence of logical and numbered steps. Some of the common stepper use cases are:
- A user makes a purchase and needs to provide some information such as name, email, phone number, and payment.
- The new account registration process includes steps such as providing a phone number, confirming the phone number using OTP, and asking the user to agree to the terms of use.
- The process of unregistering a service with steps like asking why, confirming that the user is sure, etc.
- An app or a game that requires the user to complete a number of tasks during the day in order to receive a reward.
A stepper can also be used for navigation.
Constructor:
Stepper({
  Key? key,
  required List<Step> steps,
  ScrollPhysics? physics,
  StepperType type = StepperType.vertical,
  int currentStep = 0,
  ValueChanged<int>? onStepTapped,
  VoidCallback? onStepContinue,
  VoidCallback? onStepCancel,
  ControlsWidgetBuilder? controlsBuilder,
  double? elevation,
  EdgeInsetsGeometry? margin
})
As you can see, besides the typical key property, this widget can take a few arguments. Let’s explore these arguments:
- steps: A list of Step widgets. Each Step can have a title, subtitle, and icon.
- physics: Determines the physics of the Stepper widget
- type: StepperType.vertical or StepperType.horizontal
- currentStep: The index of the step whose content is exposed
- onStepContinue, onStepCancal: The callback functions that will be called when the Continue and Cancel buttons are pressed, respectively
- controlsBuilder: Creates custom controls
- elevation: The elevation
- margin: The margin on the vertical stepper
Now it’s time to write some code.
The Example
App Preview
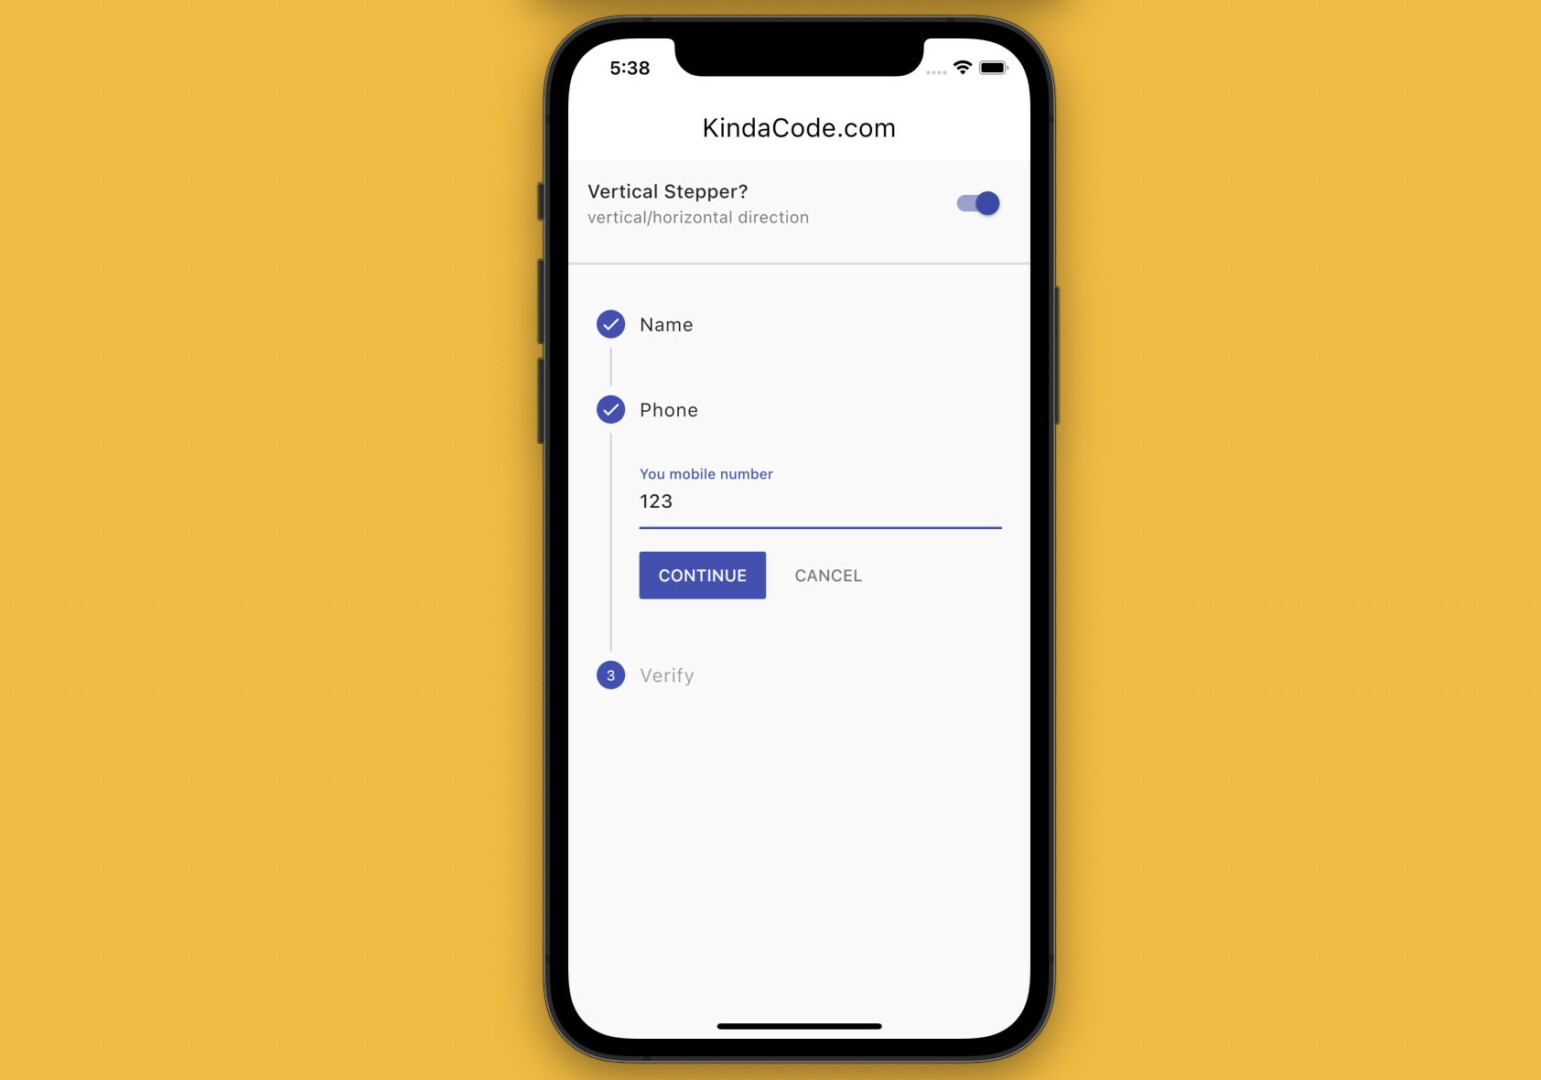
The app we are going to build contains a switch and a stepper. The switch is used to control the orientation of the stepper (vertical, or horizontal). The stepper displays the progress of 3 steps:
- Ask the user to enter a name
- Ask about the user’s phone number
- Verify the phone number
When the user hits a Continue button, the next step will be expanded. When a Cancel button is hit, the previous step will be shown. Here’s how it works:
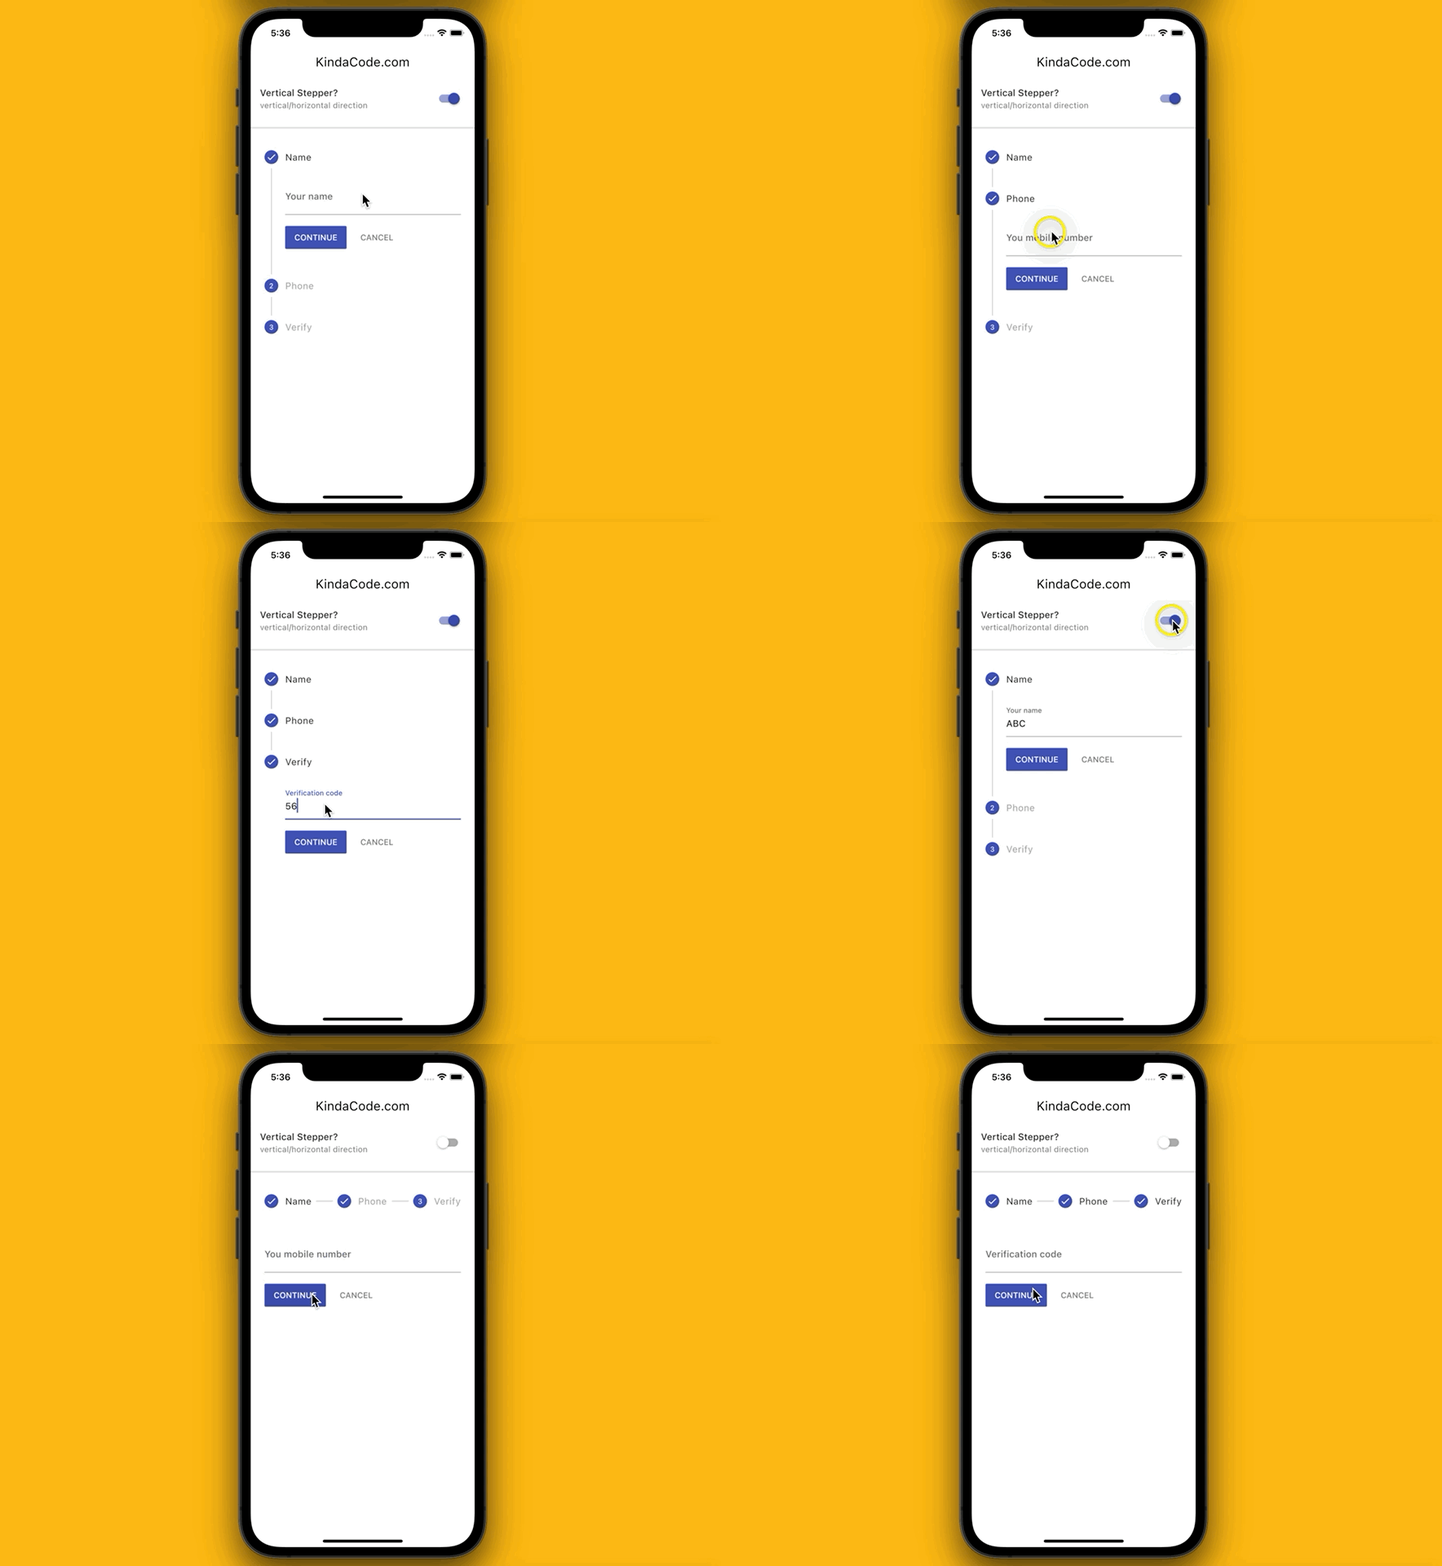
Note that this example only focuses on the Stepper widget and the UI. It doesn’t implement form validation (you can leave the text fields empty and press the buttons and the steppers will still work as normal).
The Code
The complete source code in main.dart with detailed explanations:
// main.dart
import 'package:flutter/material.dart';

void main() {
  runApp(const MyApp());
}

class MyApp extends StatelessWidget {
  const MyApp({Key? key}) : super(key: key);

  @override
  Widget build(BuildContext context) {
    return MaterialApp(
      // hide the debug banner
      debugShowCheckedModeBanner: false,
      title: 'KindaCode.com',
      theme: ThemeData(
        useMaterial3: true,
        primarySwatch: Colors.indigo,
      ),
      home: const HomeScreen(),
    );
  }
}

class HomeScreen extends StatefulWidget {
  const HomeScreen({Key? key}) : super(key: key);

  @override
  State<HomeScreen> createState() => _HomeScreenState();
}

class _HomeScreenState extends State<HomeScreen> {
  // the current step
  int _currentStep = 0;

  // Determines whether the stepper's orientation is vertical or horizontal
  // This variable can be changed by using the switch below
  bool _isVerticalStepper = true;

  // This function will be triggered when a step is tapped
  _stepTapped(int step) {
    setState(() => _currentStep = step);
  }

  // This function will be called when the continue button is tapped
  _stepContinue() {
    _currentStep < 2 ? setState(() => _currentStep += 1) : null;
  }

  // This function will be called when the cancel button is tapped
  _stepCancel() {
    _currentStep > 0 ? setState(() => _currentStep -= 1) : null;
  }

  @override
  Widget build(BuildContext context) {
    return Scaffold(
      appBar: AppBar(
        title: const Text('KindaCode.com'),
      ),
      body: Column(
        children: [
          // Controls the stepper orientation
          SwitchListTile(
              title: const Text('Vertical Stepper?'),
              subtitle: const Text('vertical/horizontal direction'),
              value: _isVerticalStepper,
              onChanged: (_) {
                setState(() {
                  _isVerticalStepper = !_isVerticalStepper;
                });
              }),
          const Divider(
            thickness: 2,
            height: 30,
          ),

          Expanded(
            // the Stepper widget
            child: Stepper(
              // vertical or horizontial
              type: _isVerticalStepper
                  ? StepperType.vertical
                  : StepperType.horizontal,
              physics: const ScrollPhysics(),
              currentStep: _currentStep,
              onStepTapped: (step) => _stepTapped(step),
              onStepContinue: _stepContinue,
              onStepCancel: _stepCancel,
              steps: [
                // The first step: Name
                Step(
                  title: const Text('Name'),
                  content: Column(
                    children: [
                      TextFormField(
                        decoration:
                            const InputDecoration(labelText: 'Your name'),
                      ),
                    ],
                  ),
                  isActive: _currentStep >= 0,
                  state: _currentStep >= 0
                      ? StepState.complete
                      : StepState.disabled,
                ),
                // The second step: Phone number
                Step(
                  title: const Text('Phone'),
                  content: Column(
                    children: [
                      TextFormField(
                        decoration: const InputDecoration(
                            labelText: 'You mobile number'),
                      ),
                    ],
                  ),
                  isActive: _currentStep >= 0,
                  state: _currentStep >= 1
                      ? StepState.complete
                      : StepState.disabled,
                ),
                // The third step: Verify phone number
                Step(
                  title: const Text('Verify'),
                  content: Column(
                    children: <Widget>[
                      TextFormField(
                        decoration: const InputDecoration(
                            labelText: 'Verification code'),
                      ),
                    ],
                  ),
                  isActive: _currentStep >= 0,
                  state: _currentStep >= 2
                      ? StepState.complete
                      : StepState.disabled,
                ),
              ],
            ),
          ),
        ],
      ),
    );
  }
}
Conclusion
You’ve learned about the Stepper widget in Flutter. This is very useful in many scenarios where the user needs to complete a sequence of steps or archive some milestones. By using this widget, you can create intuitive and modern UIs without using any third-party plugins.
If you’d like to explore more handy widgets and awesome features of Flutter, take a look at the following articles:
- Using BlockSemantics in Flutter: Tutorial & Example
- Using Provider for State Management in Flutter
- Flutter: Creating OTP/PIN Input Fields (2 approaches)
- Flutter: Making Beautiful Chat Bubbles (2 Approaches)
- Flutter: Adding a Gradient Border to a Container (2 Examples)
- Flutter: Firing multiple Futures at the same time with FutureGroup
You can also take a tour around our Flutter topic page and Dart topic page to see the latest tutorials and examples.


