This article walks you through 2 different ways to change your Android Studio theme. The first approach is to choose a theme from the built-in themes and the second one is to install a new theme made by the community as a plugin. Without any further ado, let’s get started.
Using a built-in theme
1. Open your Android Studio and go to:
- File -> Settings-> Appearance & behavior -> Appearance if you’re using Windows.
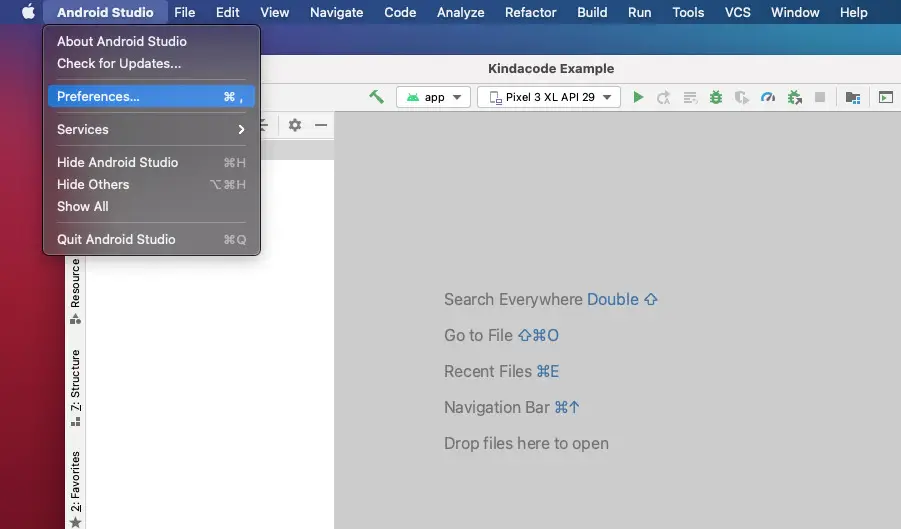
- Android Studio > Preferences > Appearance & behavior -> Appearance if you’re on a Mac.
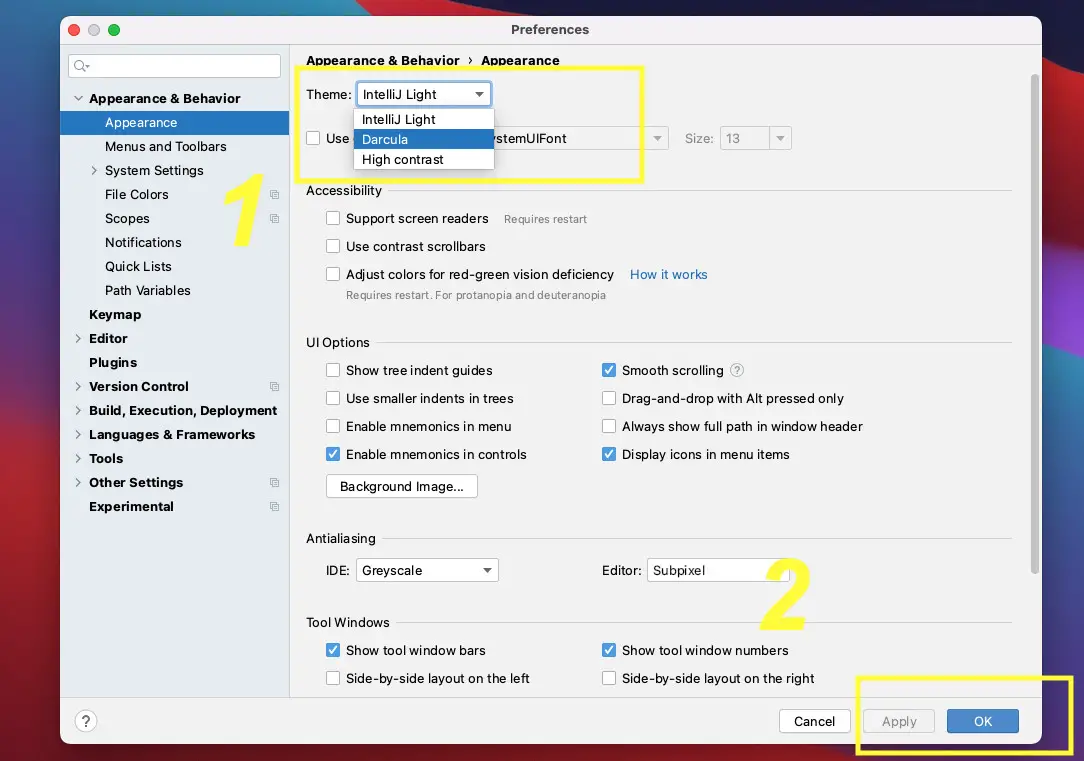
2. Click on the dropdown labeled Theme and select the theme you like from the list. After that, click on the Apply or OK button to apply your setting.
Here’s what the Darcula theme looks like:
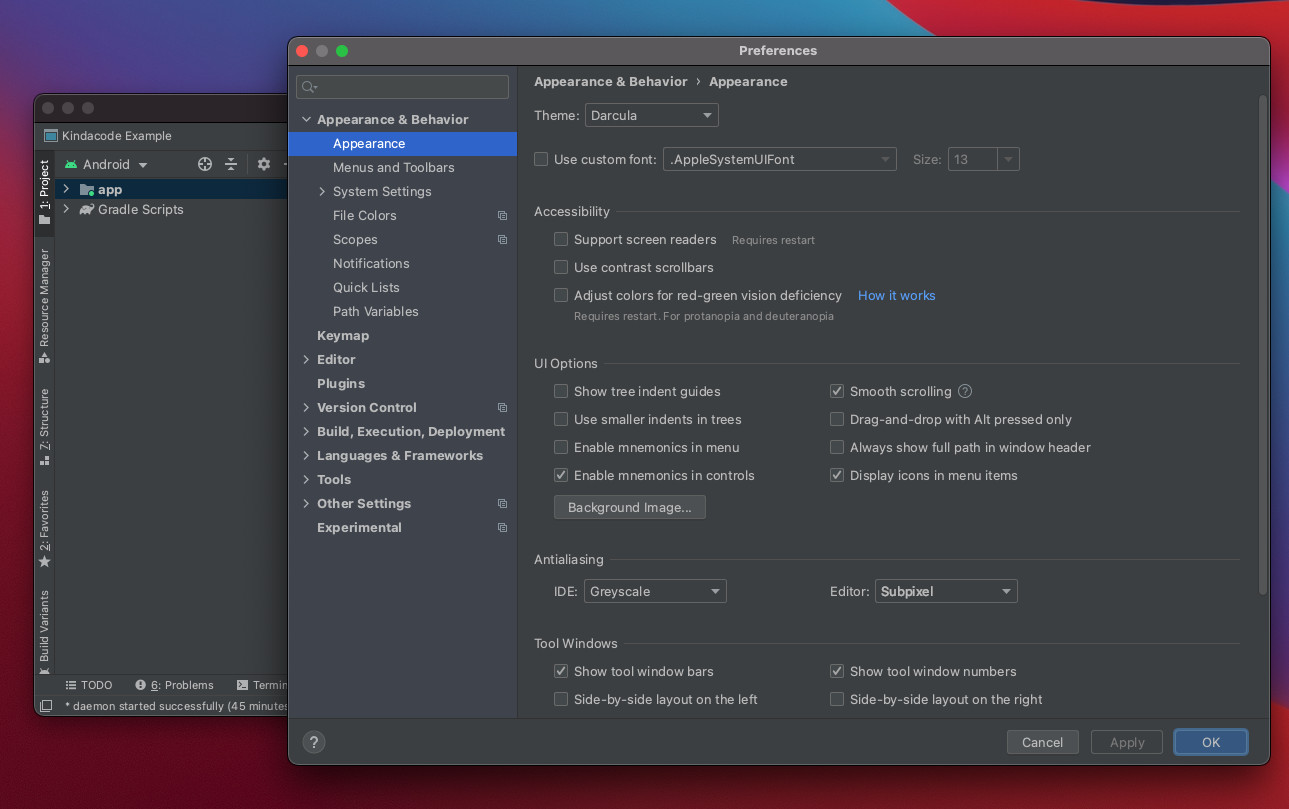
The number of official themes is very limited. Currently, there are only 3: IntelliJ Light, Darcula, and High Contrast. If none of them can make you happy, let’s move on to the next section.
Using a third-party theme
1. Go to:
- File -> Settings-> Plugins if you’re using Windows.
- Android Studio > Preferences > Plugins if you’re on a Mac.
2. Type Theme into the search field to search. A list of so many themes will appear. Click on the Install button next to the theme you like to install it.
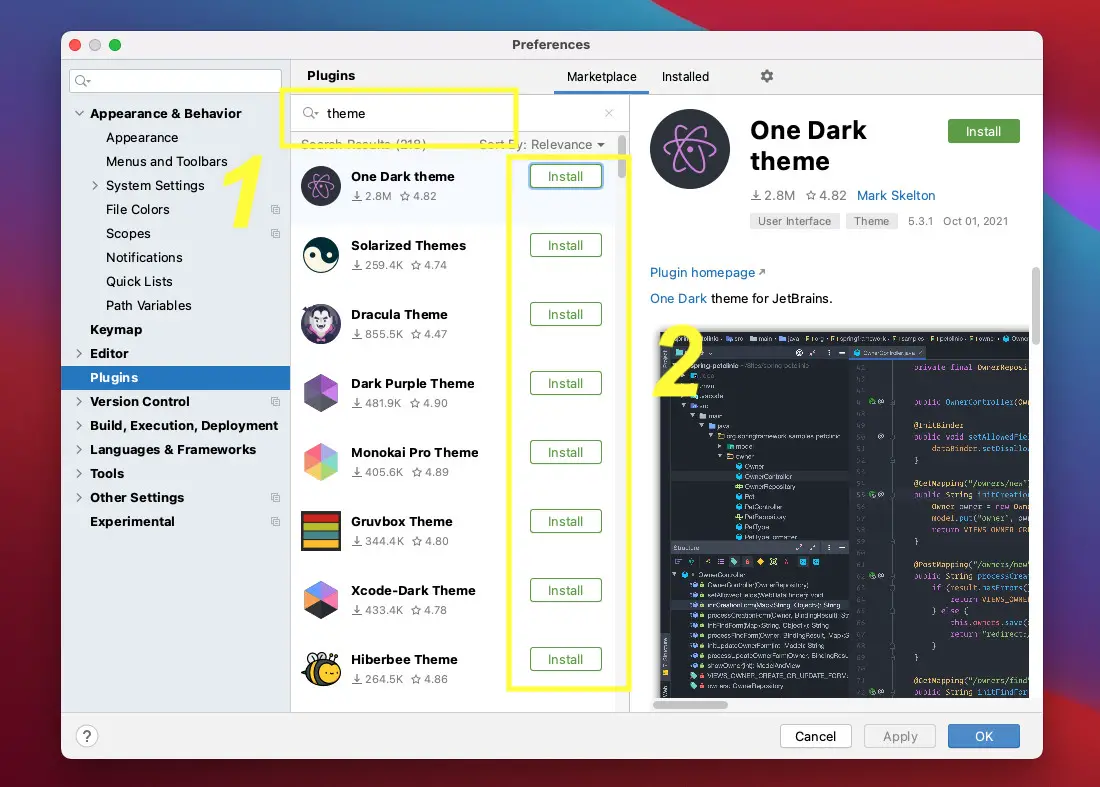
3. A confirmation dialog will show up. Select Accept to continue.
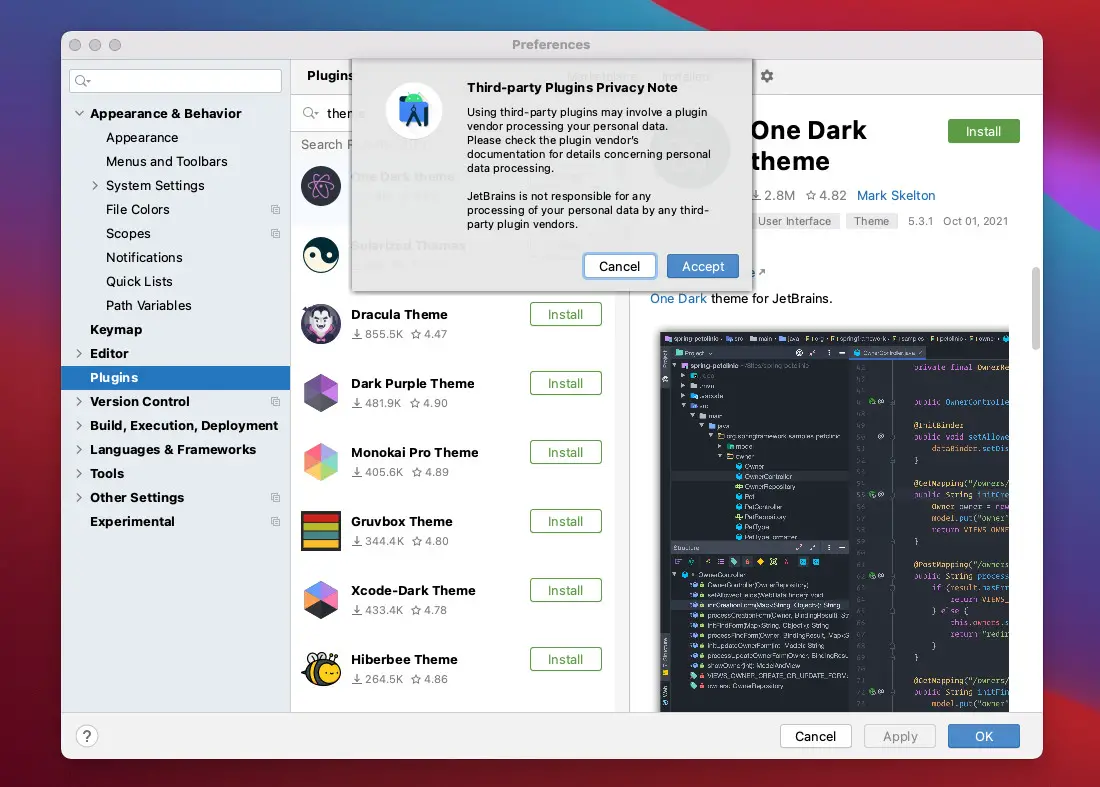
4. Last but not least, after the installation process is complete, you need to click on the Apply button or the OK button in the bottom right corner to activate the theme you recently added.
Removing a third-party theme
If you want to disable/uninstall a third-party theme, just go to the Installed tab, and click on the Disable/Uninstall button associated with that theme. See the screenshot below for more clarity:
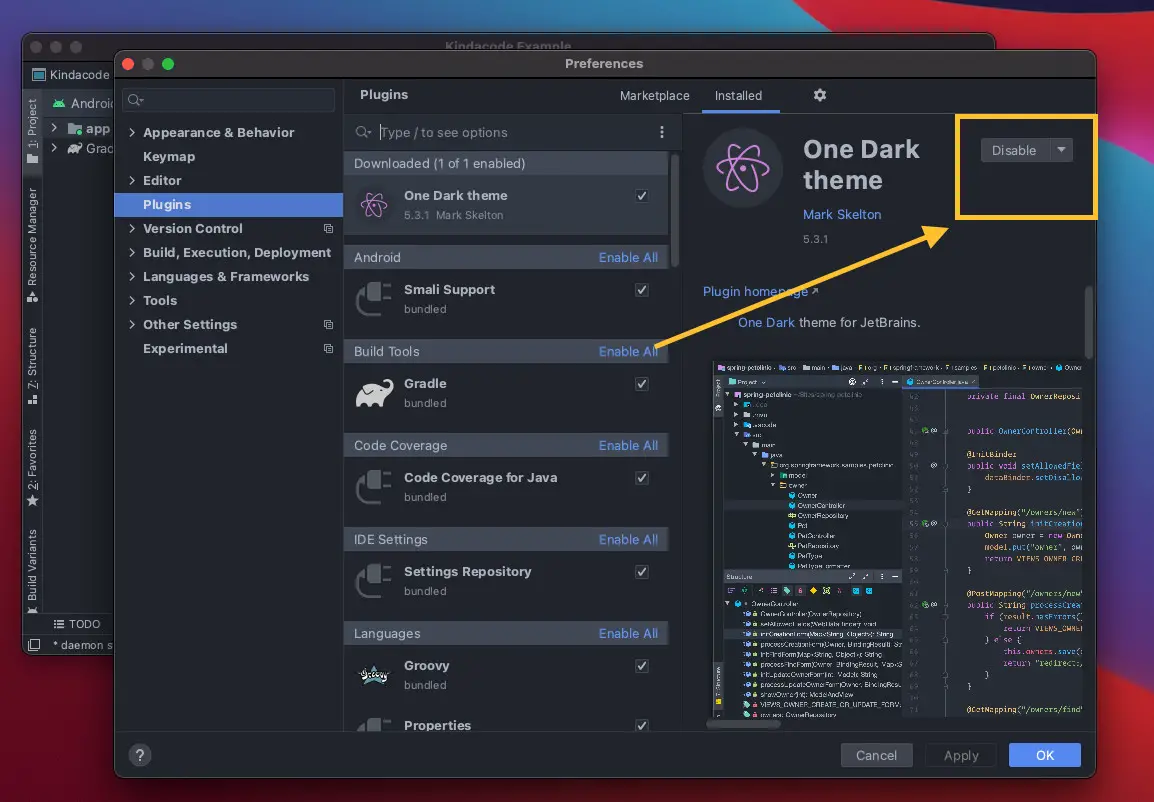
Finally, hit Apply or OK to save. You’ll come back to one of the built-in themes.
Conclusion
Using a suitable theme will help you to reduce eye strain and increase productivity when working with Android Studio. Hope this article can help you in some ways. If you’d like to explore more useful information, tips, and tricks about Android Studio, take a look at the following articles:
- How to Create a new Android Emulator
- Android: How to Get SHA Certificate Fingerprints
- How to Reset Android Studio to the Default Settings
- How to check your Android Studio version
- Install Flutter and Dart plugins in Android Studio
- 2 Ways to Check Android SDK Versions
I have made every effort to ensure that every step in this article works properly, but I may have made some mistakes or omissions. If so, please send me an email at [email protected] or leave a comment to report errors.
