This article shows you a couple of different ways to determine the Android SDK versions installed on your computer. The first approach is to use Android Studio GUI (Graphics User Interface), and the second one is to run a single command.
Table of Contents
Using Android Studio
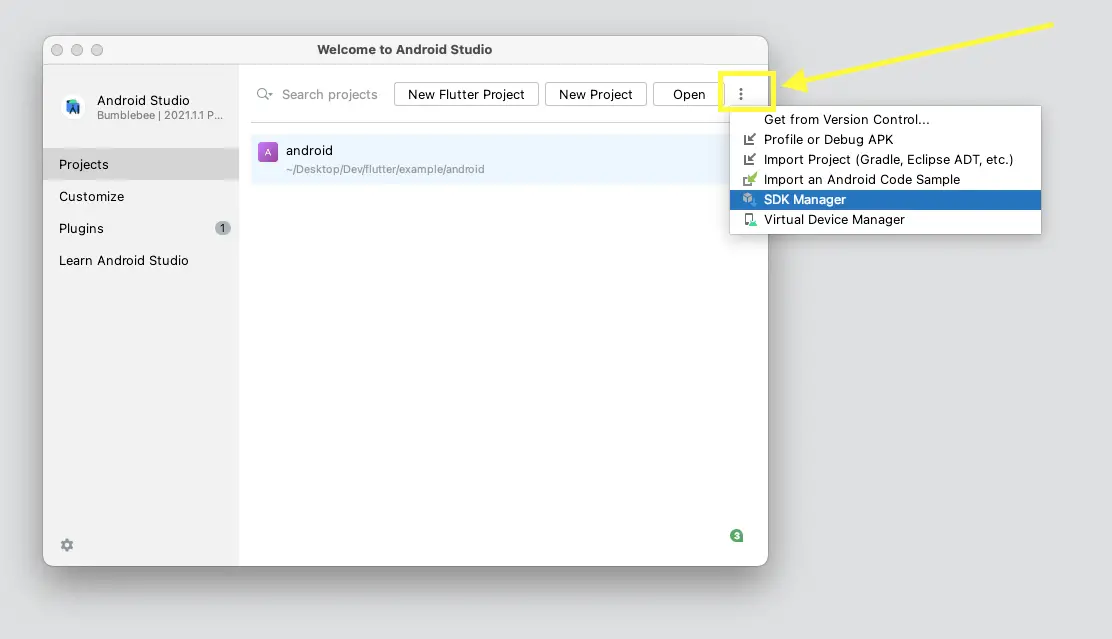
1. Open your Android Studio. In the welcome screen, click on the three-dot icon that locates at the top-right corner then select “SDK Manager” from the drop-down:
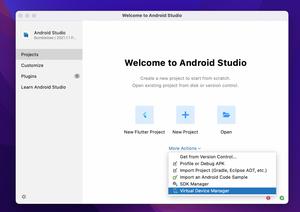
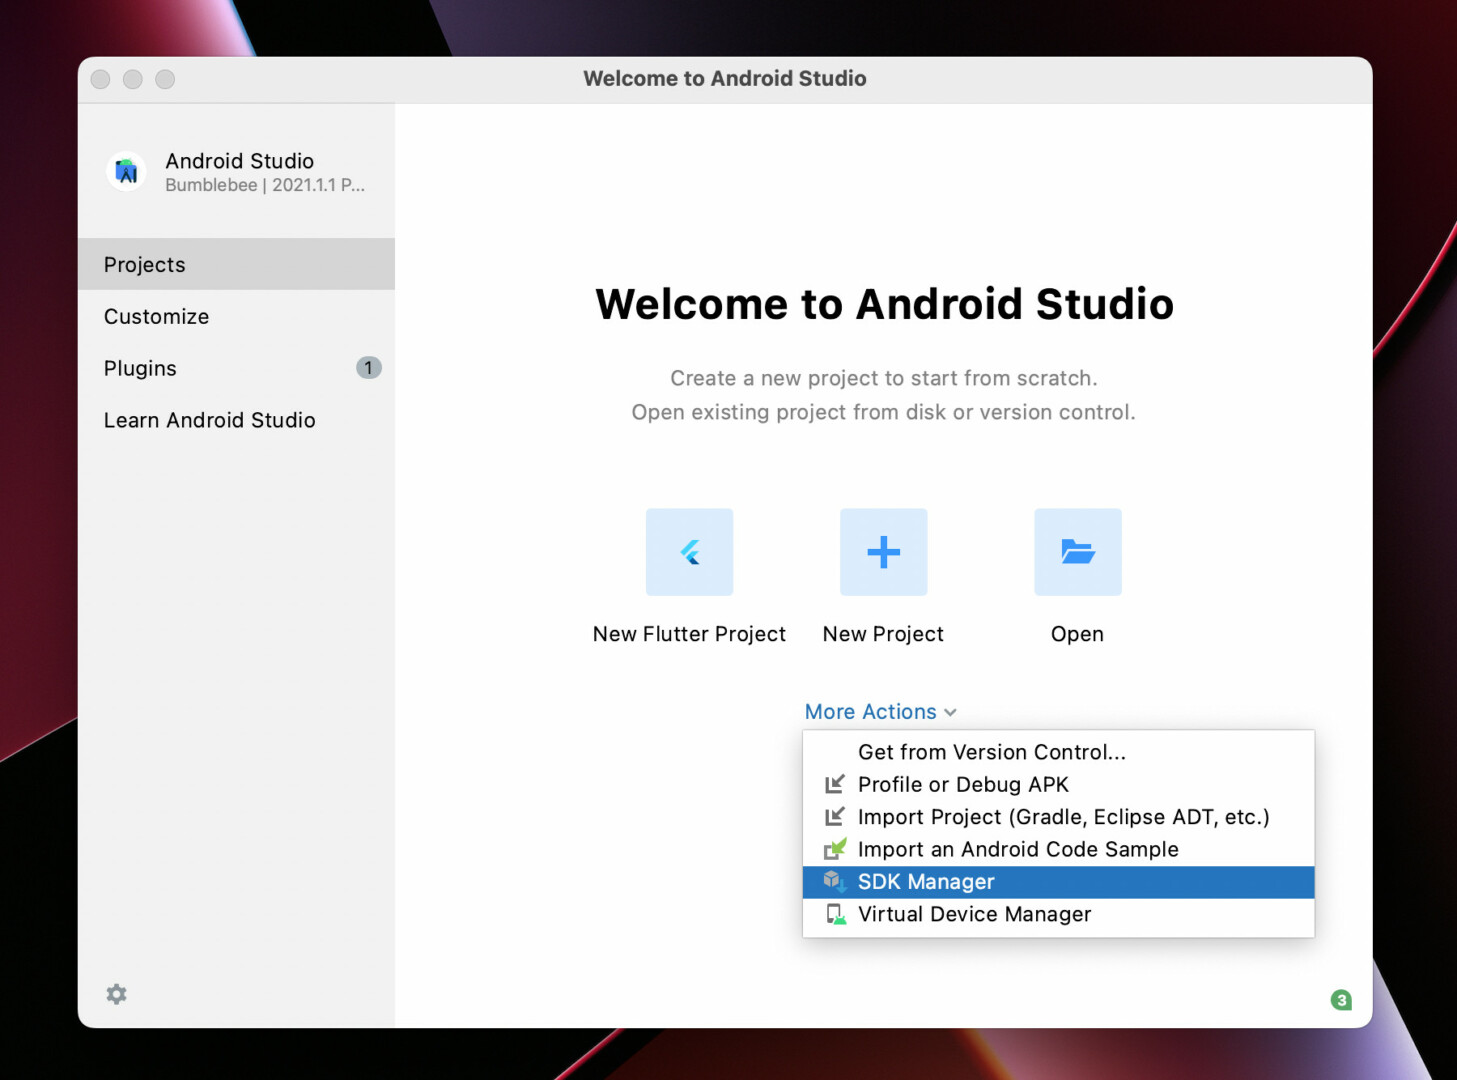
If you haven’t updated Android Studio for a long time, you might see the interface below. if it is the case, select select “More Actions” > “SDK Manager”:
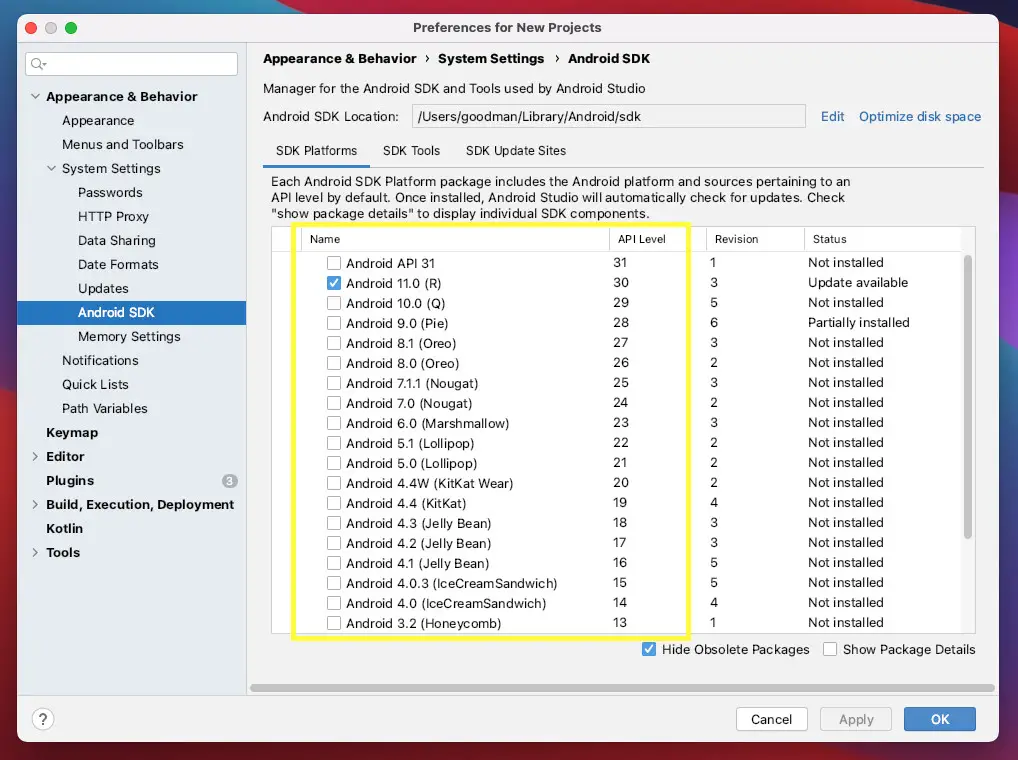
2. Navigate to “Appearance & Behavior” > “System Settings” > “Android SDK”, and now you can see the SDK versions that were installed in the “API Level” and “Name” columns (focus on “API Level”).
Using Command Line
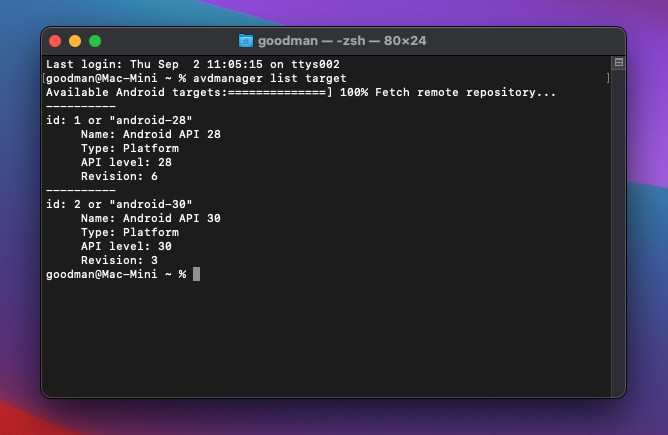
Many developers prefer to use the command line than GUI (graphic user interface). What you need to do is to open your terminal and then execute the following command:
avdmanager list targetAnd you will the result that looks similar to this:
If you receive an error, try to update your Java, then try again.
There is another command that does the same thing:
android list targetBut this one is now deprecated, and you should no longer use it.
Conclusion
We’ve gone through 2 methods to see the Android SDK versions on our machine. If you’d like to explore more about Android development as well as mobile development, take a look at the following articles:
- Flutter: Disabling Android System Back Button
- Flutter: Customizing Status Bar Color (Android, iOS)
- Flutter: Customize the Android System Navigation Bar
- React Native: How to add shadow effects on Android
- React Native – How to Update Expo SDK
You can also take a tour around our Flutter topic page and React Native topic page to see the latest tutorials and examples.
