The Positioned widget in Flutter is used to place a child of a Stack widget in a particular place. Its properties (top, left, right, bottom) can be positive or negative.
Table of Contents
Examples
Example 1
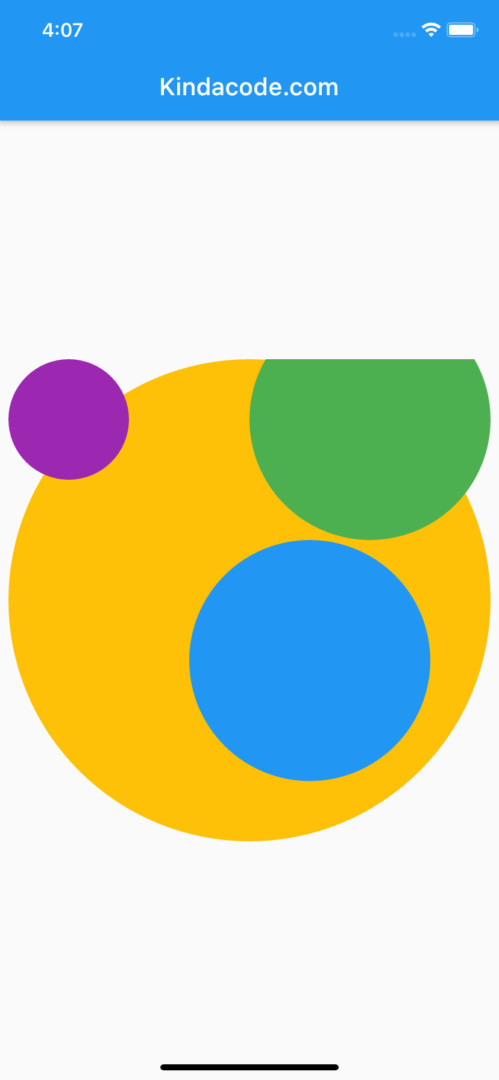
This example creates a number of circles with different colors where the largest circle is partially obscured by the smaller circles.
Screenshot:
The code:
import 'package:flutter/material.dart';

void main() {
  runApp(const MyApp());
}

class MyApp extends StatelessWidget {
  const MyApp({Key? key}) : super(key: key);

  @override
  Widget build(BuildContext context) {
    return MaterialApp(
      // Hide the debug banner
      debugShowCheckedModeBanner: false,
      title: 'Kindacode.com',
      theme: ThemeData.light(),
      home: const HomePage(),
    );
  }
}

class HomePage extends StatelessWidget {
  const HomePage({Key? key}) : super(key: key);

  @override
  Widget build(BuildContext context) {
    return Scaffold(
        appBar: AppBar(
          title: const Text('Kindacode.com'),
        ),
        body: Center(
            child: Container(
          width: 400,
          height: 400,
          decoration:
              const BoxDecoration(shape: BoxShape.circle, color: Colors.amber),
          child: Stack(
            children: [
              Positioned(
                  top: 0,
                  left: 0,
                  child: Container(
                    width: 100,
                    height: 100,
                    decoration: const BoxDecoration(
                      shape: BoxShape.circle,
                      color: Colors.purple,
                    ),
                  )),
              Positioned(
                top: 150,
                left: 150,
                child: Container(
                  width: 200,
                  height: 200,
                  decoration: const BoxDecoration(
                      shape: BoxShape.circle, color: Colors.blue),
                ),
              ),
              Positioned(
                top: -50,
                left: 200,
                child: Container(
                  width: 200,
                  height: 200,
                  decoration: const BoxDecoration(
                      shape: BoxShape.circle, color: Colors.green),
                ),
              ),
            ],
          ),
        )));
  }
}
Example 2
Preview:
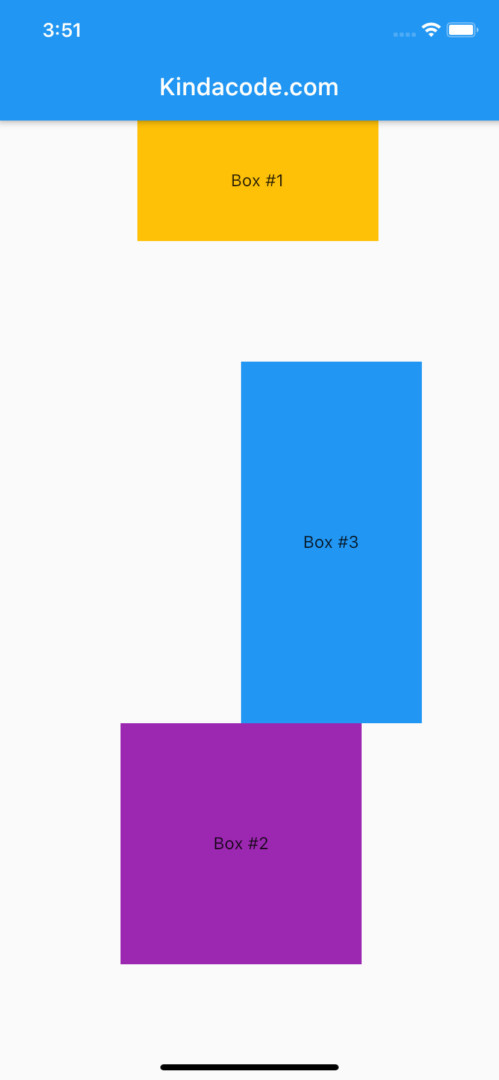
The code:
import 'package:flutter/material.dart';

void main() {
  runApp(const MyApp());
}

class MyApp extends StatelessWidget {
  const MyApp({Key? key}) : super(key: key);

  @override
  Widget build(BuildContext context) {
    return MaterialApp(
      // Hide the debug banner
      debugShowCheckedModeBanner: false,
      title: 'Kindacode.com',
      theme: ThemeData.light(),
      home: const HomePage(),
    );
  }
}

class HomePage extends StatelessWidget {
  const HomePage({Key? key}) : super(key: key);

  @override
  Widget build(BuildContext context) {
    return Scaffold(
        appBar: AppBar(
          title: const Text('Kindacode.com'),
        ),
        body: SafeArea(
            child: Stack(
          children: [
            Positioned(
                top: 0,
                right: 100,
                child: Container(
                  width: 200,
                  height: 100,
                  color: Colors.amber,
                  alignment: Alignment.center,
                  child: const Text('Box #1'),
                )),
            Positioned(
                top: 500,
                left: 100,
                child: Container(
                  width: 200,
                  height: 200,
                  color: Colors.purple,
                  alignment: Alignment.center,
                  child: const Text('Box #2'),
                )),
            Positioned(
                top: 200,
                left: 200,
                child: Container(
                  width: 150,
                  height: 300,
                  color: Colors.blue,
                  alignment: Alignment.center,
                  child: const Text('Box #3'),
                ))
          ],
        )));
  }
}
Conclusion
We’ve examined a few examples of using the Positioned widget which always is a descendant of a Stack widget. If you’d like to explore more new and exciting things about modern Flutter development, take a look at the following articles:
- Flutter: Making Beautiful Chat Bubbles (2 Approaches)
- Flutter: Creating OTP/PIN Input Fields (2 approaches)
- Ways to Add Multiple Floating Buttons in Flutter
- Flutter & Hive Database: CRUD Example
- Flutter and Firestore Database: CRUD example
- Most Popular Packages for State Management in Flutter
You can also check out our Flutter category page or Dart category page for the latest tutorials and examples.

